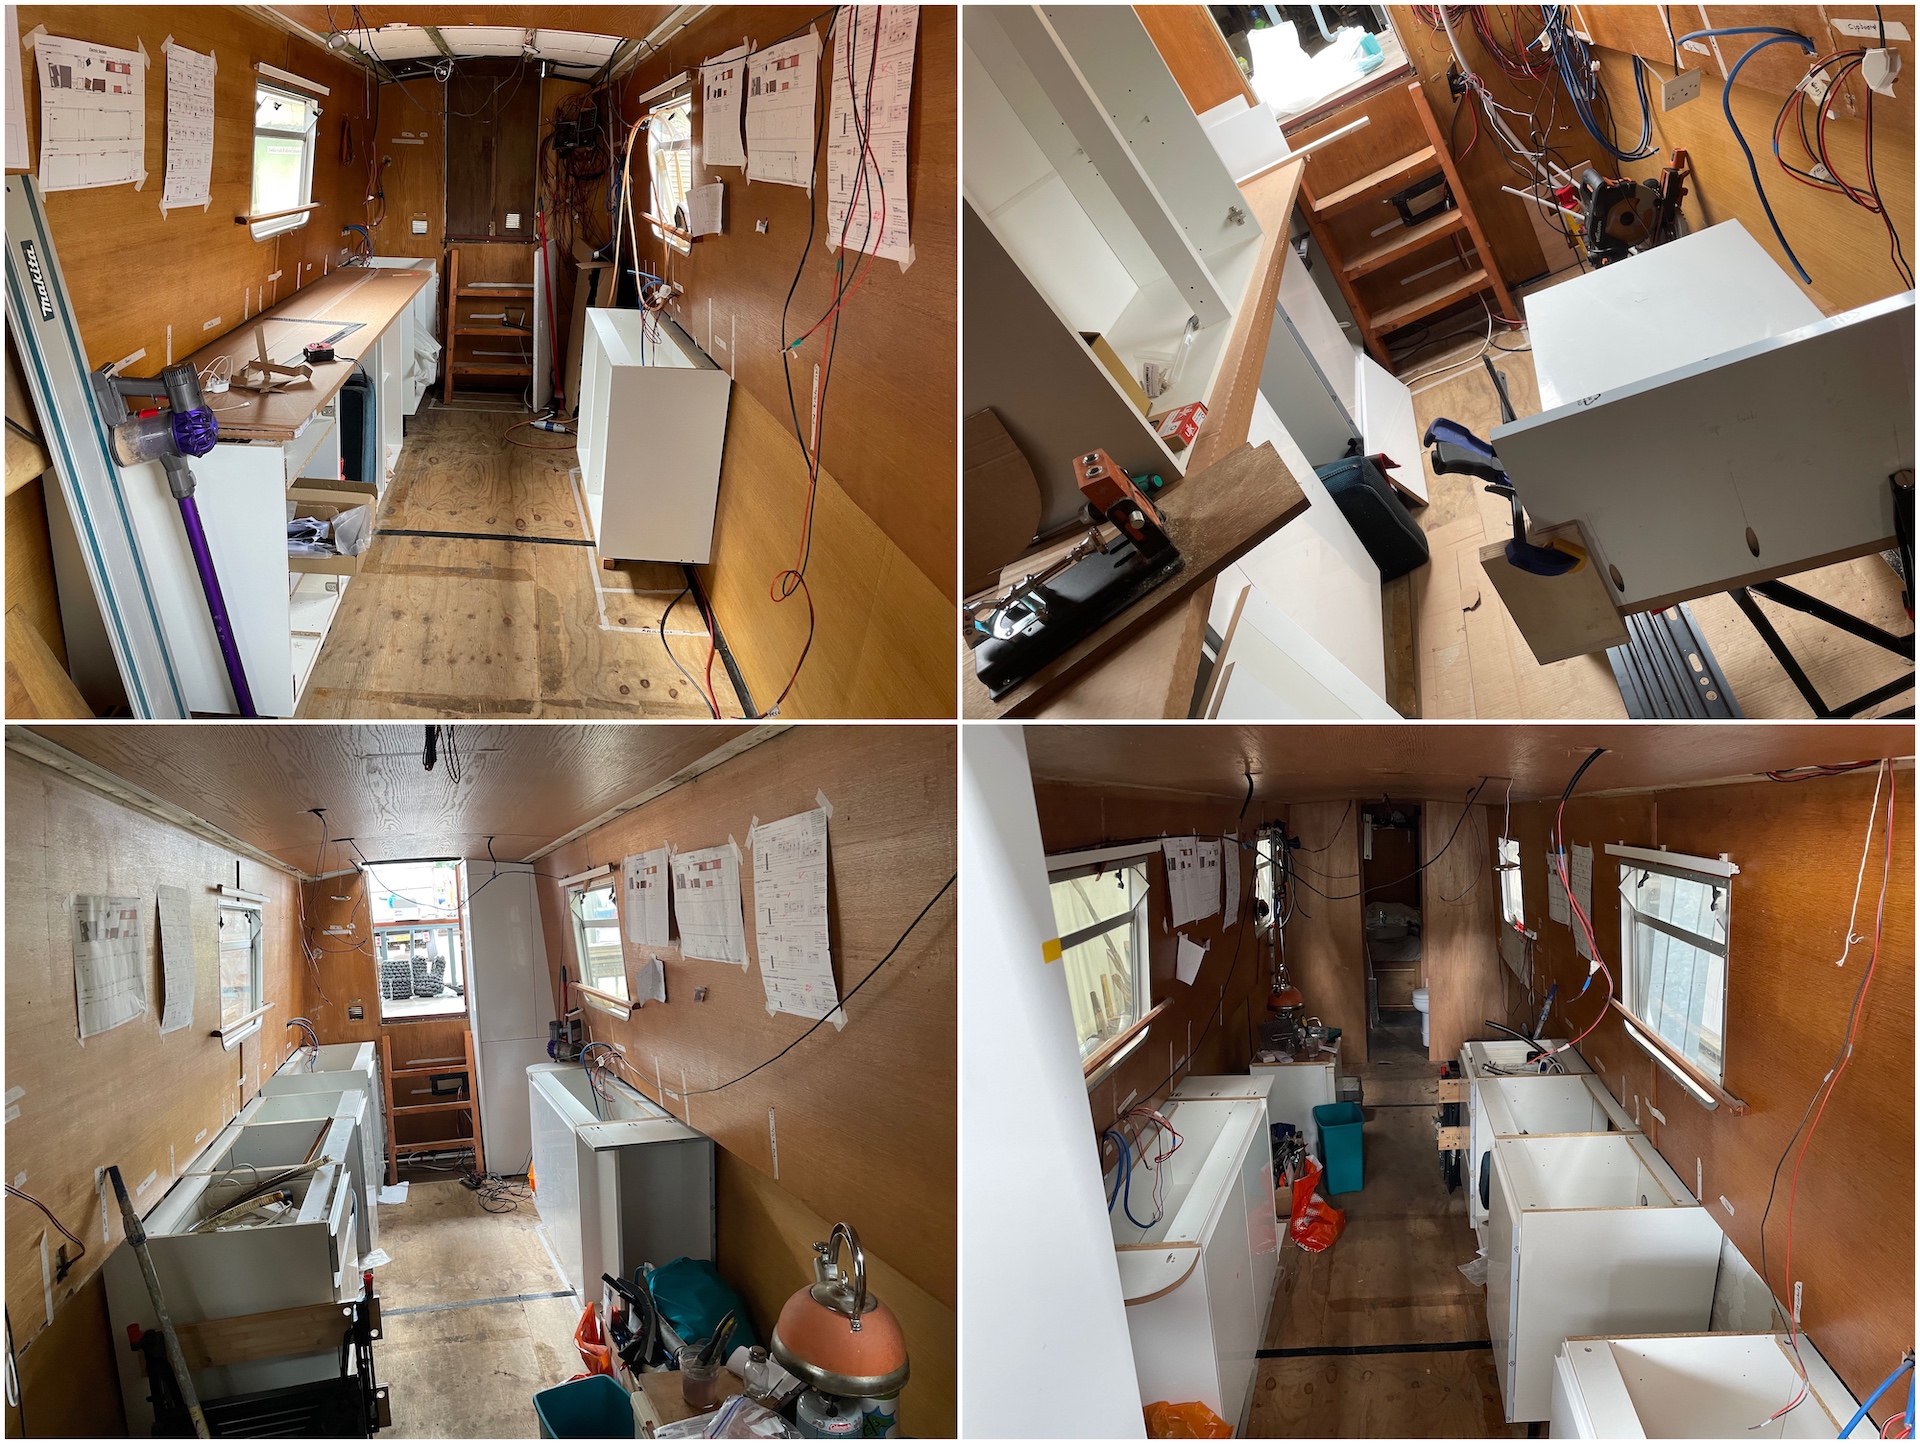
Now I had a design and a half empty shell it was time to get work. The biggest problem with working on a boat is space, you are forever moving things and constantly tidying up. All the materials had to be orderd to arrive just in time for when they were needed as there is no space on the boat to store them. The remoteness of the marina and not having a car didn’t help, I wasted a lot of hours getting local buses to go hire a van or waiting on deliveries.
Table Of Contents
New toys
Half the idea of doing a boat up was to learn something new, without doing so I don’t think I would have come some of these tools.
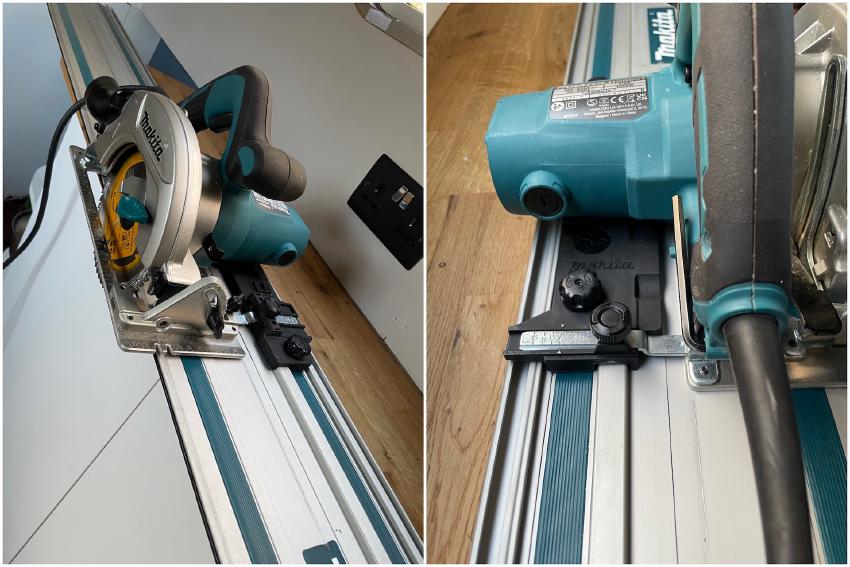
Plunge saw
In past projects I managed to do straightish cuts with a circular saw guided along a clamped piece of wood. A plunge (or track) saw is an upgrade on this, a circular saw which slides on a rail (track) that can be fed at the start of the material or be plunged directly into where you need to cut. A lot of the internal decor would need accurate cuts (worktops, bulkheads, kitchen units, etc), a jigsaw or my old circular saw method would work but it would take too long and never be as accurate.
I didn’t really need the plunge capability so rather than spending £450 on a Makita plunge saw I came up with an alternative solution for £180 that is a normal Makita circular saw, 1.5m guide rail and a guide rail adaptor to allow the circular saw to run along the track. The first cut you do with the saw is to trim the rubber seal on the track, this then gives you the straight edge to go off when cutting. I also got a 60T blade as I would be cutting melamine faced MDF where the cleanness of the cuts would be important.
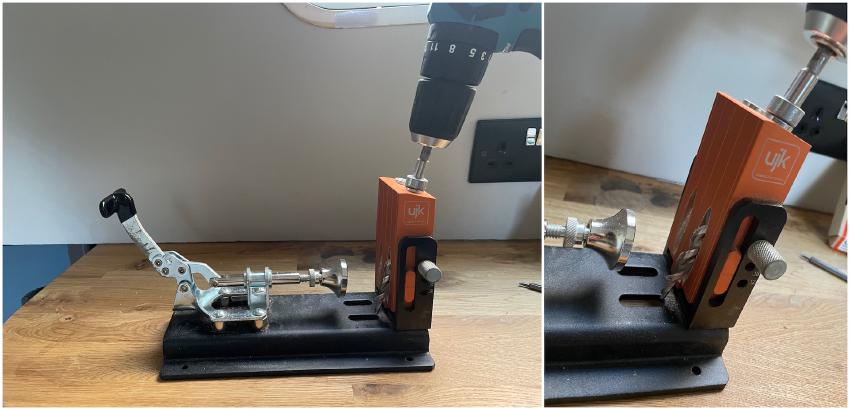
Pocket hole jig
Is a drilling guide to make accurate angled pilot holes for strong joints between boards, an essential for fitting bulkheads and building cabinets. I was advised to avoid the cheap sets on ebay so paid a bit more for an Axminster jig (includes drill and screwdriver bit) as well as an alignment clamp to hold corners together whilst you screw them. You can get a variety of screws for different depths of wood and plugs made of differing woods or coloured plastic.
Multi tool
I don’t know how I have survived this long without one, is one of those tools that you didn’t realise you needed until you got one. The list of uses is endless, it saved a mountain of time chasing sockets not to mention the endless other tasks it was used for. I went for a 12v Makita as I wanted something lightweight and nimble enough to be able to get into tight space. There was no point buying a full set of blades as I wouldn’t use most of them so I just got a standard cutting blade and carbide blade.
Dust Extractor
I started off without one and the amount of mess from the circular saw on its own was ridiculous. I taped up all the edges of the floor as you don’t want saw dust going into the bilge (it would soak up and hold moisture) and bought an Evolution dry/wet vacuum with universal adapters to fit the circular saw, jigsaw and mitre saw. Although it got some of the dust I wasn’t that impressed with it, I would get a different brand next time.
Existing tools
Other power tools used were an old Bosch jigsaw (should have replaced as don’t trust the straightness) and an evolution mitre saw which I don’t think is great but did the job (you get what you pay for).
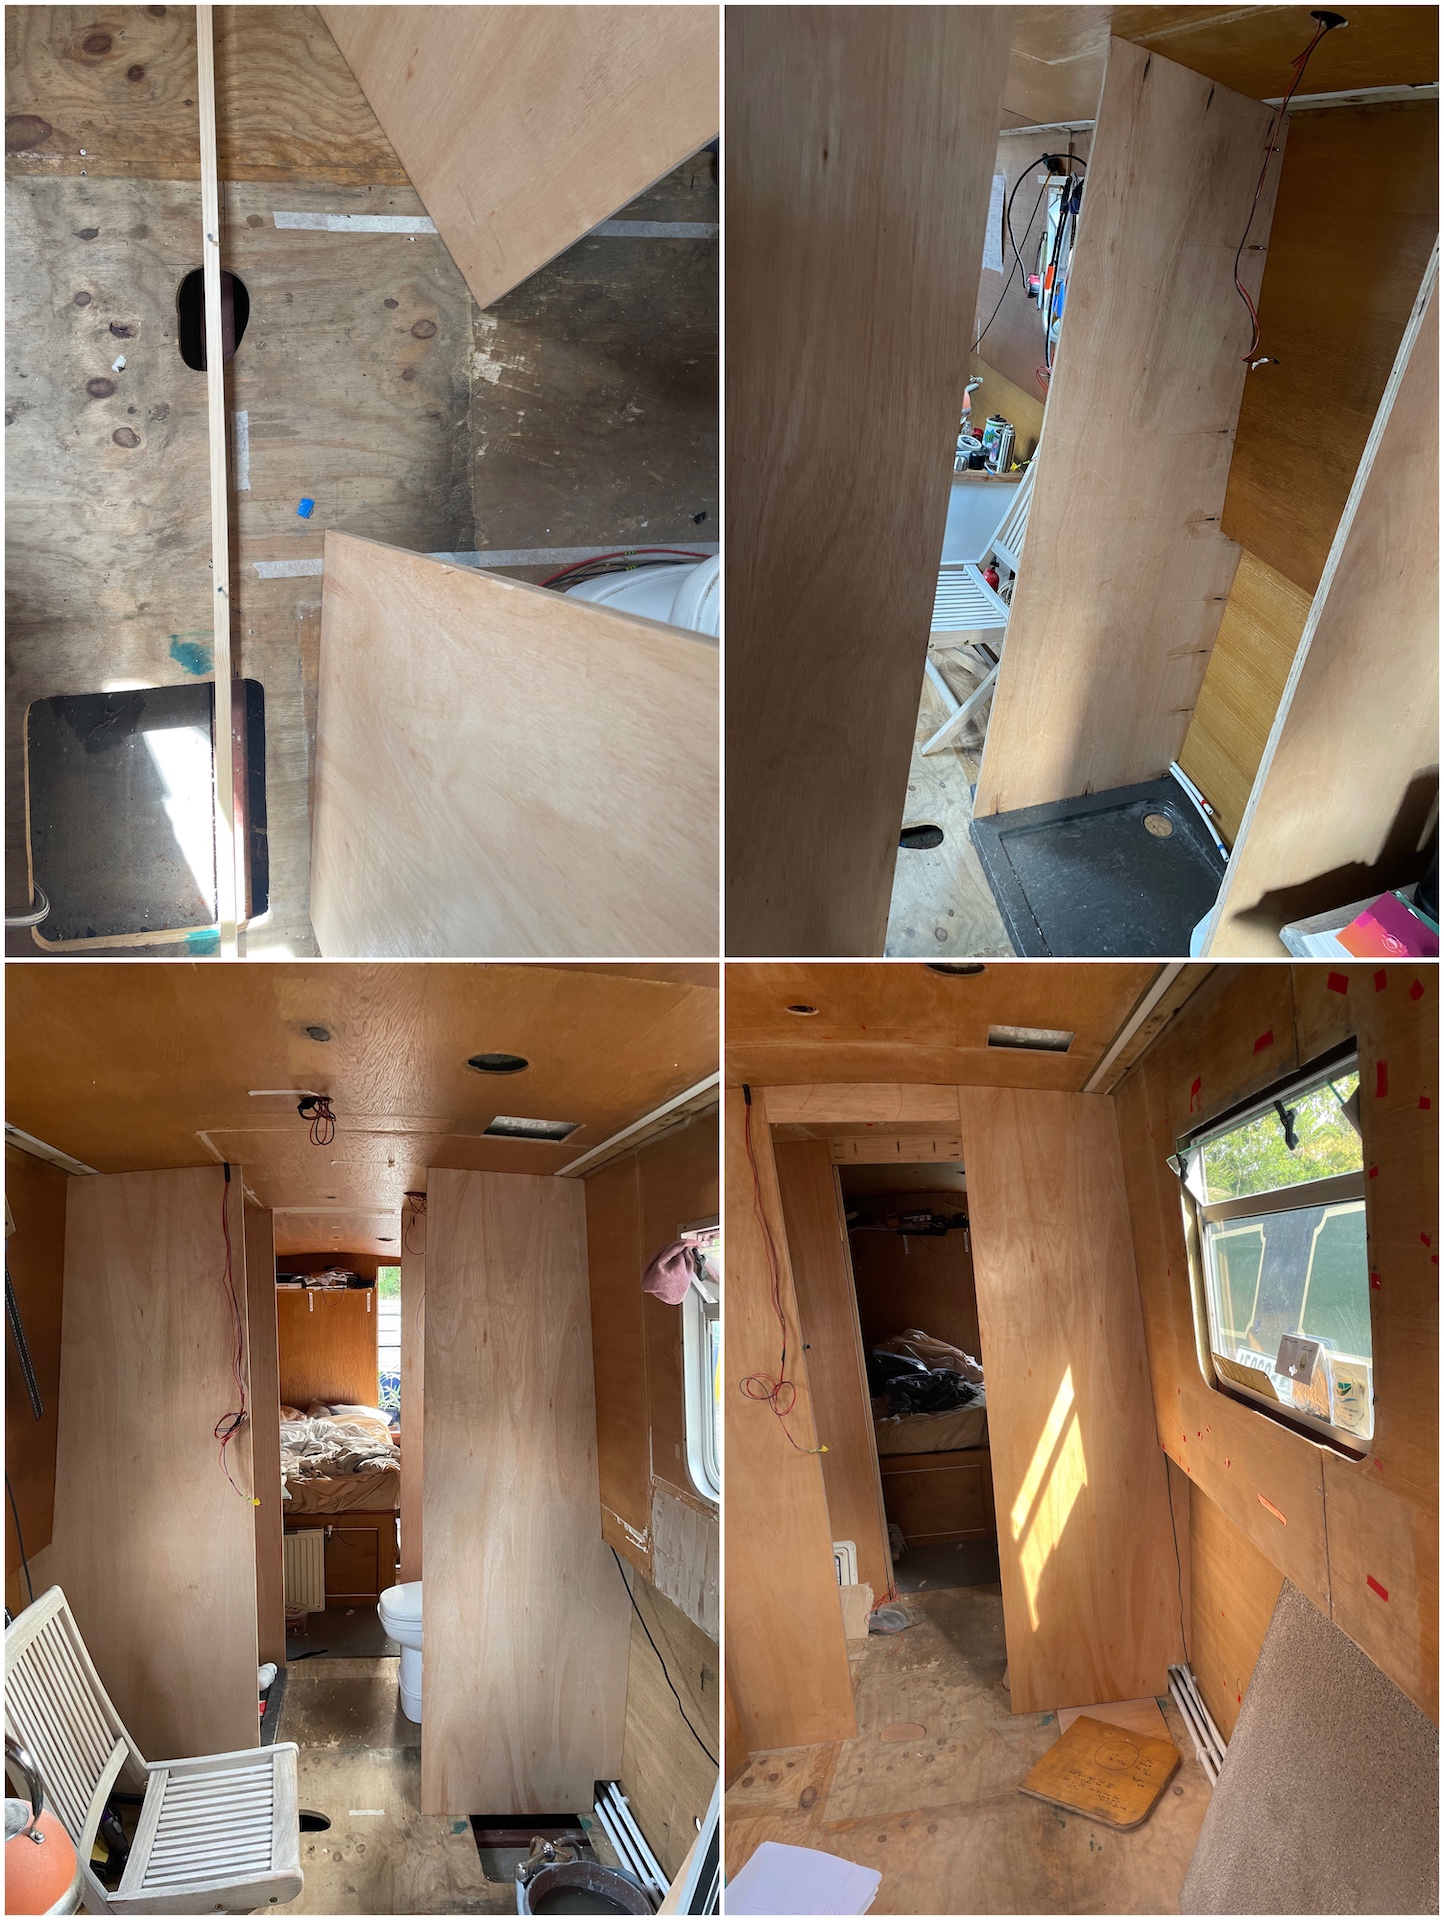
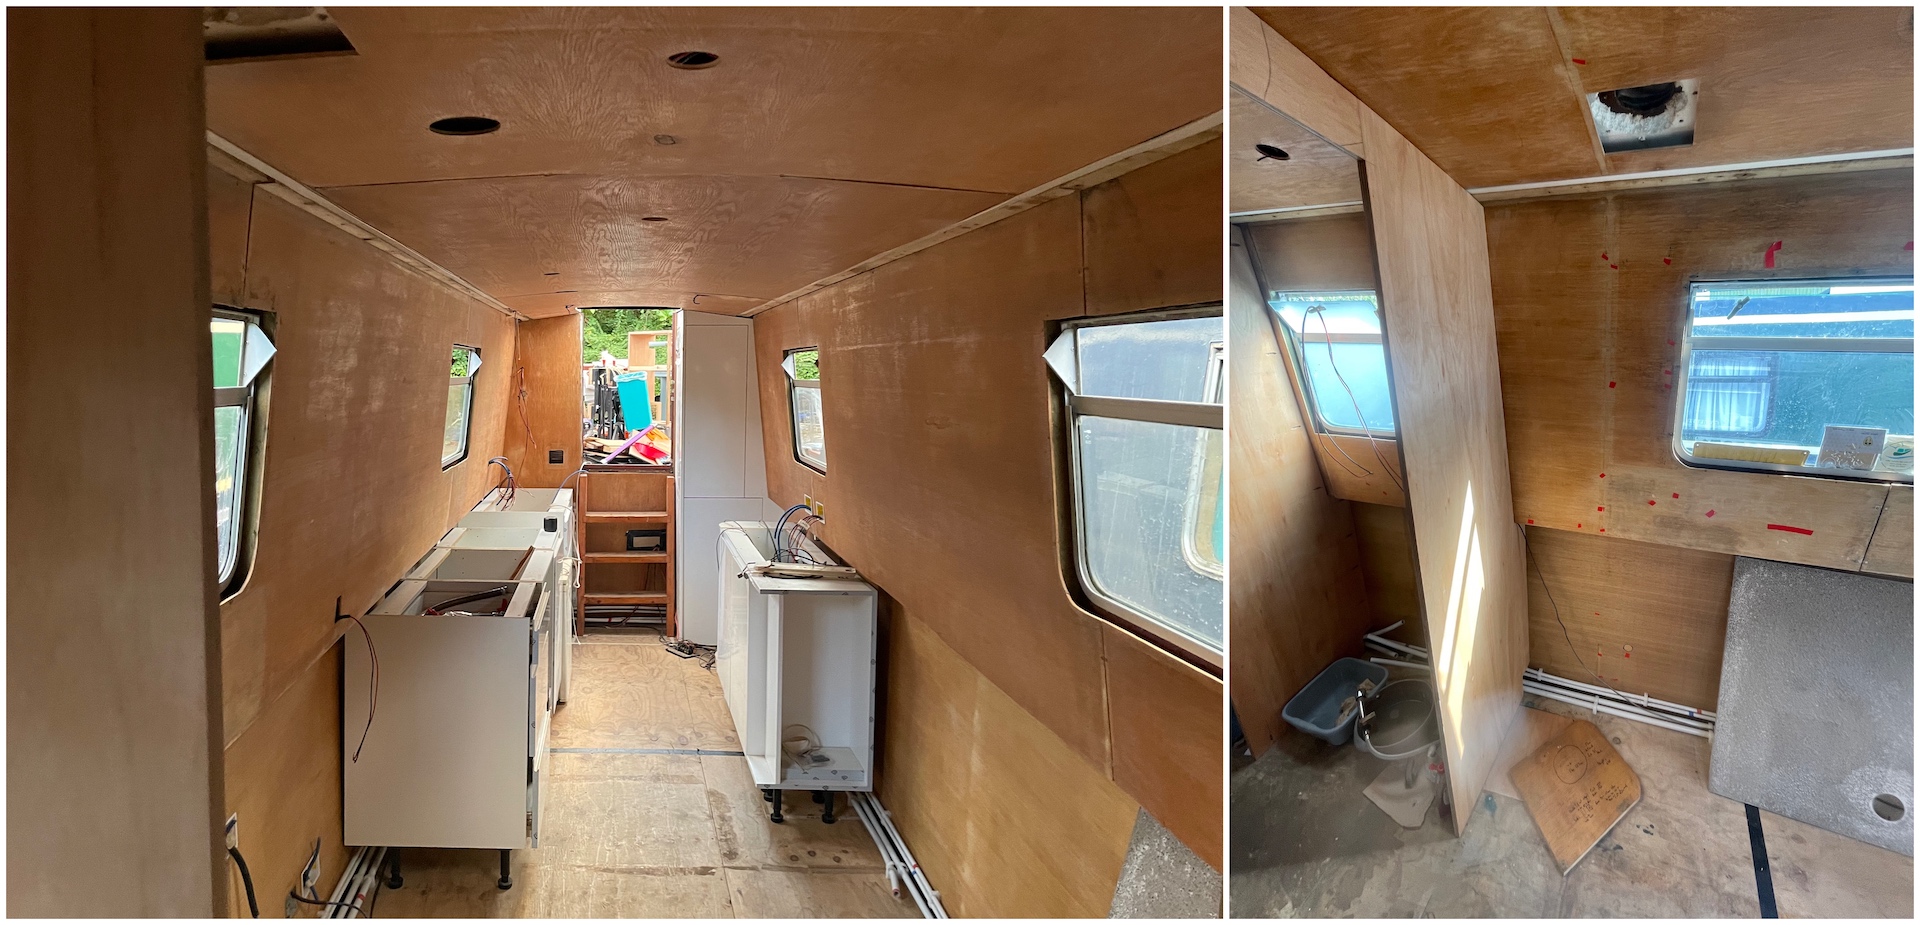
Walls (bulkheads)
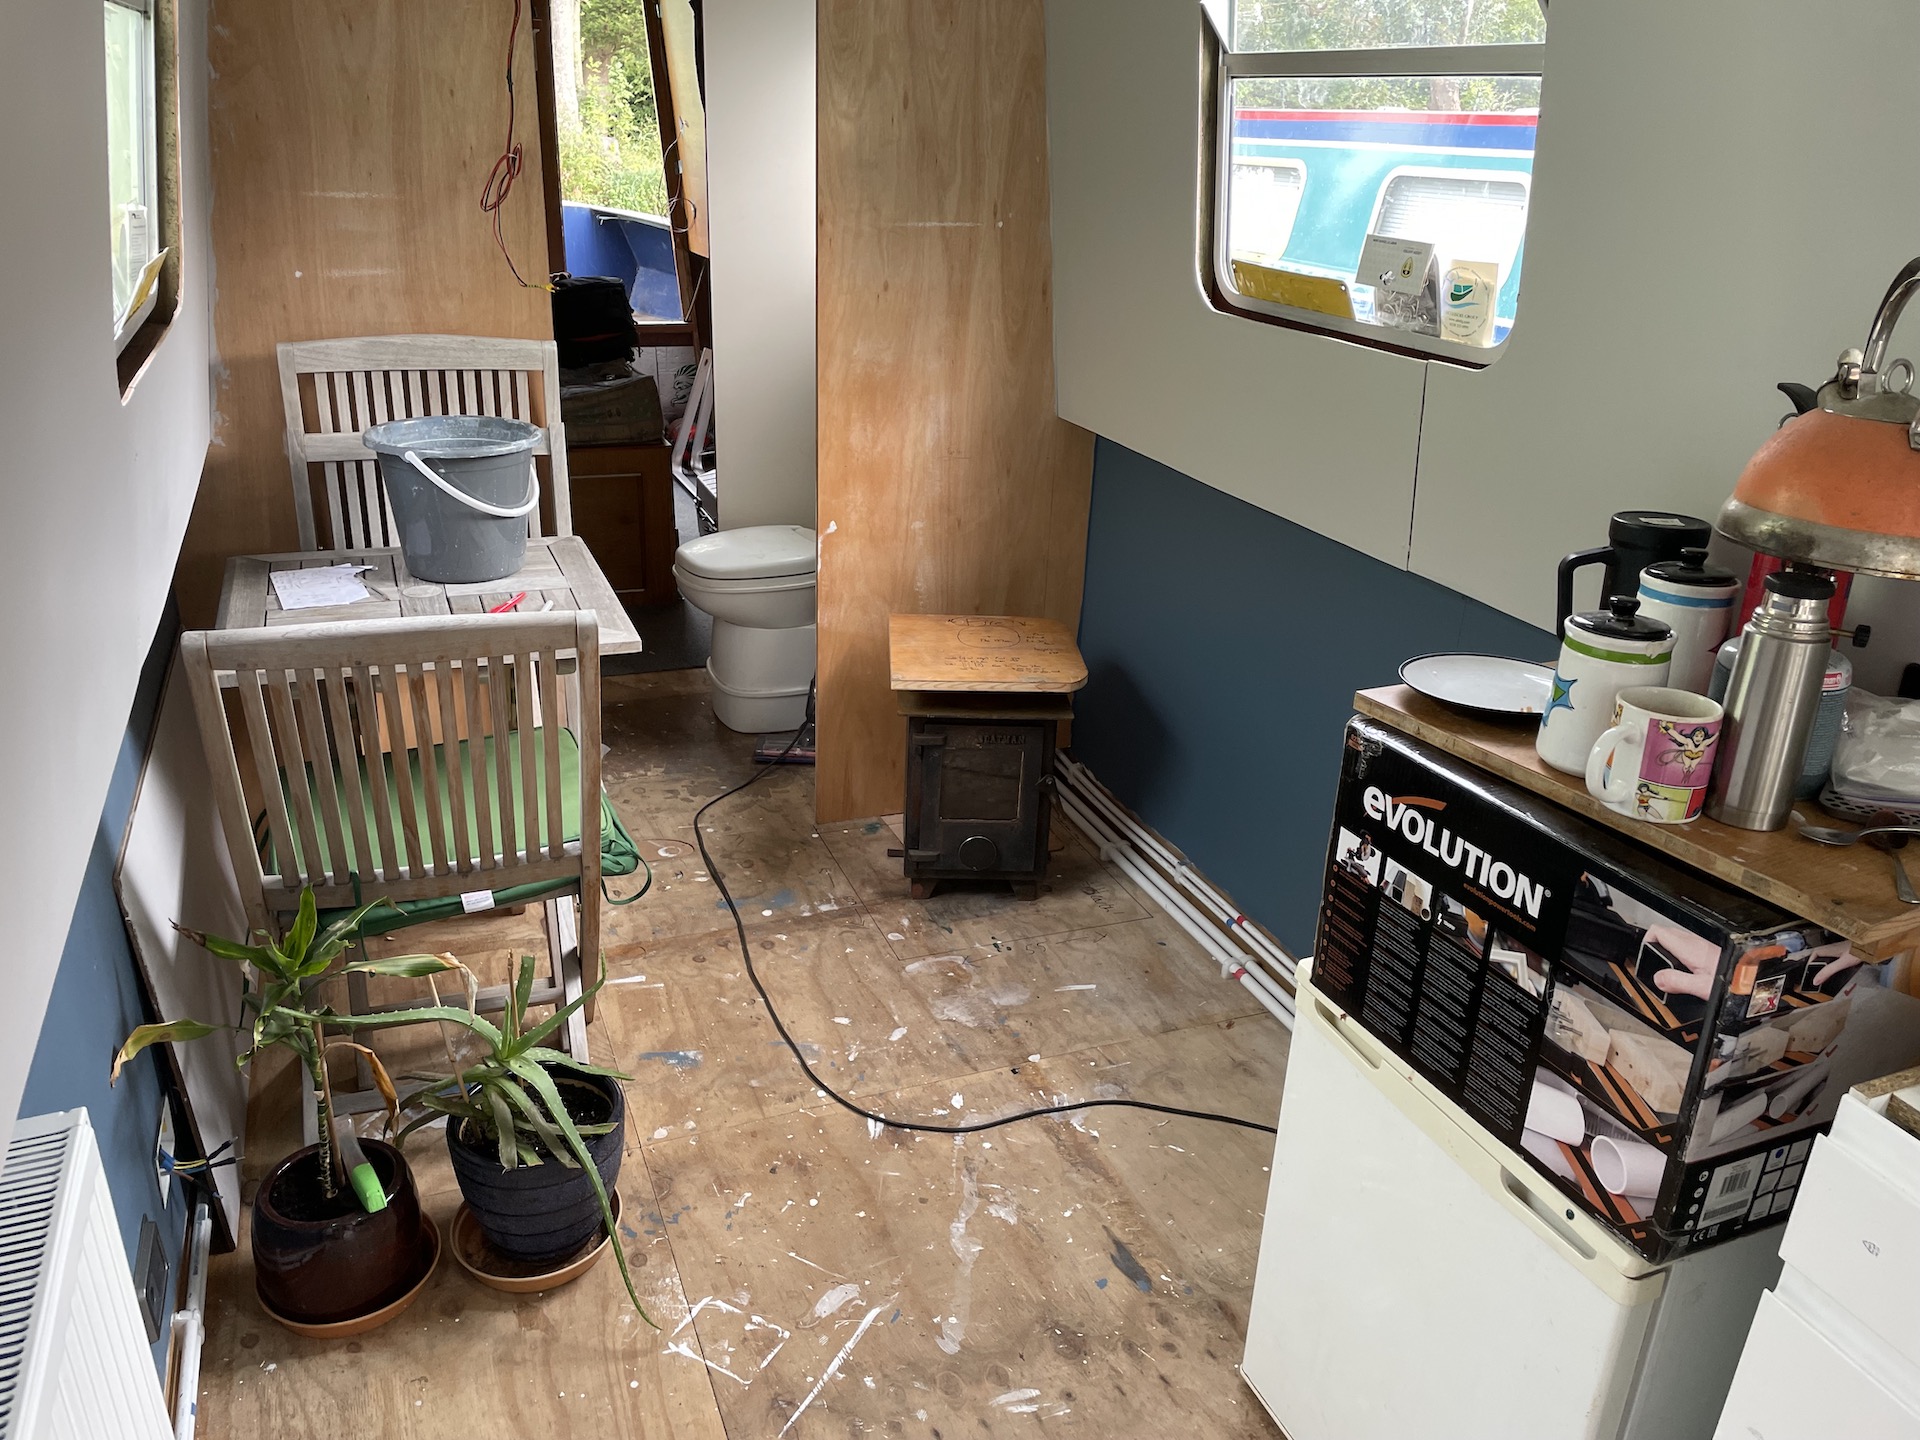
The bathroom has been moved so that the passageway now goes through the middle of it with the shower on one side and toilet and sink on the other. By doing it this way it allows me to keep the bathroom footprint small but yet still spacious enough to use. The initial plan was for the bathroom doors to fold inwards making the bathroom invisible when not used (doors become passageway walls), but logistically this was impossible as the width for the shower and toilet/sink would be too small.
Bulkheads can be an 18mm piece of wood or a stud wall, I decided against stud walls as had no need to hide pipes and they take up more space. Birch plywood is a popular choice for boats but is pricey at the moment as the main producer was Ukraine, instead I went for hardwood plywood where the face veneers are hardwood and the internal plies are softwood. The quality of the face veneer is graded from A to D with A having very few visible defects and D being pretty rough and ready. As I was not buying in bulk and had to use local suppliers I struggled to find many different hardwood veneers, I can’t remember what I got in the end all though I think it cost about £180 for three 2440mm x 1220mm x 18mm sheets.
The bulkheads have an angle below the gunwale, an angle above the gunwale and a curve on the ceiling. I first templated it in cardboard using an empty cable roll to get the curve, then did a trial run with some scrap 9mm ply before finally cutting the proper stuff. I was hoping the same template could be used to cut all 4 bulkheads but unfortunately each needed a slight alteration. They don’t have to be 100% accurate as when they are screwed to the walls it pulls the side panels in so you will lose any small gaps.

The pocket holes are drilled prior to putting the walls up on the bathroom side as this side will either be painted or covered by shower panels. One of the early lessons you learn on a boat is that nothing is straight, a spirit level is absolutely no use at all. I lined up the first bulkhead with the stern doors, then used this as my straight edge for fitting the rest of them. The main concern is that they are inline across the boat and the door frame is the same width all the way up. The middle bit at the top of the door frame was added after.
Kitchen
I bought a Wickes off the shelf kitchen for about £1000, it is pretty basic but with the wooden worktops it won’t look too bad. I got matching end pieces (melamine faced MDF) to use for building the electric cupboard as well as the curved shelving and bookshelf.
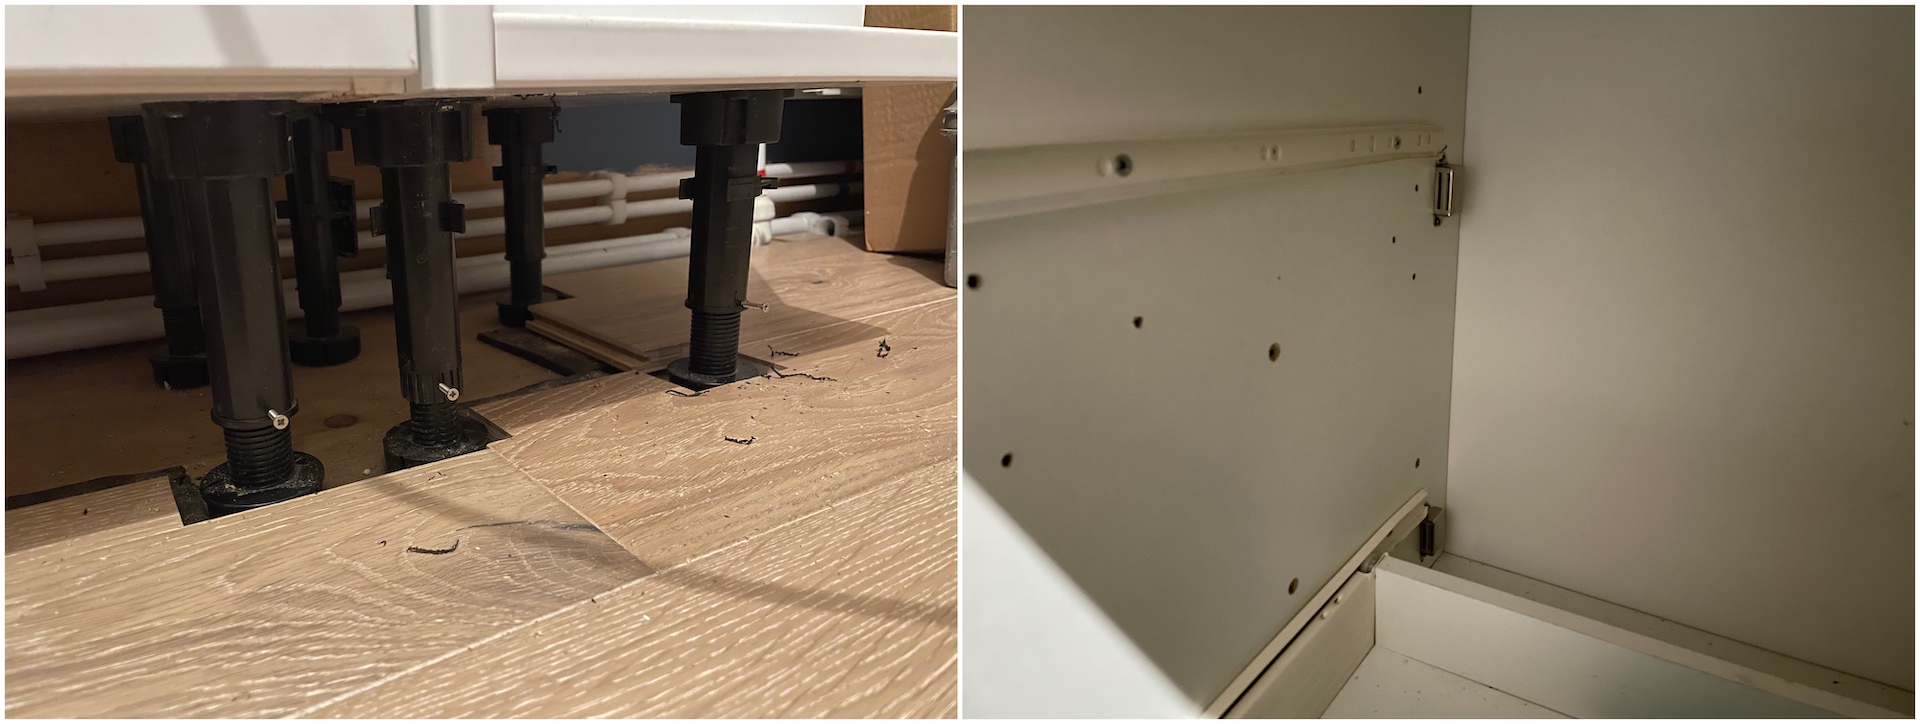
I locked the adjustable cupboard legs with screws incase they moved under the boat vibrations and added magnets to the draws as they had a tendency to open in locks or when the boat rocked. If I was to do this again with more time I would just buy the cupboard doors and make the actual units myself as a narrowboat kitchen could ideally do with being customised. Some examples of things that I would want to achieve are angled or curved units, different cupboard depths (for sink and hob), draws and cupboards combined into the same units and better use of the empty plinth space under the cupboards.
The 28mm oak worktops were bought online so I could get them pre-oiled and cut to size as one of the edges needed to be curve.
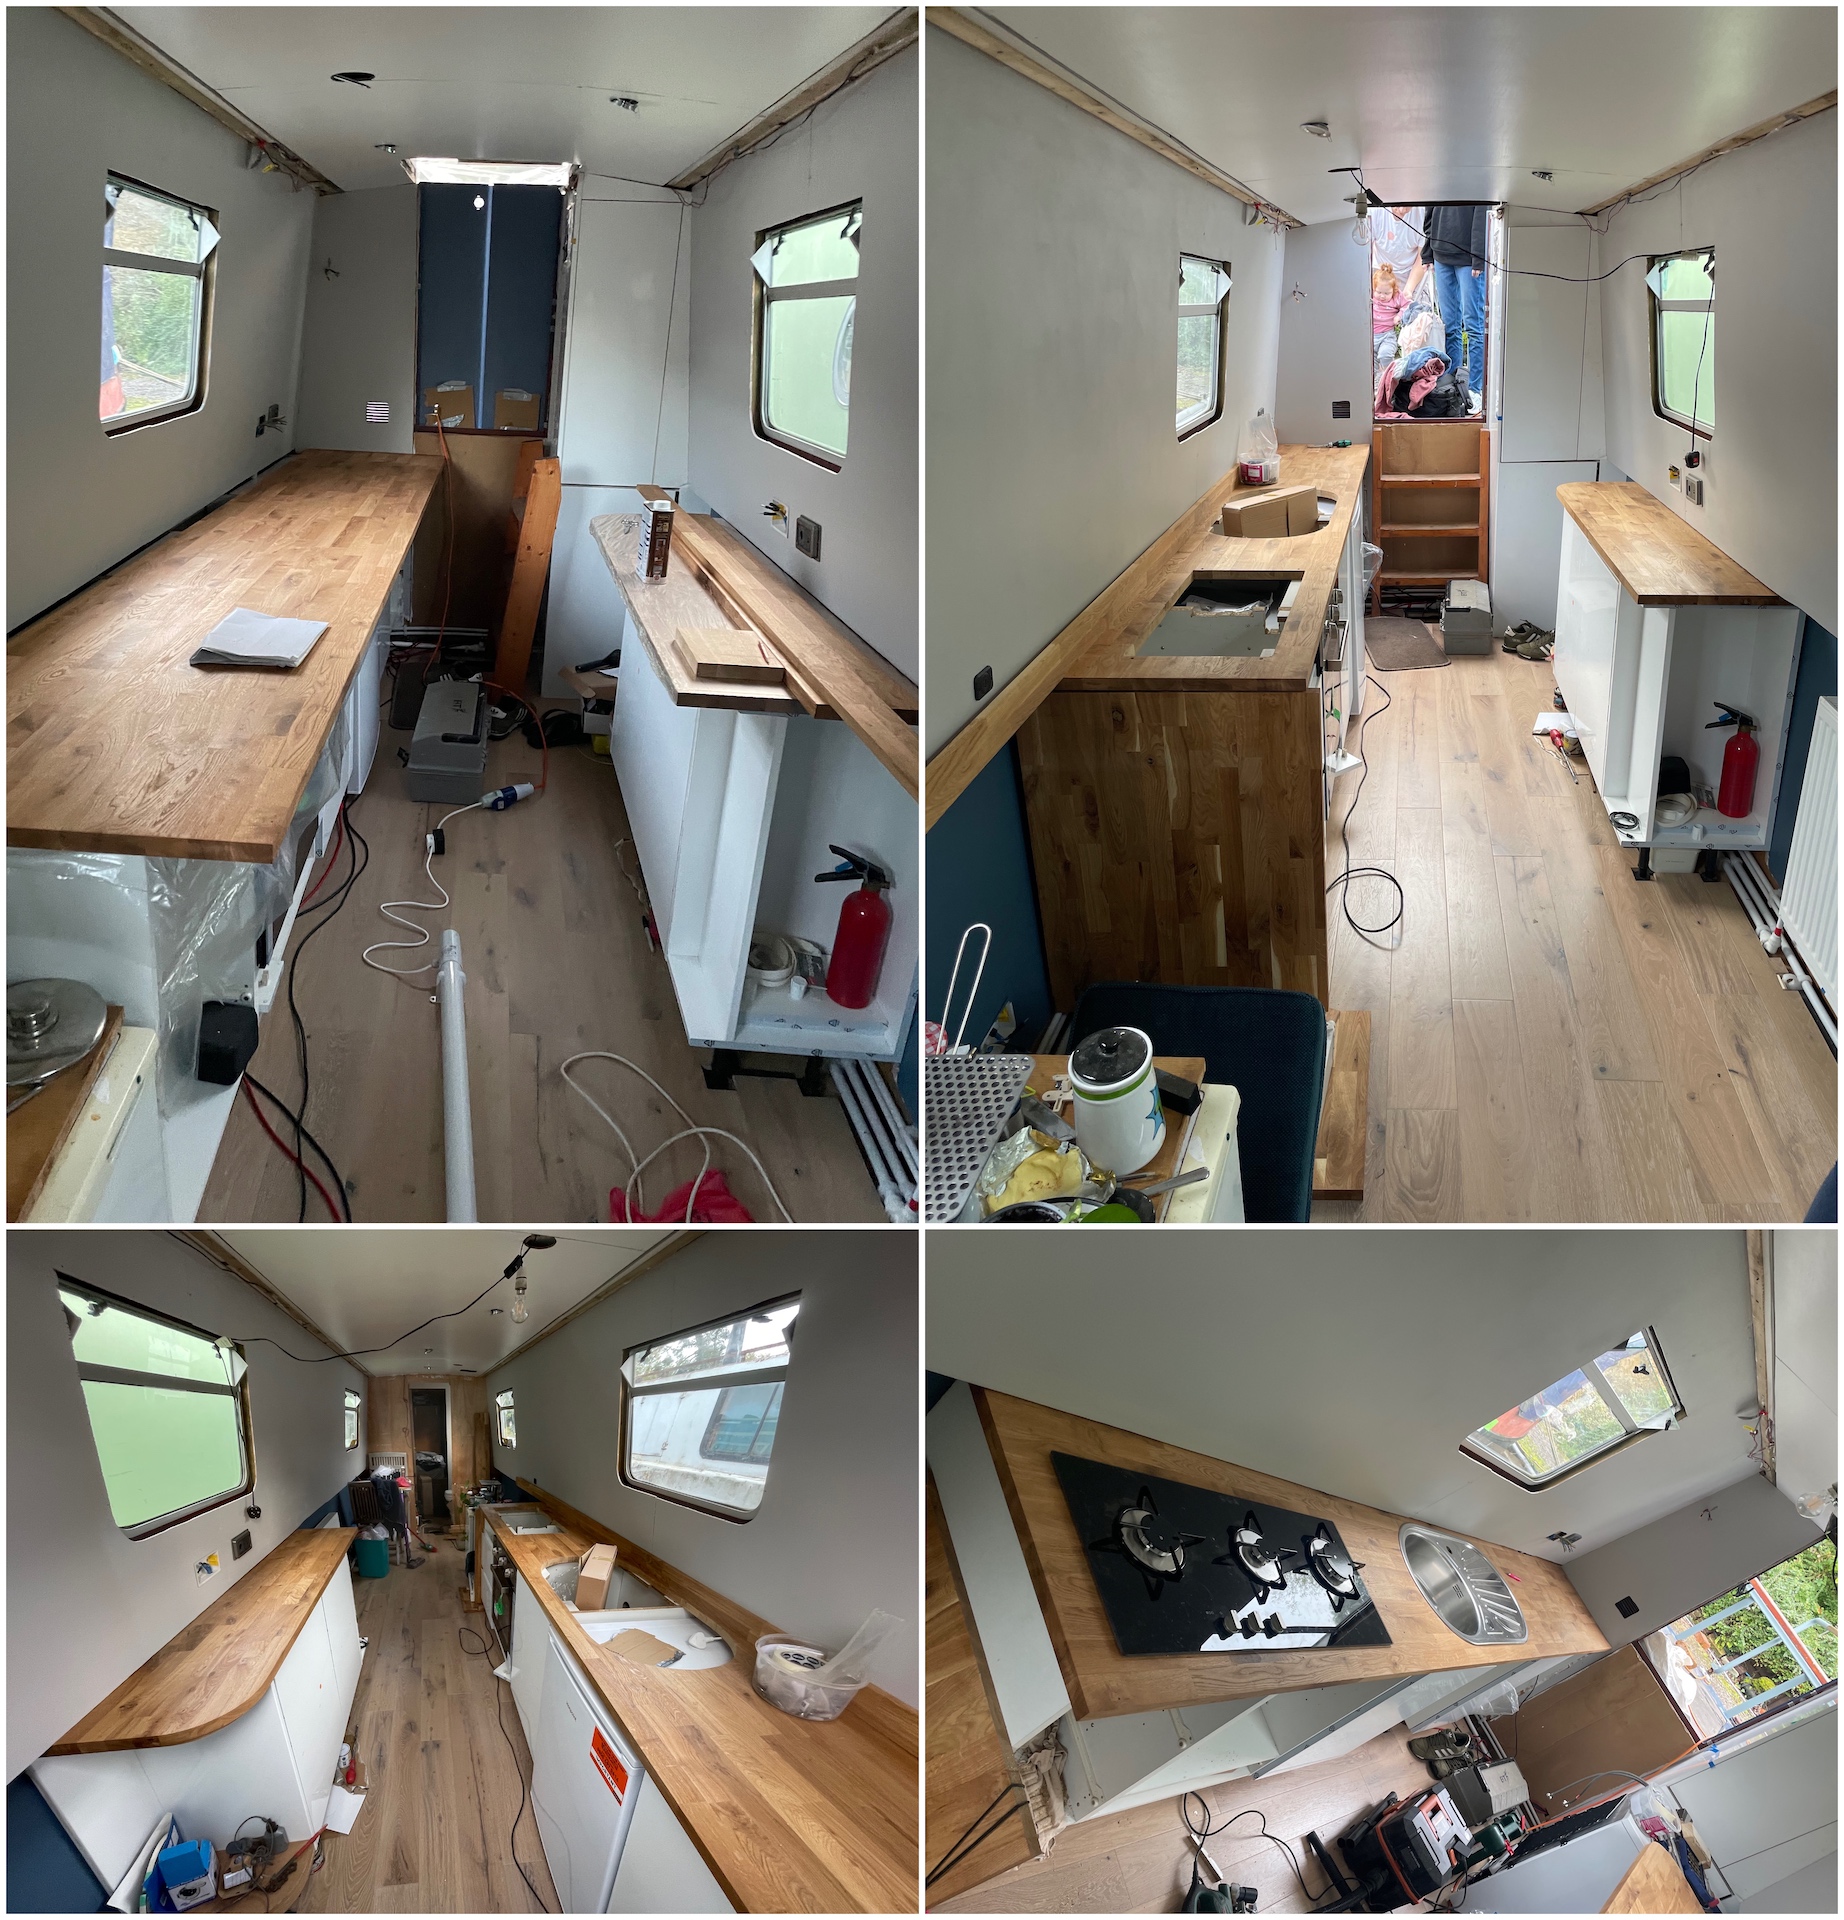
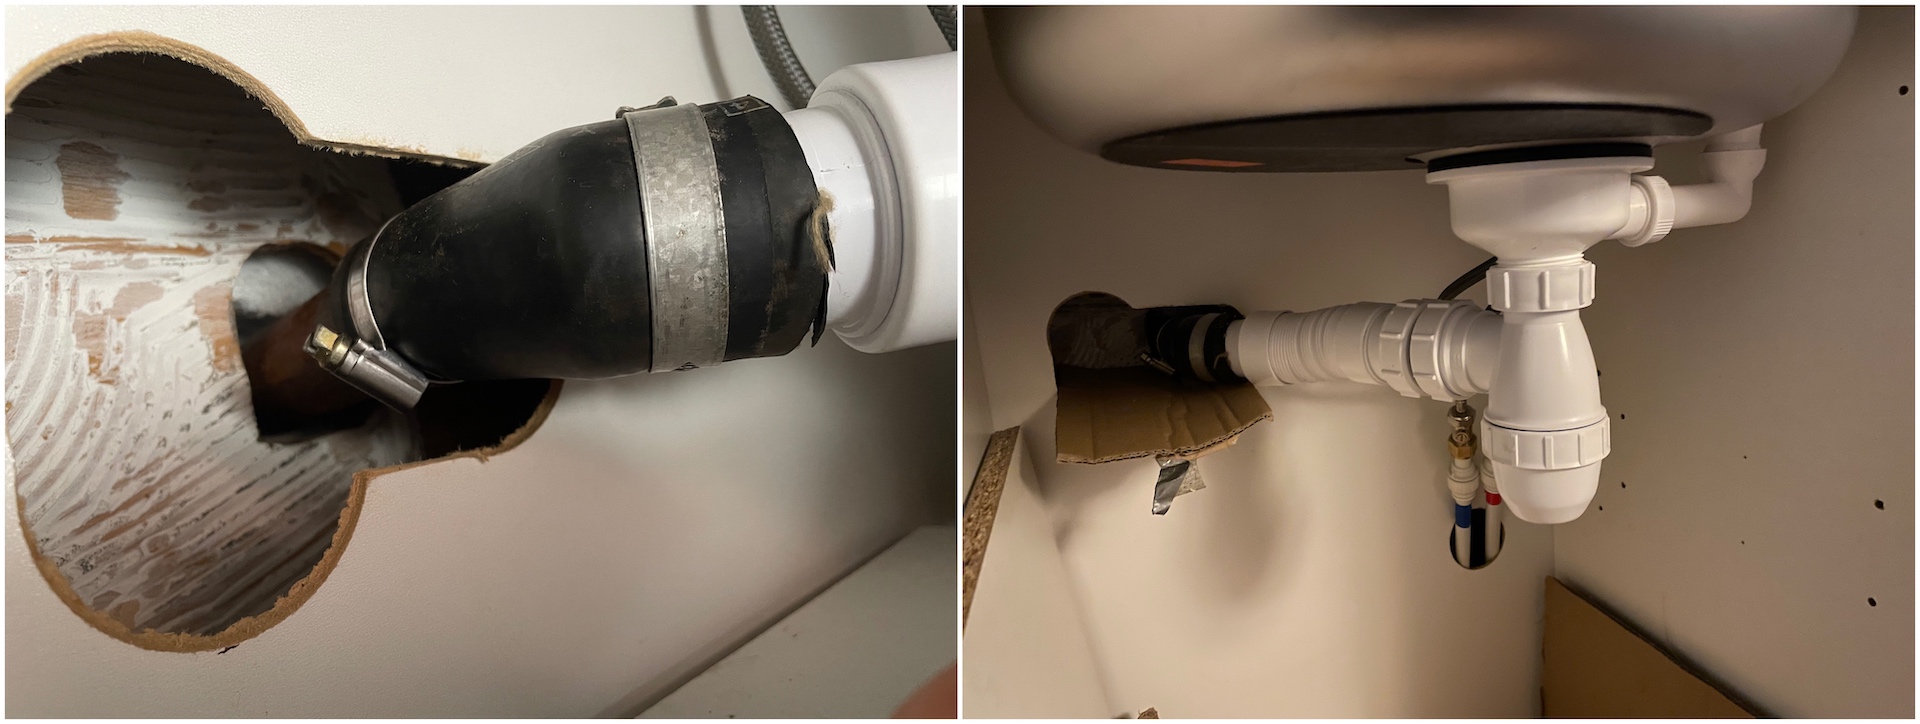
100mm of the kitchen unit depth is lost under the gunwale meaning that a normal sized sink won’t fit, I went for a curved sink that was 445mm wide. The sink has to be of such a depth that the sink waste is above the boats waste pipe to avoid needing an additional pump. The waste pipe diameter is a non-standard 32mm so I reused the flexible coupler that was on the original sink (similar to this) and joined this to the waste via a McAlpine miniflex5 adaptor as flexible piping would better withstand any vibrations.
Engineered wood rather than laminate was used for the floor as it gives a nicer finish with better longevity as the 4mm oak veneer can be sanded and retreated if need be in the future. Fitting the floor was a nightmare, I had to move everything I could to the bedroom and shower tray, anything left over had to be moved from one side of the boat to the other whilst fitting.
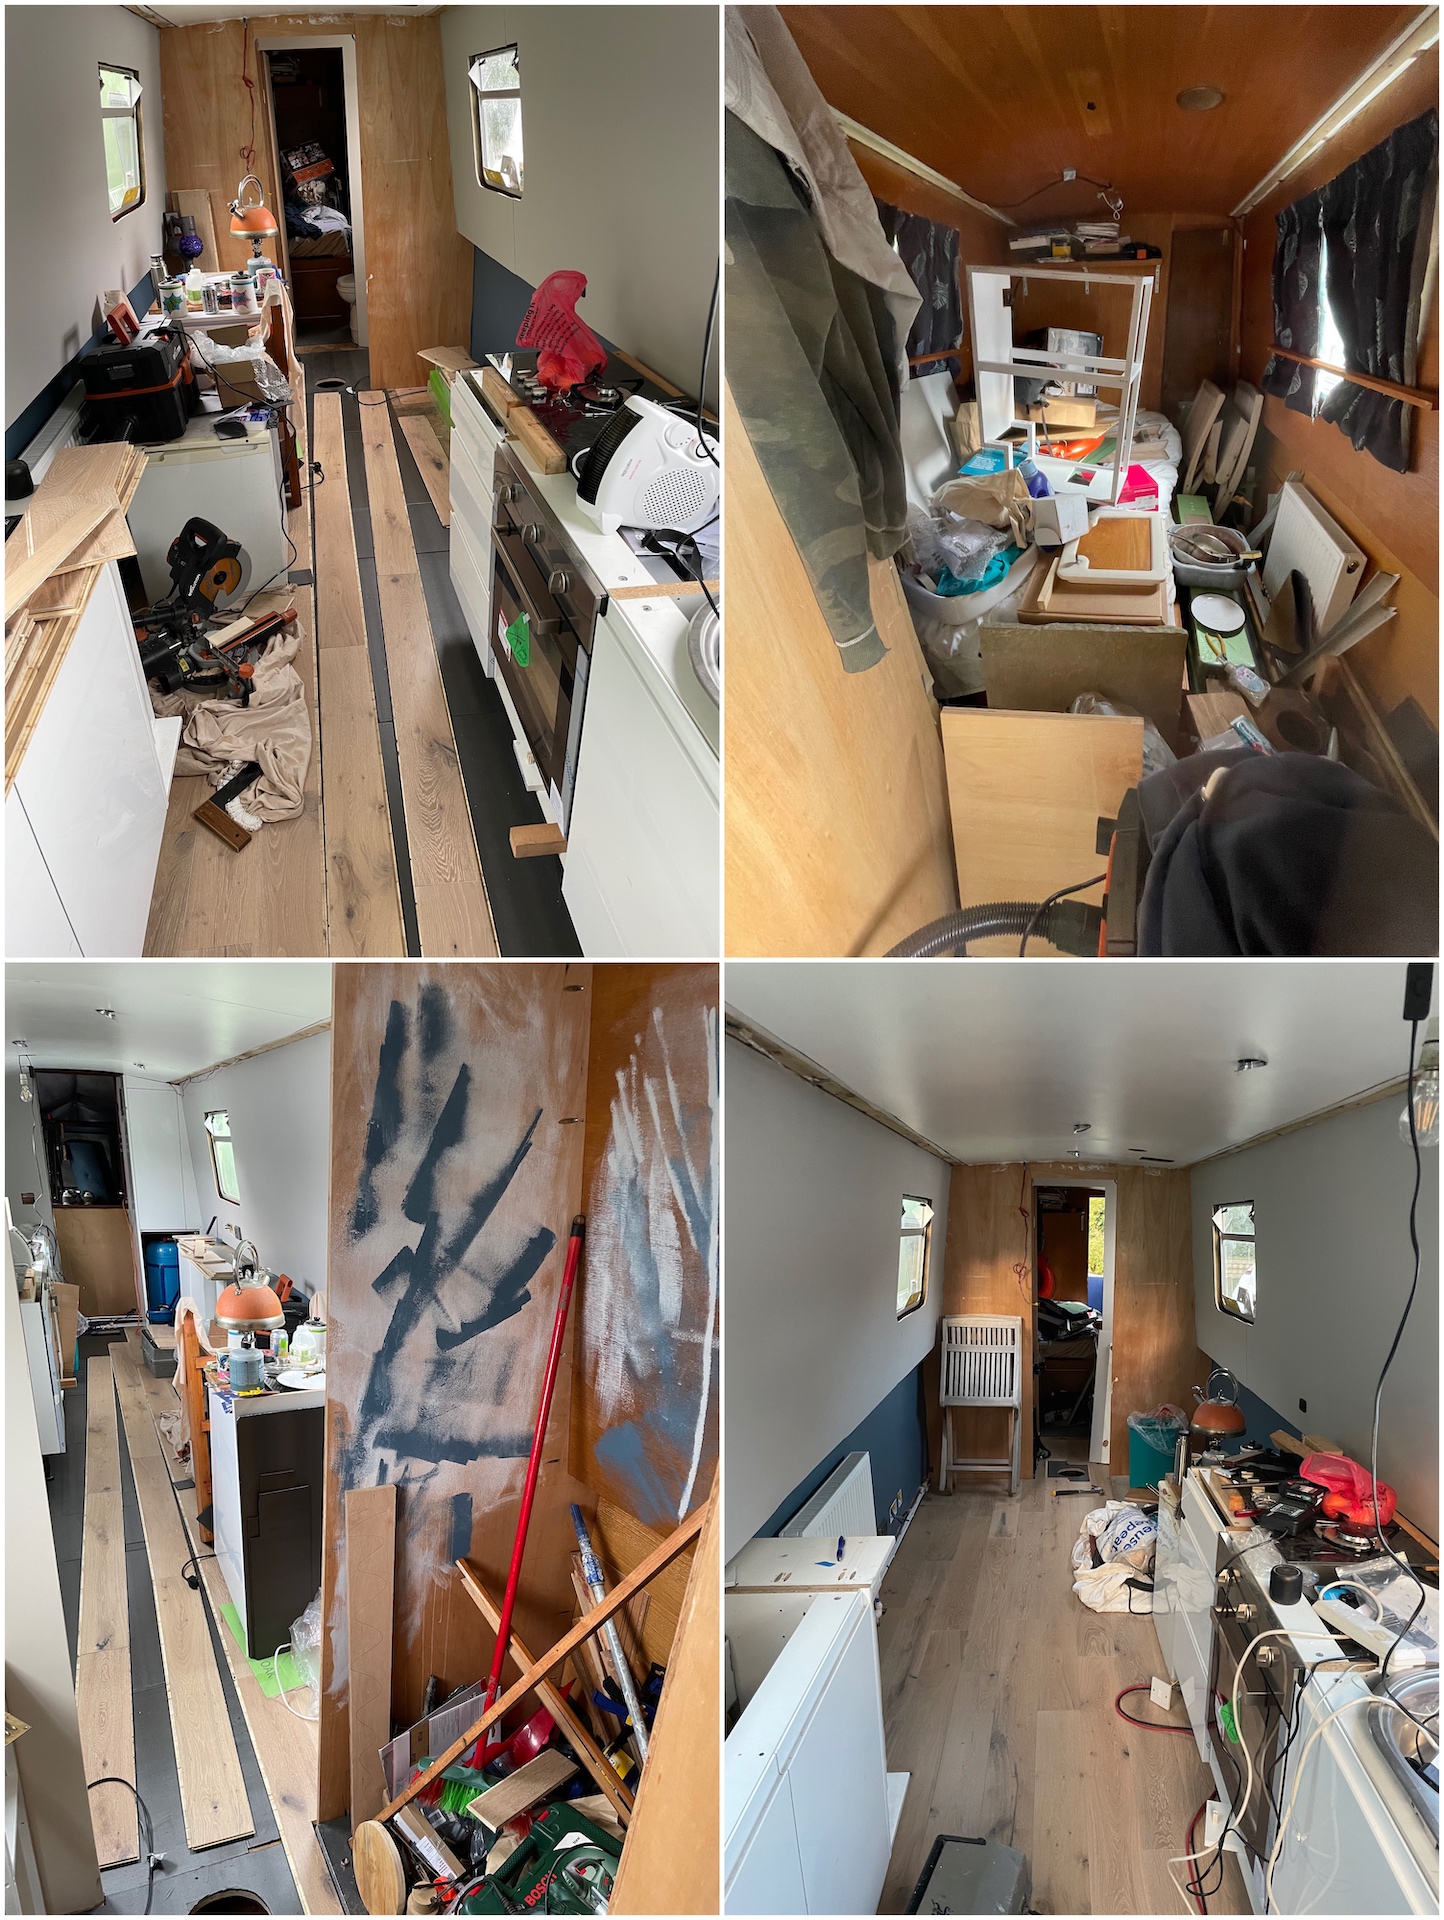
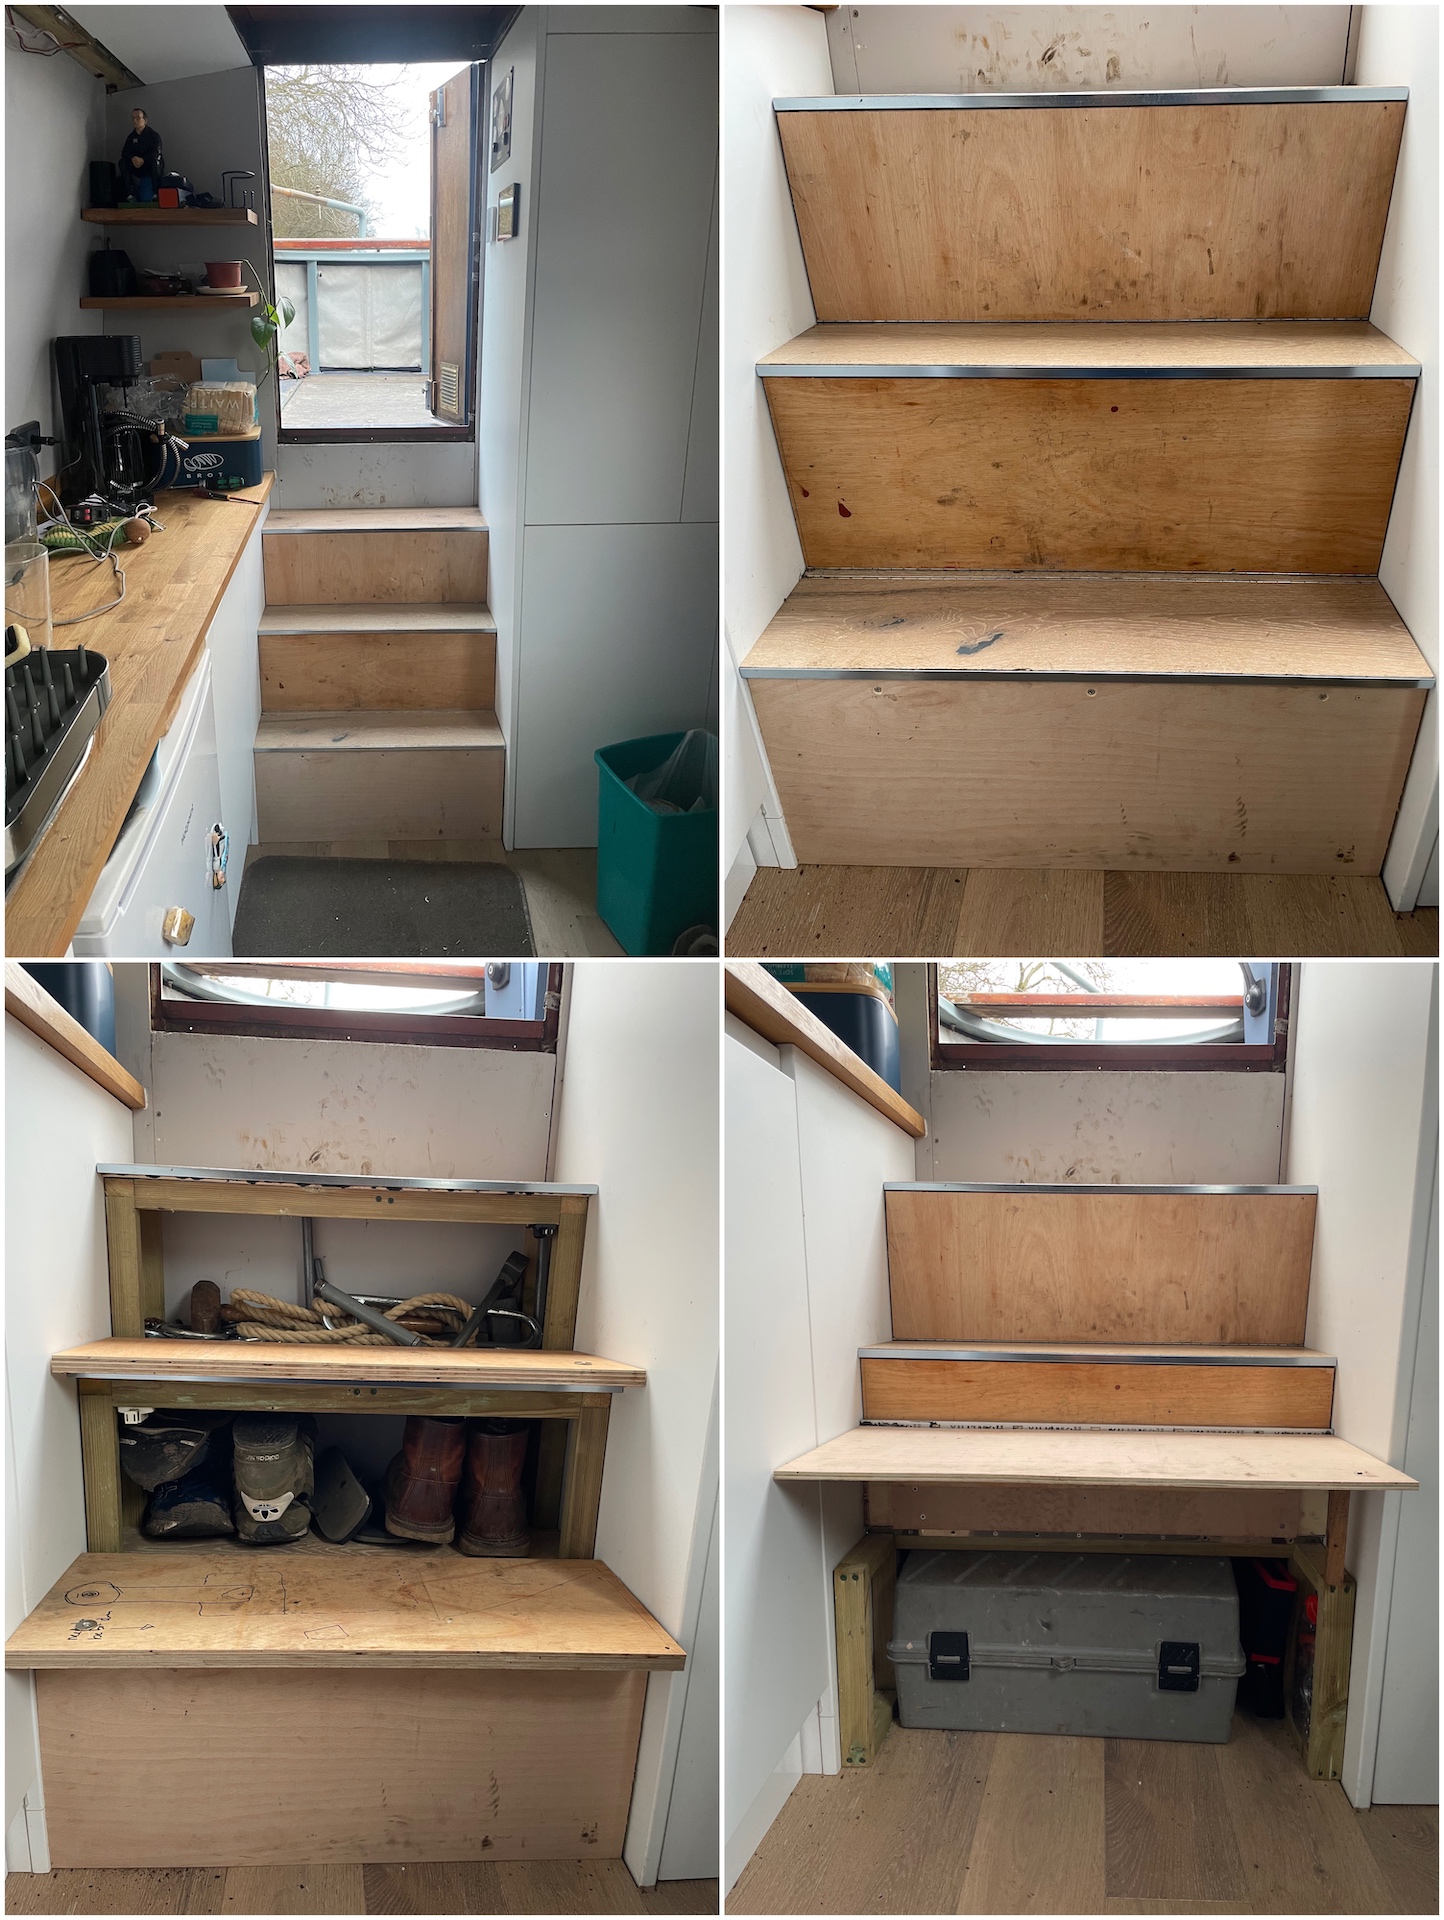
The stern steps are pretty rudimental, a frame made out of 25mm x 38mm treated timber covered in leftover flooring and plywood. The top two steps hinge from the front as access from the top would be difficult due to the steps depth, the bottom step opens both the top and front in one motion to allow easy access to bigger objects such as tools.
Painting
The 80s caravan wood effect had to go so I sanded the walls and ceiling with a combination of a mouse sander and by hand (I should have hired a proper sander). I used Everbuild 2-part wood filler to fill any imperfections (old fixtures and fittings, water damage, raised grain because of condensation around the windows, tiles adhesive, etc) that I thought would show up after painting. It is a bit of a pain to use as must be mixed in small quantities and is tough to sand, however it dries rock solid so you would hope that it wont crack under the tough conditions of the boat.
Next the walls where painted with Zinsser Bulls Eye 123 Plus, a primer, sealer and stain blocker all in one. Stain blocking is essential as since it is an old boat the insulation wont be as good (certainly not spray foam) so there will be in parts some bare metal under the wood, condensation will form on this and could cause water stains. Being a water-based rather than solvent-based paint meant that it was a lot easier to apply and cleanup. I got the initial idea to use it from reading this good blog post on painting a boat.
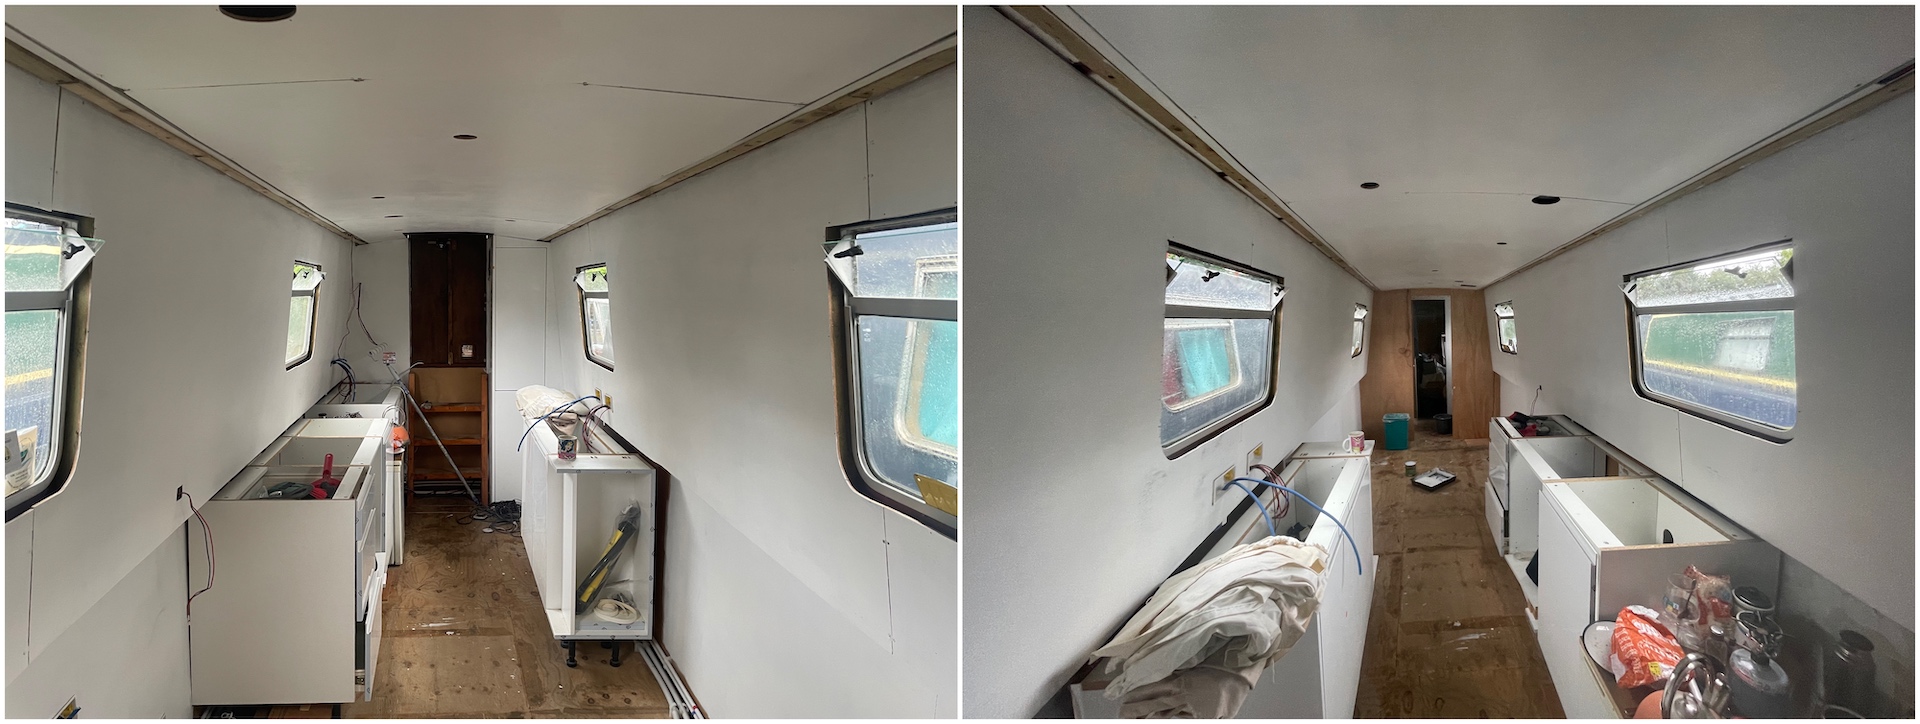
Finally a top coat of Crown easy clean was applied as it should be more durable than standard paints. Different colours are used for above and below the gunwale as this allows me to use a darker colour scheme in part without making the boat feel too small.