If you have an understanding of Python and have been working with Ansible it is likely at some point you will get to the stage where you ask yourself ‘there has to be something better’. For network automation that better could well be Nornir.
I am not sure how much use this series of posts will be to others, they are written for the purpose of helping me get my head round Nornir and to keep track of tips and tricks I come across along the way.
- The Basics: Information to get started with nornir and understand how it works
- Inventory Structure and Filtering: Explains how the inventory is structured and how to manipulate its contents
- Tasks, Plugins and Templates: How tasks are built and information on the use of common connection plugins and nornir-template
I am not as much a hater of Ansible as some, it does offer an easy way to do limited tasks if the modules already exist. Small defined playbooks using modules ok, medium to large playbooks or any type of complexity, bad, debugging, a total nightmare. After spending the past few weeks working with Nornir I have come to realise all those things I accepted as the norm with Ansible don’t have to be, with a little bit of Python knowledge you have total control of the look and feel of your automation tasks.
Table Of Contents
What is Nornir?
Nornir is a multi-threaded network automation framework that abstracts inventory and task execution. The multi-threaded nature allows it to manage the configuration of multiple network devices concurrently (default 20) compared to say native Netmiko which would run against devices sequentially. It uses a different thread for each host (in the inventory) to concurrently execute and keep track of the tasks.
Nornir tasks run actions against the data. Tasks can contain shared community plugins, your own custom plugins or native Python code. The Nornir framework ties the inventory (data) and the tasks together allowing them to be run on a subset of devices whilst handling the data, parallelization and keeping track of the returned output and/or errors.
In Nornir3 the core has been de-coupled from the plugins meaning you extend Nornir to meet your needs by installing and importing the plugins that you require. There are network plugins to connect to devices (nornir-napalm, etc), inventory plugins for building the inventory (nornir-netbox, etc) and nornir-utils which contains some of the former core tasks such as print_result and load_yaml.
pip3 install nornir

pip3 install nornir_utils
pip3 install nornir_jinja2
pip3 install nornir_netmiko
The flexibility of Nornir comes from the fact that it is pure Python. You can call Nornir in any part of a script and use its different elements (plugins) at differing times. I really like how the output is decoupled from the actual tasks giving you the freedom choose what and when to return to screen. You are not constraint by having to to run the whole framework in one go and print the whole result for meaningless admin tasks.
Configuration file (config.yml)
The config file provides inventory (file location, inventory plugin) and task parallelization information. Inventory options are specific to the inventory plugin, so if using nornir_netbox it would be the URL and token.
The num_workers option of the runner plugin defines the number of threads to be used, ‘run the task in parallel over x number of hosts at one time’ (default of 20 if not set). Setting plugin: serial runs the task over each host one after the other in a simple loop without any parallelization. When debugging parallelization should be disabled by setting the num_workers to 1 as the python debugger doesn’t interact well with threads.
inventory:
  plugin: SimpleInventory
  options:
    host_file: "inventory/hosts.yml"
    group_file: "inventory/groups.yml"
    defaults_file: "inventory/defaults.yml"
runners:
  plugin: threaded
  options:
    num_workers: 100
Inventory
The inventory is a Python dictionary containing one or more hosts. The inventory can be populated in various ways using any of the pre-defined inventory plugins. The default plugin SimpleInventory stores all the relevant data in three yaml files: hosts, groups, defaults
The dictionaries are hierarchical with hosts being the most relevant and defaults the least. Values in defaults will be returned if neither the hosts nor the parent groups have a specific value for that element. Nornir allows you to populate custom data in host or group objects under the data dictionary using whatever key/value data structure you choose. This also includes the ability to have nested dictionaries.
The same schema (layout) is used for hosts, groups and defaults. It can be viewed using:
from nornir.core.inventory import Group
import json
print(json.dumps(Group.schema(), indent=4))
hosts.yml
Not all dictionaries are mandatory, connection_options (parameters for plugins like naplam), port and groups (must be list) are all optional.
r1:
  hostname: 192.168.2.1
  port: 23
  platform: iosxe
  username: vagrant
  password: vagrant
  groups: [router]
  data:
    site: reading
    role: wan
    type: network_device
sw1:
  hostname: 192.168.2.2
  platform: ios
  groups: [switch]
  data:
    site: london
    role: campus
    type: network_device
groups.yml
Groups allow for the organization of hosts based on functionality and other criteria. groups.yml follows the same rules as the hosts.yml in terms of formatting and inheritance and has the capability to inherit elements from other groups (use groups dict within a group).
global:
    data:
        domain: global.local
switch:
    data:
        mgmt: vlan10
router:
    groups: [global]
    data:
        mgmt: Loopback1
firewall: {}
defaults.yml
The bottom of the tree in terms of inheritance, Nornir will always use the values from here unless they are overridden in groups or hosts.
connection_options:
  scrapli:
    extras:
      auth_strict_key: false
    platform: cisco_iosxe
    port: 22
  username: admin
  password: admin123
Initialising the inventory
Initialising Nornir with the configuration variables loads the inventory, updates any dictionaries inherited from defaults or groups and moves the data dictionaries into the same level as all other dictionaries. Initialisation can be done using a configuration file, programmatically with dictionaries or a combination of both. Below is an example of all 3 methods, you only need to do one:
from nornir import InitNornir
nr = InitNornir(config_file="config.yml")
from nornir import InitNornir
nr = InitNornir(runner={"plugin": "threaded", "options": {"num_workers": 100}},
                inventory={"plugin": "SimpleInventory", "options": {
                    "host_file": "inventory/hosts.yml", "group_file": "inventory/groups.yml"}})
from nornir import InitNornir
nr = InitNornir(config_file="config.yml", runner={"plugin": "threaded", "options": {"num_workers": 50}})
nr.config.inventory.options                         To see the inventory file locations
nr.config.runner.options                            To see the runner options
To run a simple task import a connection plugin (napalm_get) and use print_result to track the hosts that this was performed on and return the output to screen.
from nornir_utils.plugins.functions import print_result
from nornir_napalm.plugins.tasks import napalm_get

results = nr.run(task=napalm_get, getters=["facts"])
print_result(results)
Anything returned by a task is a special Nornir object, print_result deciphers that to prettify and print the host, task banner and device output. Alternatively the task output (what napalm_get returned) for a host can be manually called using .result.
print(results['sw1'].result)
Task options
Nornir keeps track of failed_hosts and won’t run future tasks on them until the inventory is re-initialised. Failed hosts can be viewed and made back eligible for future tasks individually or for all hosts.
nr.data.failed_hosts
nr.data.recover_host('sw1')
nr.data.reset_failed_hosts()
The execution of tasks on failed hosts can be forced with the argument on_failed=True and hosts that are “good” can be excluded the with on_good=False. These are set in the run method when the task is called.
run(task=template_file, template="vlan_acl_tmpl.j2", path="templates/", on_failed=True)
task.run(task=napalm_cli, commands=["show ip ospf neighbor"], on_good=False)
dry_run controls whether to apply the changes to the device or just simulate them. By default all changes are applied as the default inherent setting is dry_run=False. Napalm (napalm_configure) is the only plugin that supports dry_run and returns the configuration that would be applied. Netmiko (netmiko_send_config) does not support it, Scrapli (send_config, send_configs) does support it but does not return any output.
dry_run can be set globally for the inventory at initialization or on a per-task basis in the run method. If set in both places the later takes precedence.
nr = InitNornir(config_file="config.yml", dry_run=True)
print_result(nr.run(task=napalm_configure, configuration="interface loopback1\n description Created by Nornir ", dry_run=True))
It is useful to have a task run_once in situations such as loading files or rendering templates. Nornir has no native run_once feature so to achieve this can use an inventory filter to select the first host. This could be expanded on to get the first host in each group, for example if you wished to render a config template for each group.
nr.filter(F(name=list(nr.inventory.hosts.keys())[0]))
nr.filter(F(name=list(nr.filter(F(groups__any=['nxos'])).inventory.hosts.keys())[0]))
Task results
To understand the printing the results first need understand the format of the data returned by Nornir. AggregatedResult is a dict-like object that aggregates the results for all devices with hosts either iterated through or called individually.
Scrapli needs importing as it is used with all the preceding examples.
from nornir import InitNornir
from nornir_scrapli.tasks import send_command, send_commands, send_configs

nr = InitNornir(config_file="config.yml")
A single task run on its own will only have the one result, ScrapliResult: “send_commands”.
cmd_result = nr.run(task=send_commands, commands=["show version", "show ip int brief"])

print(cmd_result)
AggregatedResult (send_commands): {'HME-SWI-VSS01': MultiResult: [ScrapliResult: "send_commands"]}
A task function always has multiple results with the first being the actual function result (Result: “task_result”) and the rest being the actual task results (ScrapliResult: “send_command”, ScrapliResult: “Create Loopback”).
def task_result(task):
    task.run(task=send_command, command="show ip int brief")
    task.run(task=send_configs, name='Create Loopback', configs=['interface loop11', 'description Created by nornir-scrapli'])
task_result = nr.run(task=task_result)

print(task_result)
AggregatedResult (task_result): {'HME-SWI-VSS01': MultiResult: [Result: "task_result", ScrapliResult: "send_command", ScrapliResult: "Create Loopback"]}
AggregatedResult shows the overall result rather than individual task results. This includes things such as the hosts it was run against and the hosts that failed. dir(task_result) returns all the possible associated parameters that can be called.
task_result.keys()                                      Hosts that the script was run against
dict_keys(['HME-SWI-VSS01'])
task_result.failed                                      If the task failed
False
task_result.failed_hosts                                Hosts that the tasks failed against
{}
Supplying the hostname as the key calls the result of an individual host, the MultiResult. It is a list-like object of results for each sub-task executed on a host. It can be iterated over or individual results called by referencing the list slice, with the first (0) always being the main_task.
task_result['HME-SWI-VSS01']
MultiResult: [Result: "task_result", ScrapliResult: "send_command", ScrapliResult: "Create Loopback"]
task_result['HME-SWI-VSS01'][0]
Result: "function_tasks"
task_result['HME-SWI-VSS01'][1]
ScrapliResult: "send_command"
The outcome of a sub-task can be viewed by calling any of its associated parameters.
task_result['HME-SWI-VSS01'][1].changed                 Boolean showing if anything was changed by the task (shown in print_result header)
task_result['HME-SWI-VSS01'][1].diff                    Used by NAPALM for diffs between configs
task_result['HME-SWI-VSS01'][1].failed                  Boolean showing if the individual task failed
task_result['HME-SWI-VSS01'][1].host                    Host task run against
task_result['HME-SWI-VSS01'][1].name                    Name of the task
task_result['HME-SWI-VSS01'][1].result                  Result of the task, so what is printed under the print_result header
task_result['HME-SWI-VSS01'][1].severity_level          Severity level of the task
print_title and print_result
Both plugins are imported from nornir_utils
from nornir_utils.plugins.functions import print_title, print_result
print_title can be used to print a title anywhere within the Nornir output, be it start, mid-task or end.

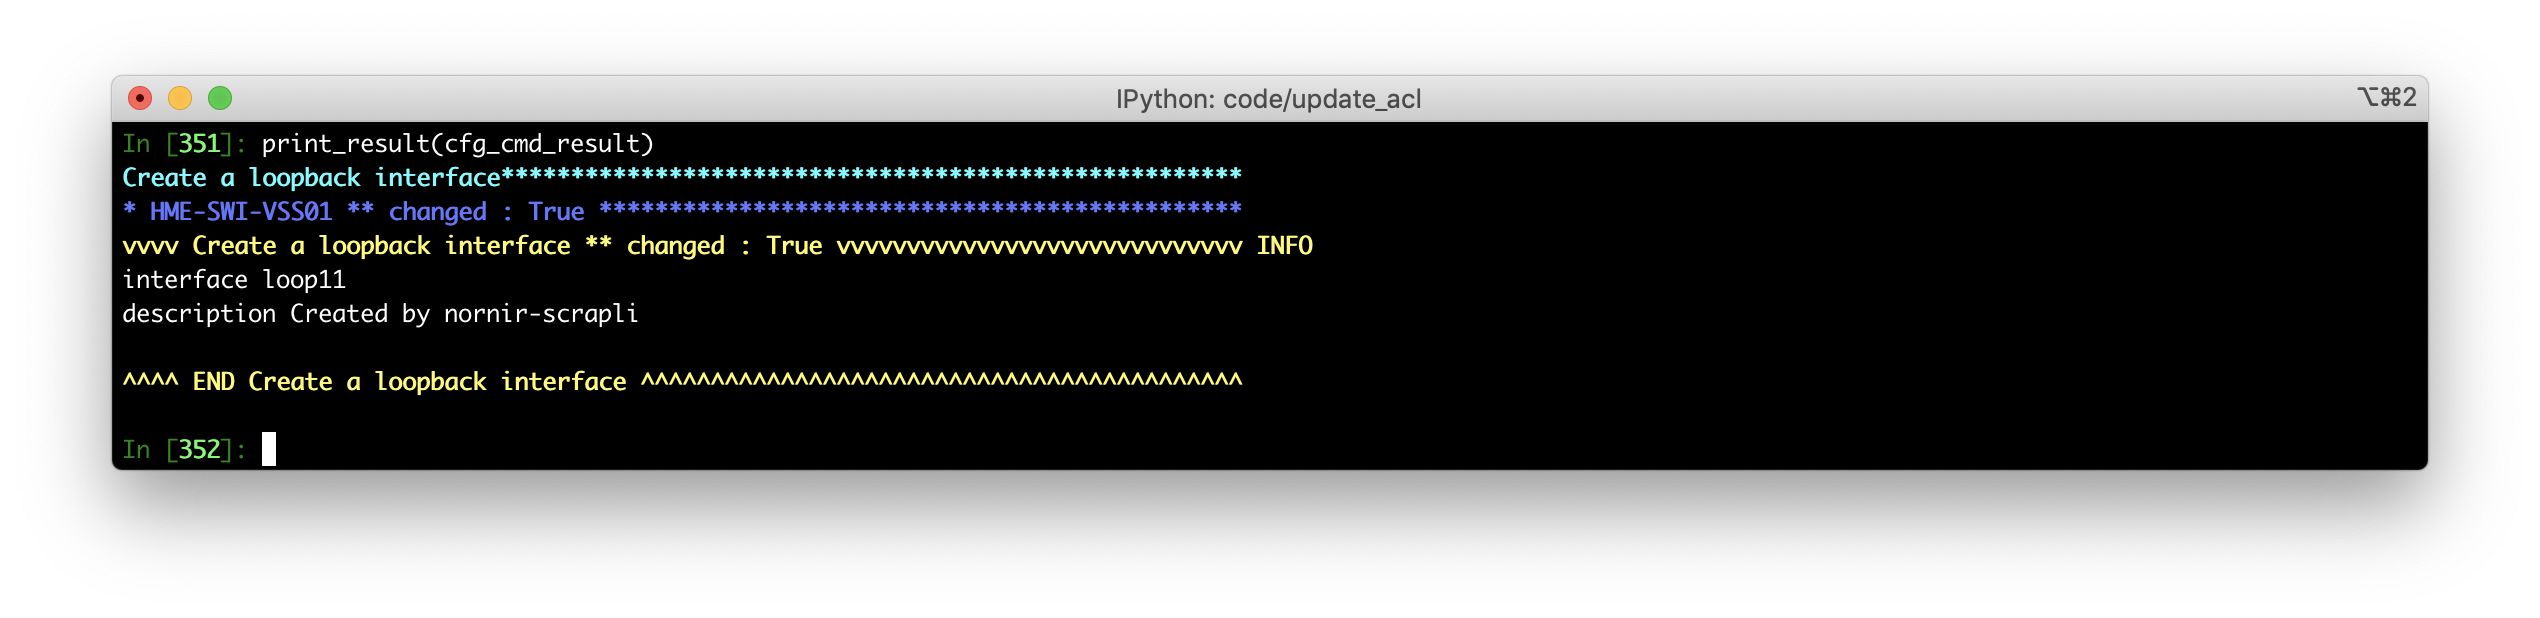
print_result prints the output of the tasks on a per-host basis. The first line (cyan) is the task name followed by the hostname with its change status (blue) and finally a wrapper of the task with the colour either being green or yellow dependant on whether a change was made or not.
show_cmd_result = nr.run(task=send_command, command="show interface gi0/1 status")

The name of the wrapper will be the task name unless name has been used to change this when running the task.
cfg_cmd_result = nr.run(name="Create a loopback interface", task=send_configs, configs=["interface loop11", "description Created by nornir-scrapli"])
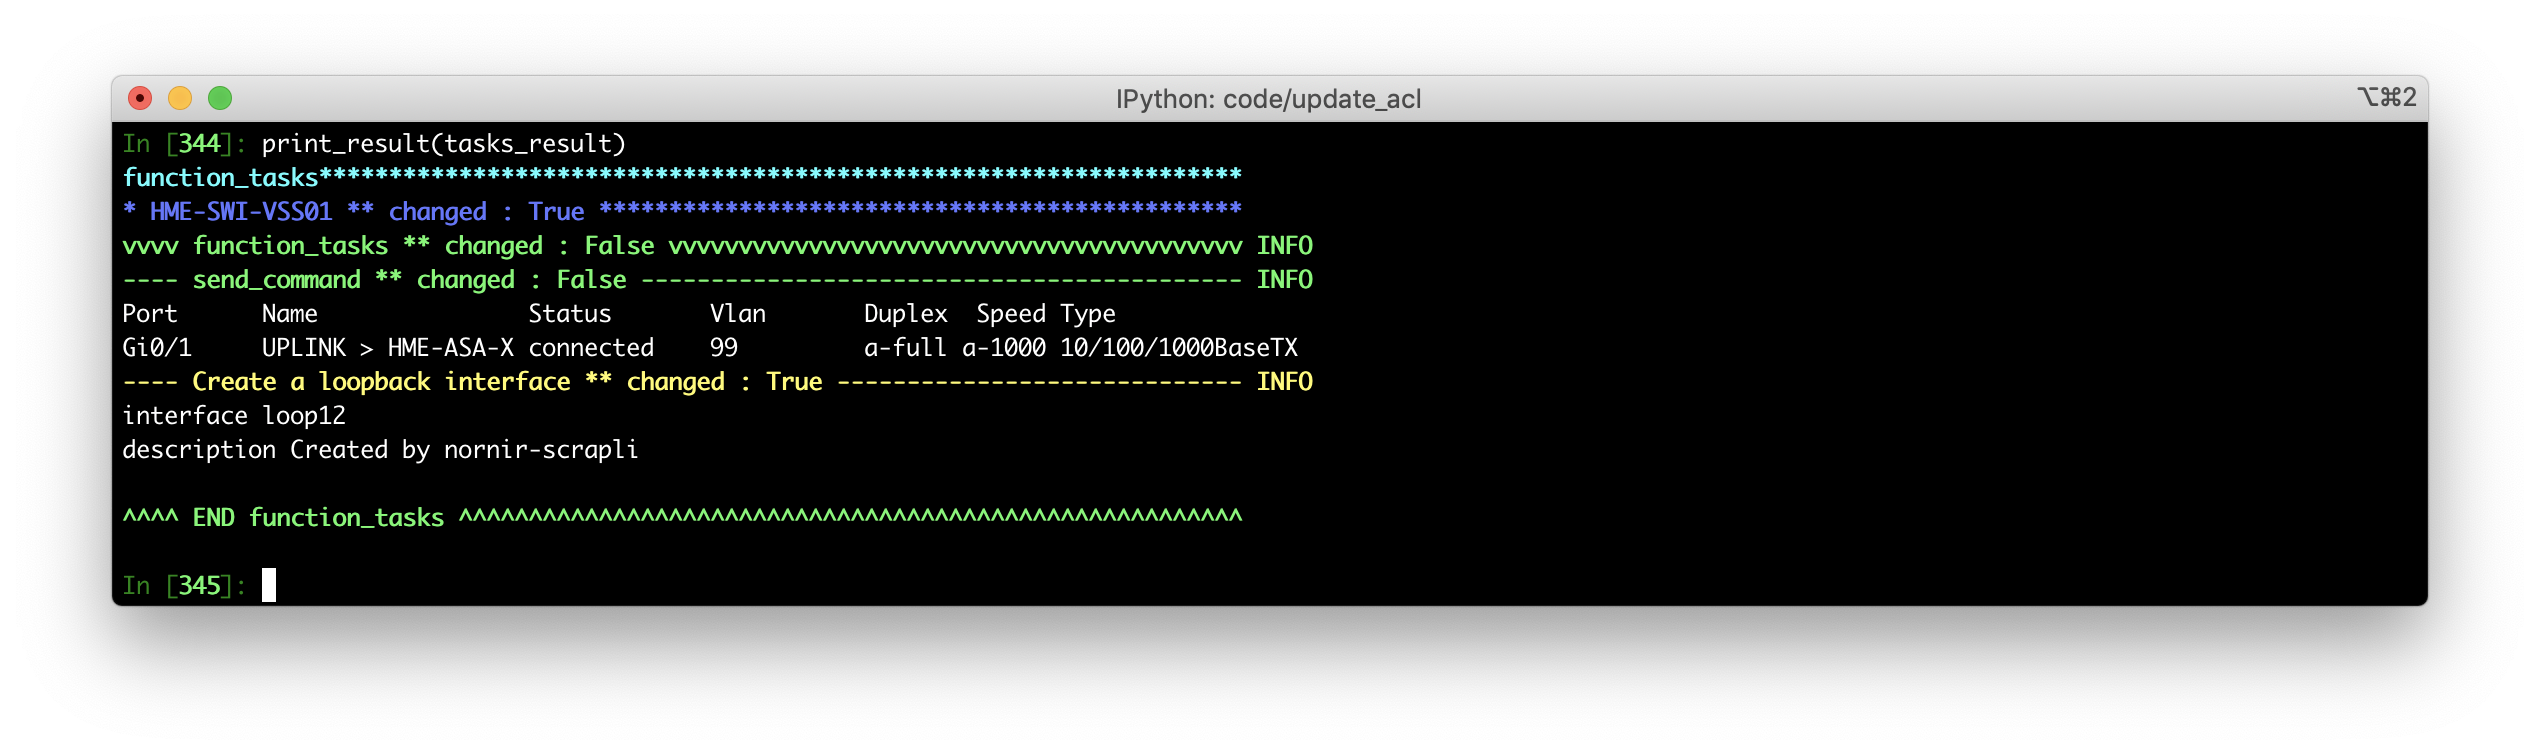
As a function containing tasks is called as the task this means that the function becomes the first result (0) and the actual sub-task results proceed this. Therefore in print_result the function name is the main-task wrapper and the sub-tasks each have their own header within the it.
def function_tasks(task):
    task.run(task=send_command, command="show interface gi0/1 status")
    task.run(name="Create a loopback interface", task=send_configs, configs=["interface loop12", "description Created by nornir-scrapli"])

tasks_result = nr.run(task=function_tasks)
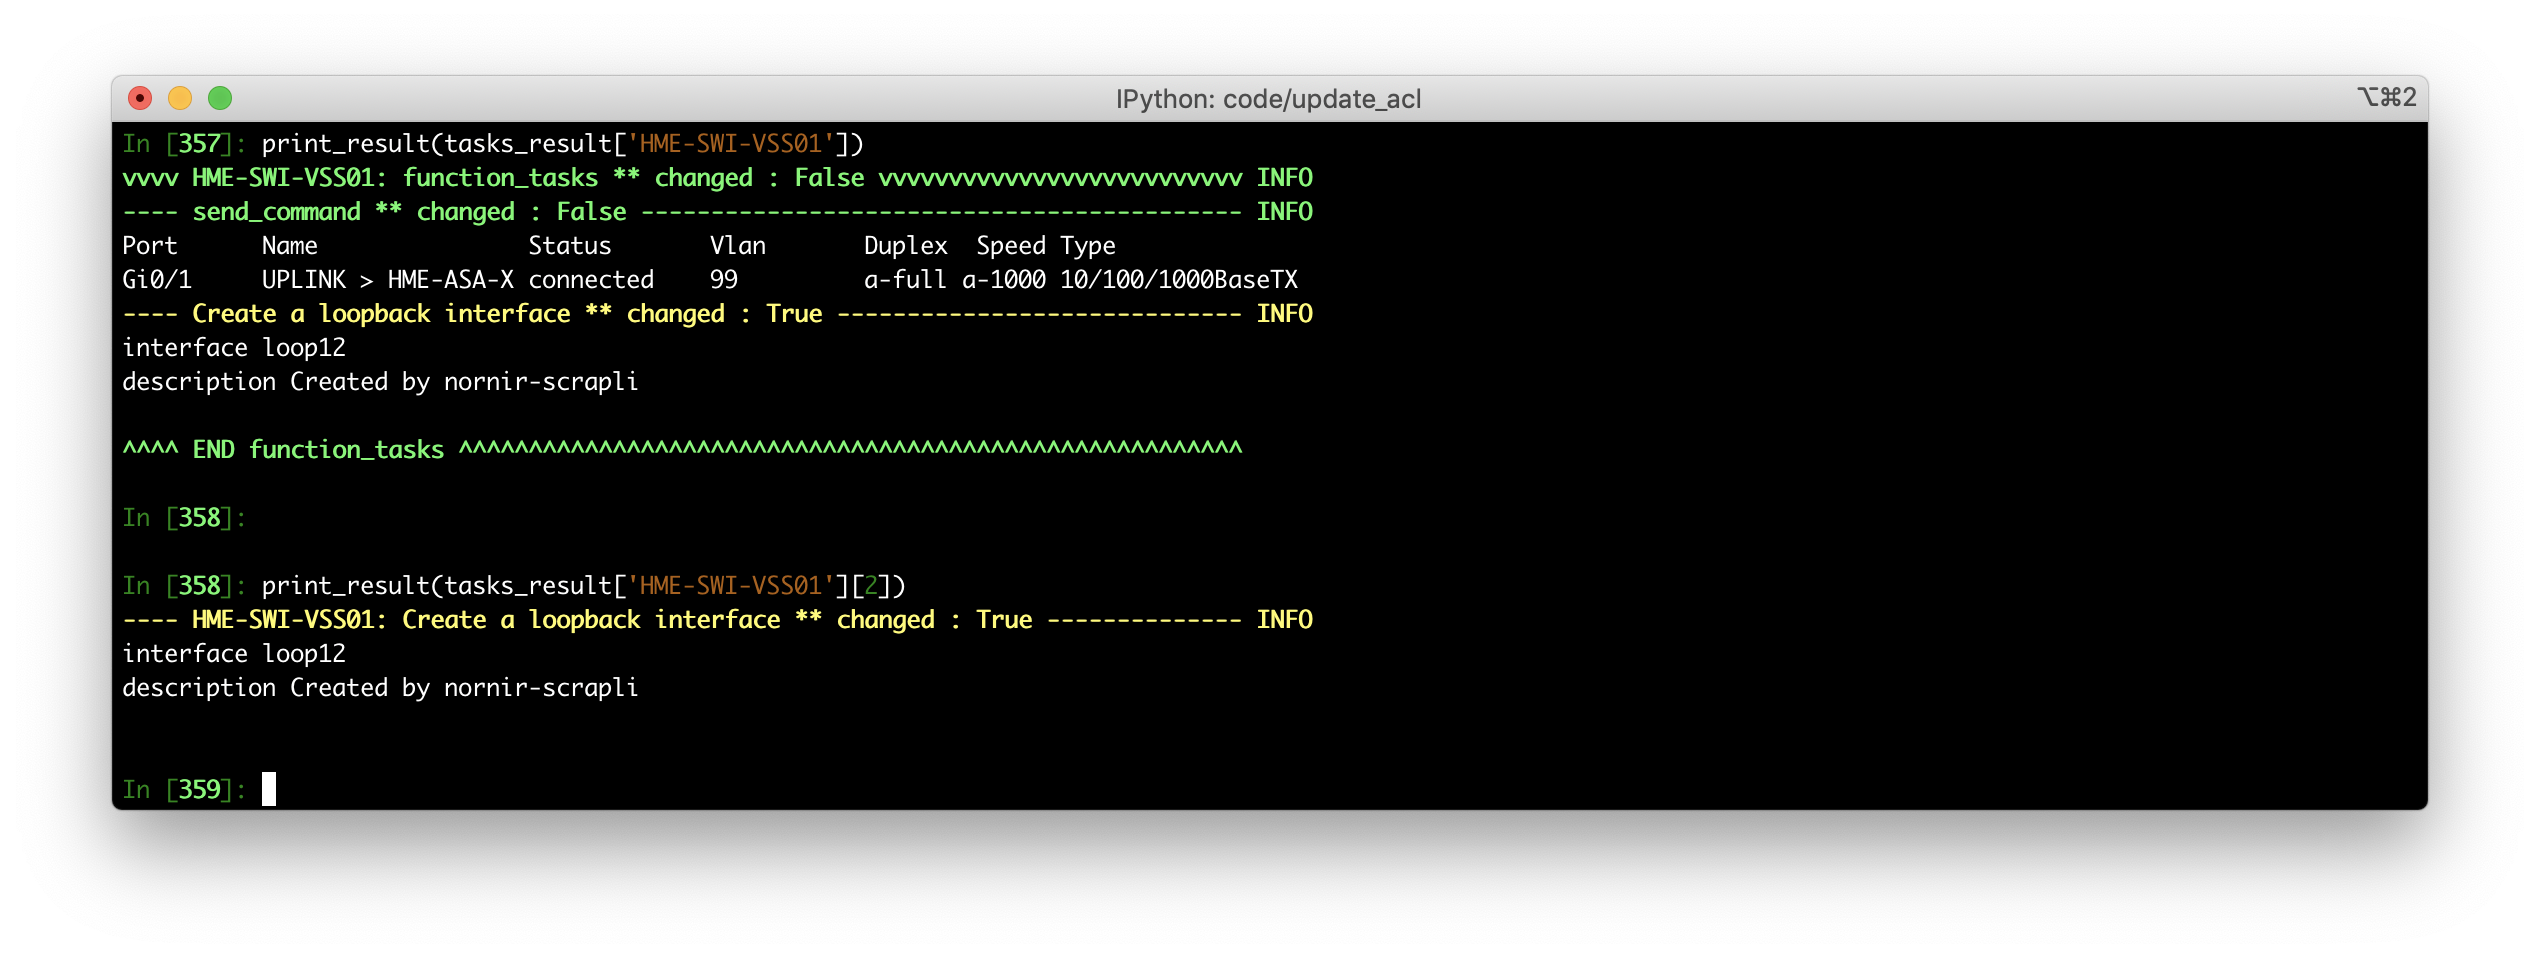
The result can be filtered by specifying a single host or a specific task for a host. The function name is result0 so the actual task results start at 1.
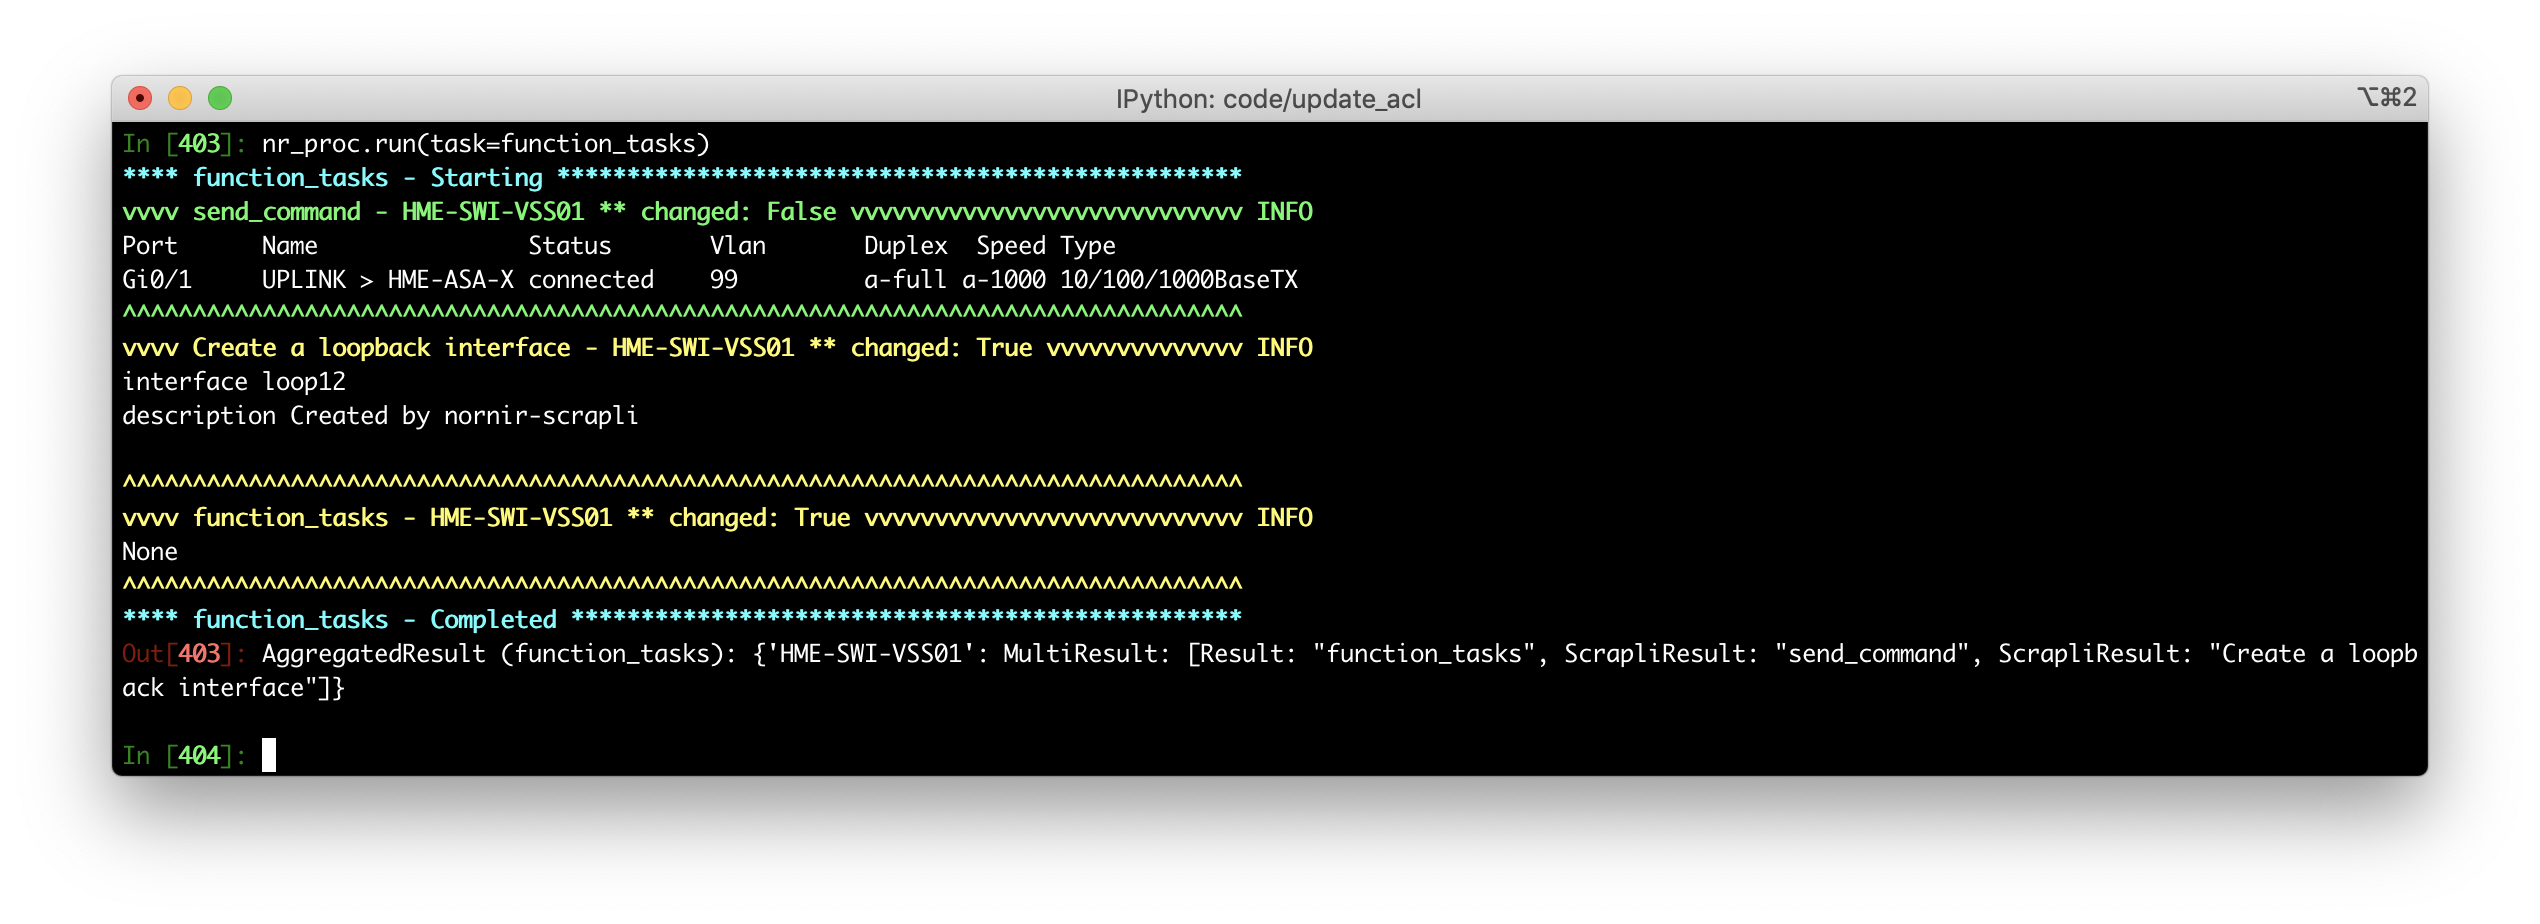
Processor PrintResult is an alternative way of dealing with the results of a task in real-time. It processes the events asynchronously meaning that the results of a host can be used as soon as the host is completed without the need to wait for the rest of the hosts to complete. Similarly to .filter, .with_processors returns a copy of the nornir inventory with the processors assigned to it.
from nornir_utils.plugins.processors import PrintResult

nr_proc = nr.with_processors([PrintResult()])

def function_tasks(task):
    task.run(task=send_command, command="show interface gi0/1 status")
    task.run(name="Create a loopback interface", task=send_configs, configs=["interface loop12", "description Created by nornir-scrapli"])

nr_proc.run(task=function_tasks)
In this example the results are printed to screen immediately rather than having to call print_result afterwards.
Modifying the printed output
To content of MultiResult is the resultant of the data returned by the task (plugin) being run. For example, Scrapli send_command returns the output of a show command and send_config returns the configuration that was added. These plugins use nornir.core.task.Result to format the returned data into a structure that the framework can print. This data is put in the result dictionary.
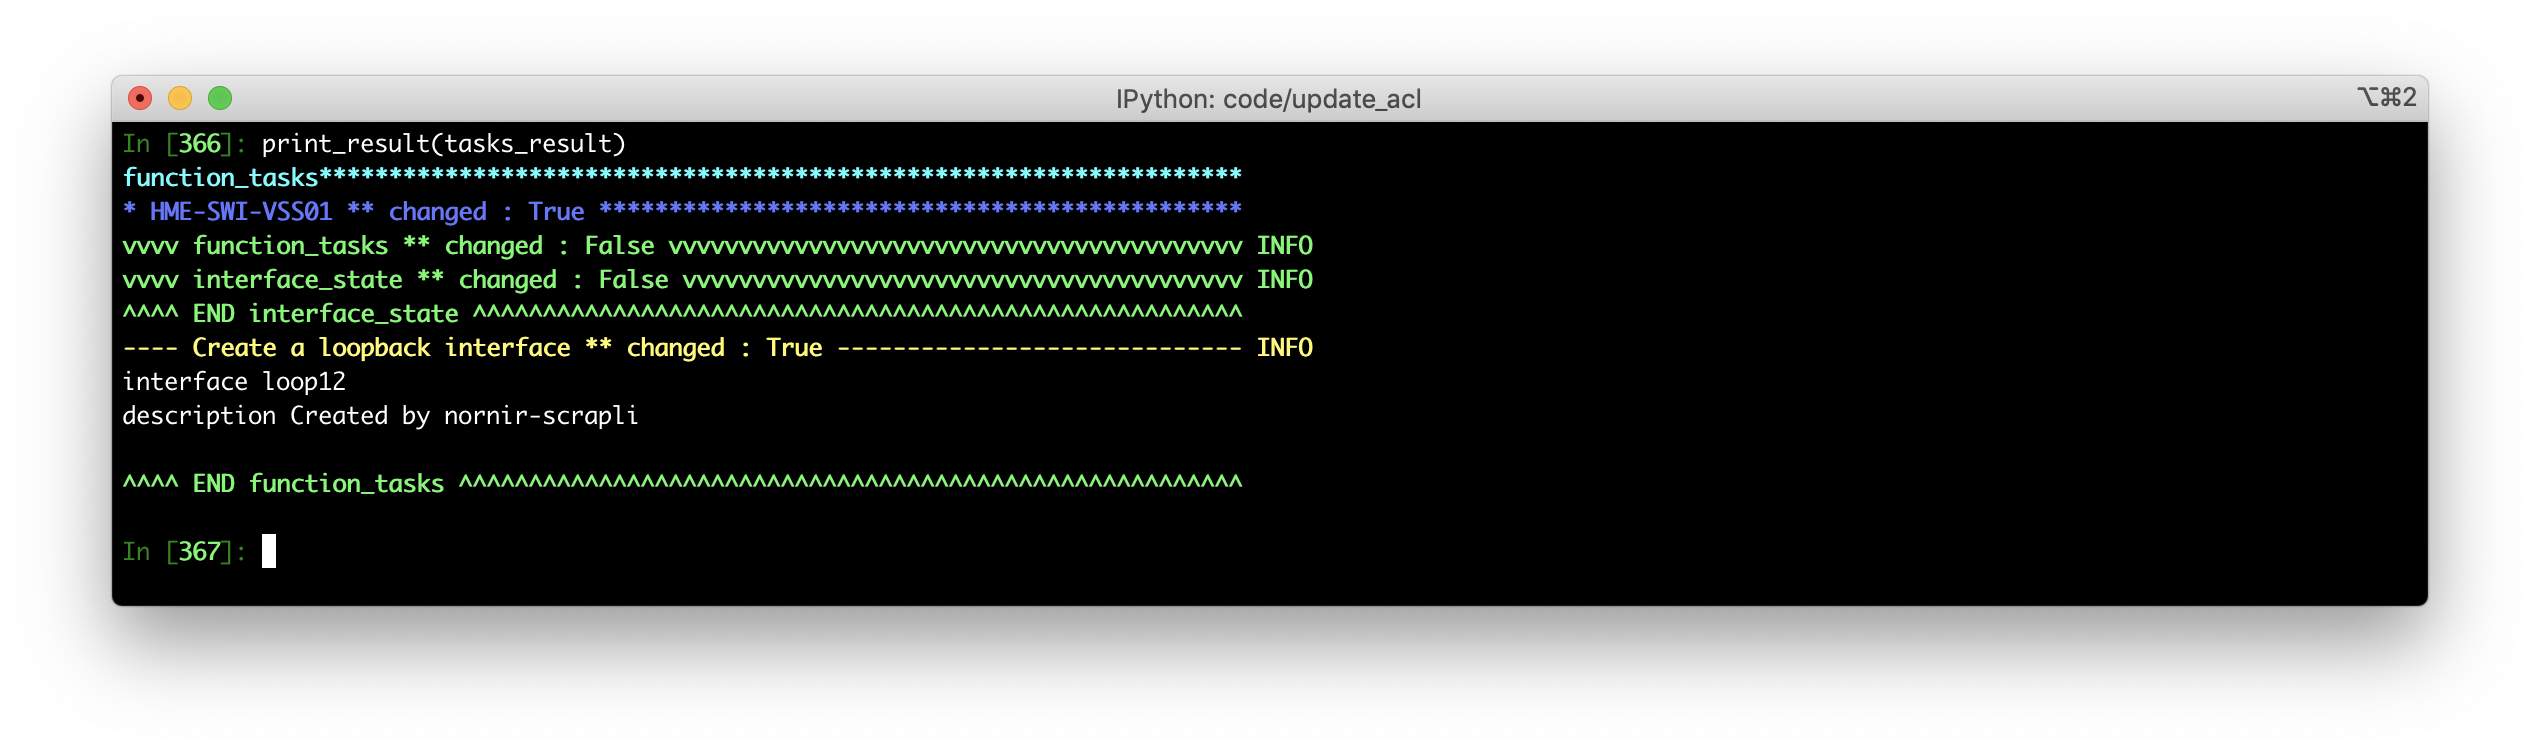
There is no way to stop the returned data from being stored in the result dictionary, however there are ways to stop it from being printed. The easiest way to accomplish this is to change the severity level of the task to DEBUG as by default print_result only displays tasks with a severity level of INFO. A failed task will always be printed as it has a severity level of ERROR regardless of the one specified by the user.
import logging

def interface_state(task):
    task.run(task=send_command, command="show interface gi0/1 status", severity_level=logging.DEBUG)

def function_tasks(task):
    task.run(task=interface_state)
    task.run(name="Create a loopback interface", task=send_configs, configs=["interface loop12", "description Created by nornir-scrapli"])

tasks_result = nr.run(task=function_tasks)
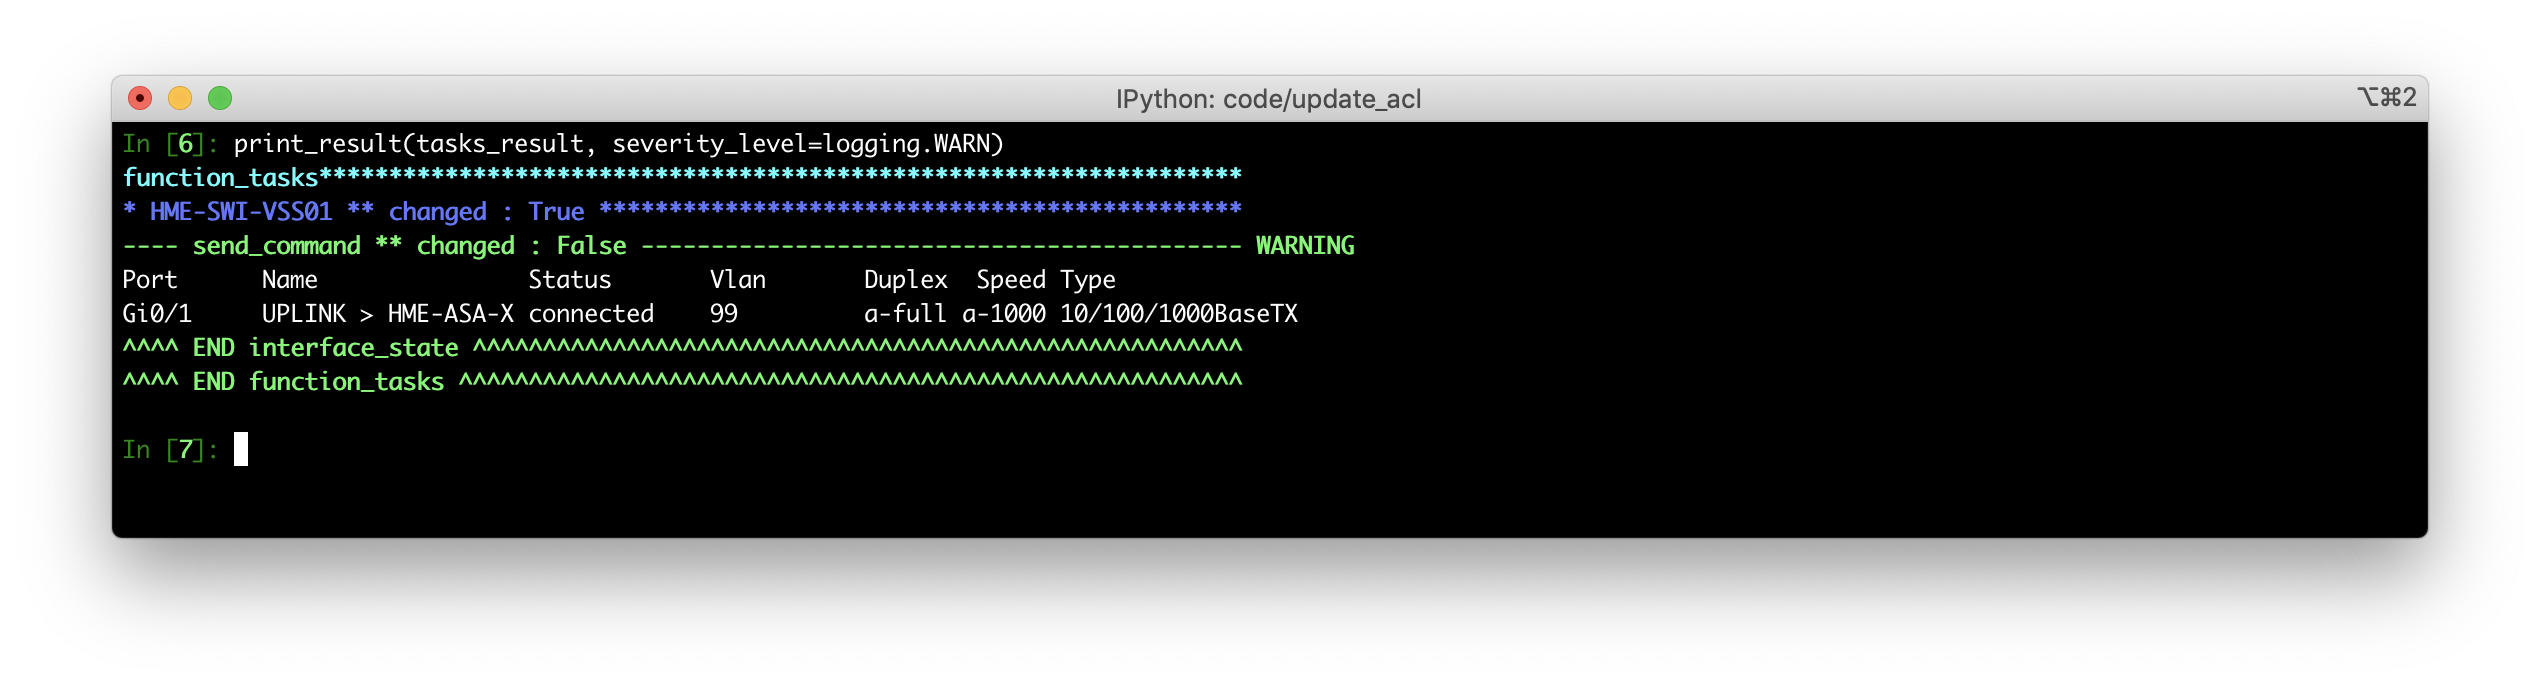
The logic of this can be reversed by changing the severity level of what is printed, so only print things that you have set to a level of WARN.
def interface_state(task):
    task.run(task=send_command, command="show interface gi0/1 status", severity_level=logging.WARN)

def function_tasks(task):
    task.run(task=interface_state)
    task.run(name="Create a loopback interface", task=send_configs, configs=["interface loop12", "description Created by nornir-scrapli"])

tasks_result = nr.run(task=function_tasks)
print_result(tasks_result, severity_level=logging.WARN)
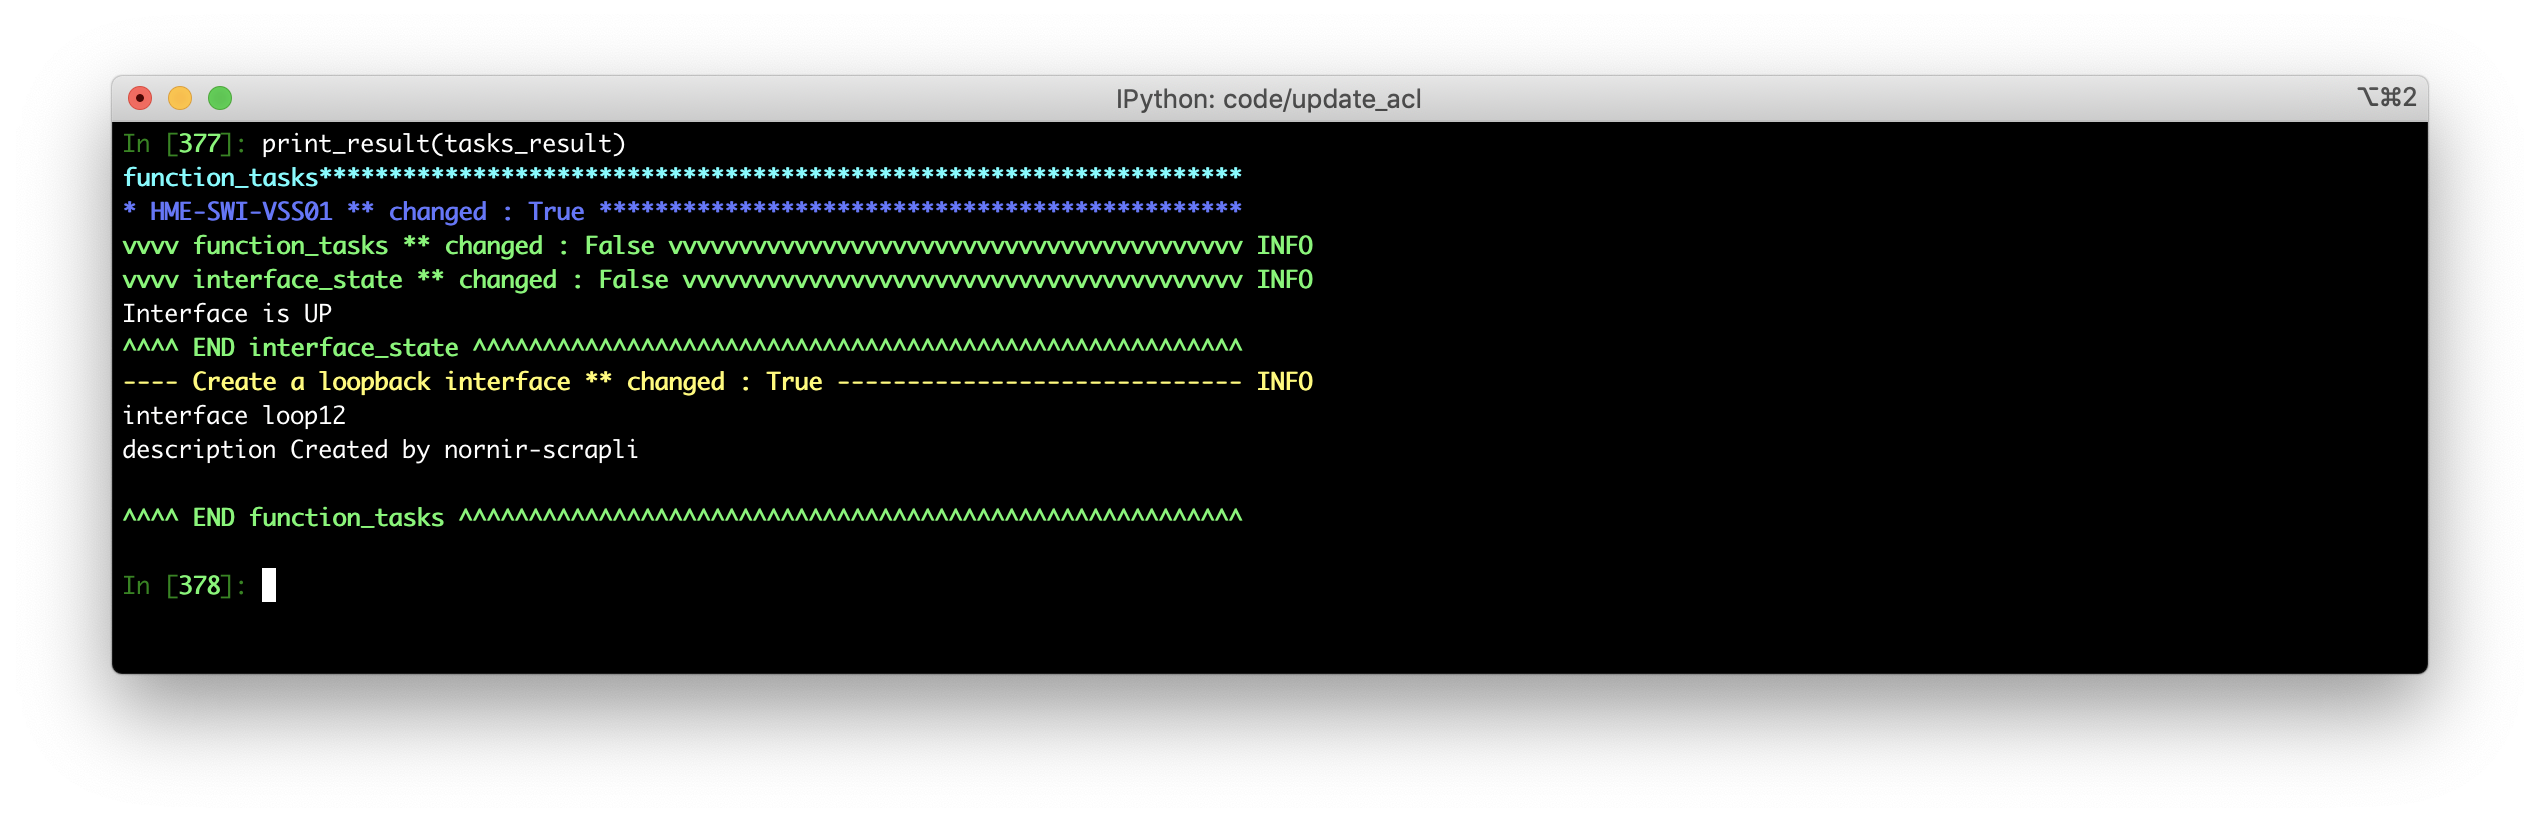
This can be taken a step further by filtering the sub-task result (show command) and instead returning a custom value as the result of the interface_state function. For example, this does so on a conditional basis based on the actual result of the sub-task.
import logging
from nornir.core.task import Result

def interface_state(task):
    output = task.run(task=send_command, command="show interface gi0/1 status", severity_level=logging.DEBUG)
    if 'connected' in output.result:
        return Result(host=task.host, result="Interface is UP")
    else:
        return Result(host=task.host, result="Interface is DOWN")

def function_tasks(task):
    task.run(task=interface_state)
    task.run(name="Create a loopback interface", task=send_configs, configs=["interface loop12", "description Created by nornir-scrapli"])

tasks_result = nr.run(task=function_tasks)
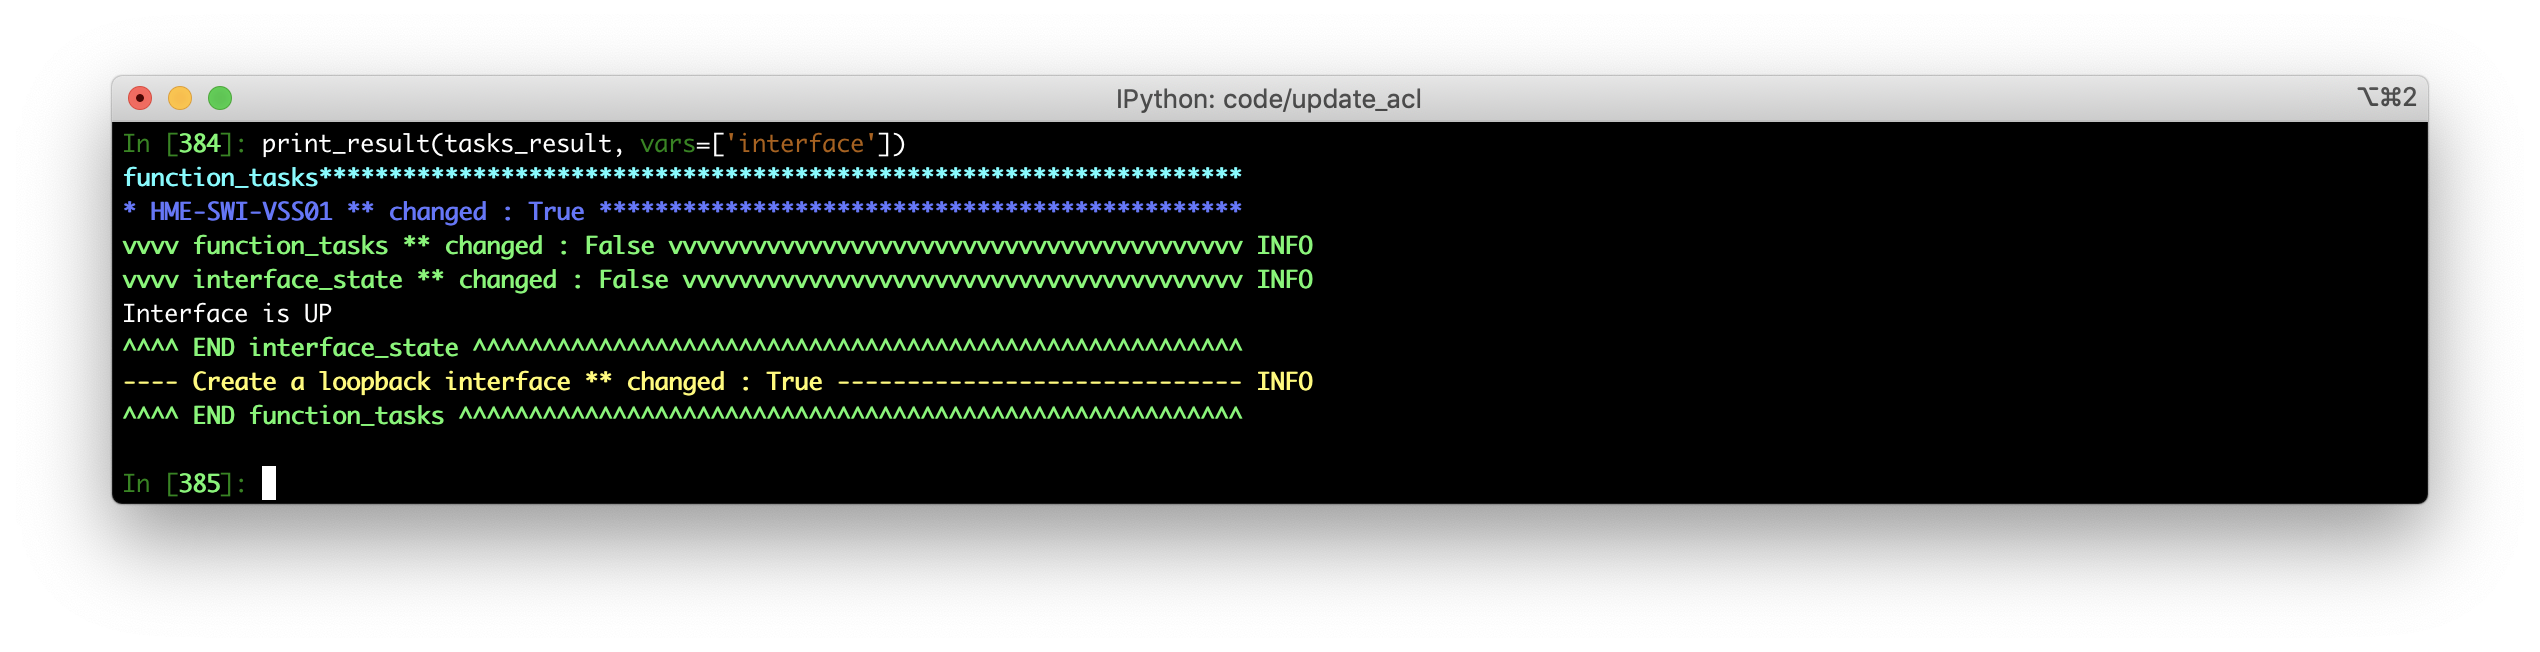
print_result(tasks_result) is the equivalent of print_result(tasks_result, vars=['result']). For this reason additional custom variables can be added to it and/or result removed. The problem with removing result is that it won’t print any task results, although unlike using severity-level it will still print the task name.
def interface_state(task):
    output = task.run(task=send_command, command="show interface gi0/1 status", severity_level=logging.DEBUG)
    if 'connected' in output.result:
        return Result(host=task.host, interface="Interface is UP")
    else:
        return Result(host=task.host, interface="Interface is DOWN")

def function_tasks(task):
    task.run(task=interface_state)
    task.run(name="Create a loopback interface", task=send_configs, configs=["interface loop12", "description Created by nornir-scrapli"])

tasks_result = nr.run(task=function_tasks)
Reference
This post by Said van de Klundert does a great job of explaining how to started with Nornir whilst also going into detail on its inner workings.
Carl Montanari (of Scrapli fame) did an interesting series of posts about moving from Ansible to Nornir. It uses Nornir2 so the syntax is a bit different, but the principles are really well explained.
Wim Wauters post on connection plugins provides some good simple examples to help get started with Netmiko, Naplam and Scrapli.
DV Journey is a Nornir project that interests me due to the way that it is structured and its unit-testing.