A run through using the CLI to set up a Palo firewall at home covering the initial configuration, upgrading, BGP routing and a basic firewall policy.
Table Of Contents
Similar to Cisco software the CLI has two modes of operation:
- operational (>): Show commands of the operational state, general system settings and troubleshooting
- configuration (#): For making system and policy changes, can run operational commands in config mode by prepending them with ‘run’
In general when issuing show commands (interfaces, sessions, etc) they are displayed as a table unless a specific object is specified (such as an interface) with the result being a lot more detail on that object (non-table view). Any commands that take follow will show the data in realtime, kind of like tail -f does in linux.
Using tab or ? in a command shows all the possible options, + is an option and > means that there are further sub-options.
# set deviceconfig system dns-setting ?
> dns-proxy-object   Dns proxy object to use for resolving fqdns
> servers            Primary and secondary dns servers
  <Enter>            Finish input

ste@HME-PAL-OEW1# set deviceconfig system dns-setting servers
+ primary     Primary DNS server IP address
+ secondary   Secondary DNS server IP address
  <Enter>     Finish input
find is a super useful command similar to a wiki that lets you search all cli commands (show, set, clear, etc) that contain the keyword.
find command keywordcli_keyword
Request commands are run in operational mode and are used for displaying system information and performing system-level tasks such as licensing, upgrades, plugins, High-availability and reboots.
request restart systemrequest shutdown system
Within operational mode the XML formatted running config can be viewed with the optional use of xpath (xpath is a WCS standard) to filter this down to different sections.
> show config running
> show config running xpath mgt-config
> show config running xpath devices
> show config running xpath devices/entry[@name='localhost.localdomain']/deviceconfig/system
> show config running xpath devices/entry[@name='localhost.localdomain']/network/interface
> show config running xpath *//rulebase/security/rules
Within configuration mode the per-section configuration (includes non-committed changes) can be viewed as xml (default), json or a more traditional per line output with set. This setting is per-console session, it does not survive the console session.
> set cli config-output-format [default | json | set | xml]
> configure
# show config mgt-config
# show deviceconfig system
# show network interface
# show rulebase security rules
For any tasks (upgrades, commit, etc) that are been processed or have previously performed can check the progress and status using show jobs.
ste@HME-PAL-OEW1> show jobs ?
> all         All jobs
> id          By id
> pending     Pending jobs
> processed   Completed/active jobs
For normal administrative operations the CLI is set to interact and provide feedback in the form of auto-completion and error messages if a command is incorrect or there are invisible line breaks. scripting mode is useful for entering long lists of set commands as it disables interaction (no auto-complete or error messages) and suppresses special characters to help to prevent pasted config failing because of one-line errors.
> set cli scripting-mode on
Basic setup
When a Palo boots up it takes a while for the services to startup meaning you can SSH in pretty quickly but user authentication will fail with a wrong password message until the services have finished starting.
Change management interface from DHCP to static, turn off password complexity (does not apply to admin password) and add a user (prompts for password). If you wish all the commands for a configuration section can be chained into the one line rather than split across multiple lines.
set deviceconfig system typestatic set mgt-config password-complexity enabledno set mgt-config usersste permissions role-based superuser yesset mgt-config usersste password
Set the base management configuration, this is in its own routing table separate from any firewall virtual-routers (VRFs).
set deviceconfig system hostnameHME-PAL-OEW1 set deviceconfig system ip-address10.10.128.3 netmask255.255.255.0 default-gateway10.10.128.1 set deviceconfig system dns-setting servers primary10.10.10.104 secondary1.1.1.1 set deviceconfig system domainstesworld.com set deviceconfig system timezoneEurope/London set deviceconfig system ntp-servers primary-ntp-server ntp-server-address10.10.10.51 set deviceconfig system ntp-servers secondary-ntp-server ntp-server-addresstime.cloudflare.com
To view settings (in xml or as flat config lines if have changed cli config-output-format) before applying.
show mgt-config
show deviceconfig

commit
Add management profiles (what protocols are allowed to interfaces), interfaces, zones and the default gateway. Similar to a VRF Palos use the concept of virtual-routers to allow for multiple separate routing tables which each hold member interfaces and routing elements.
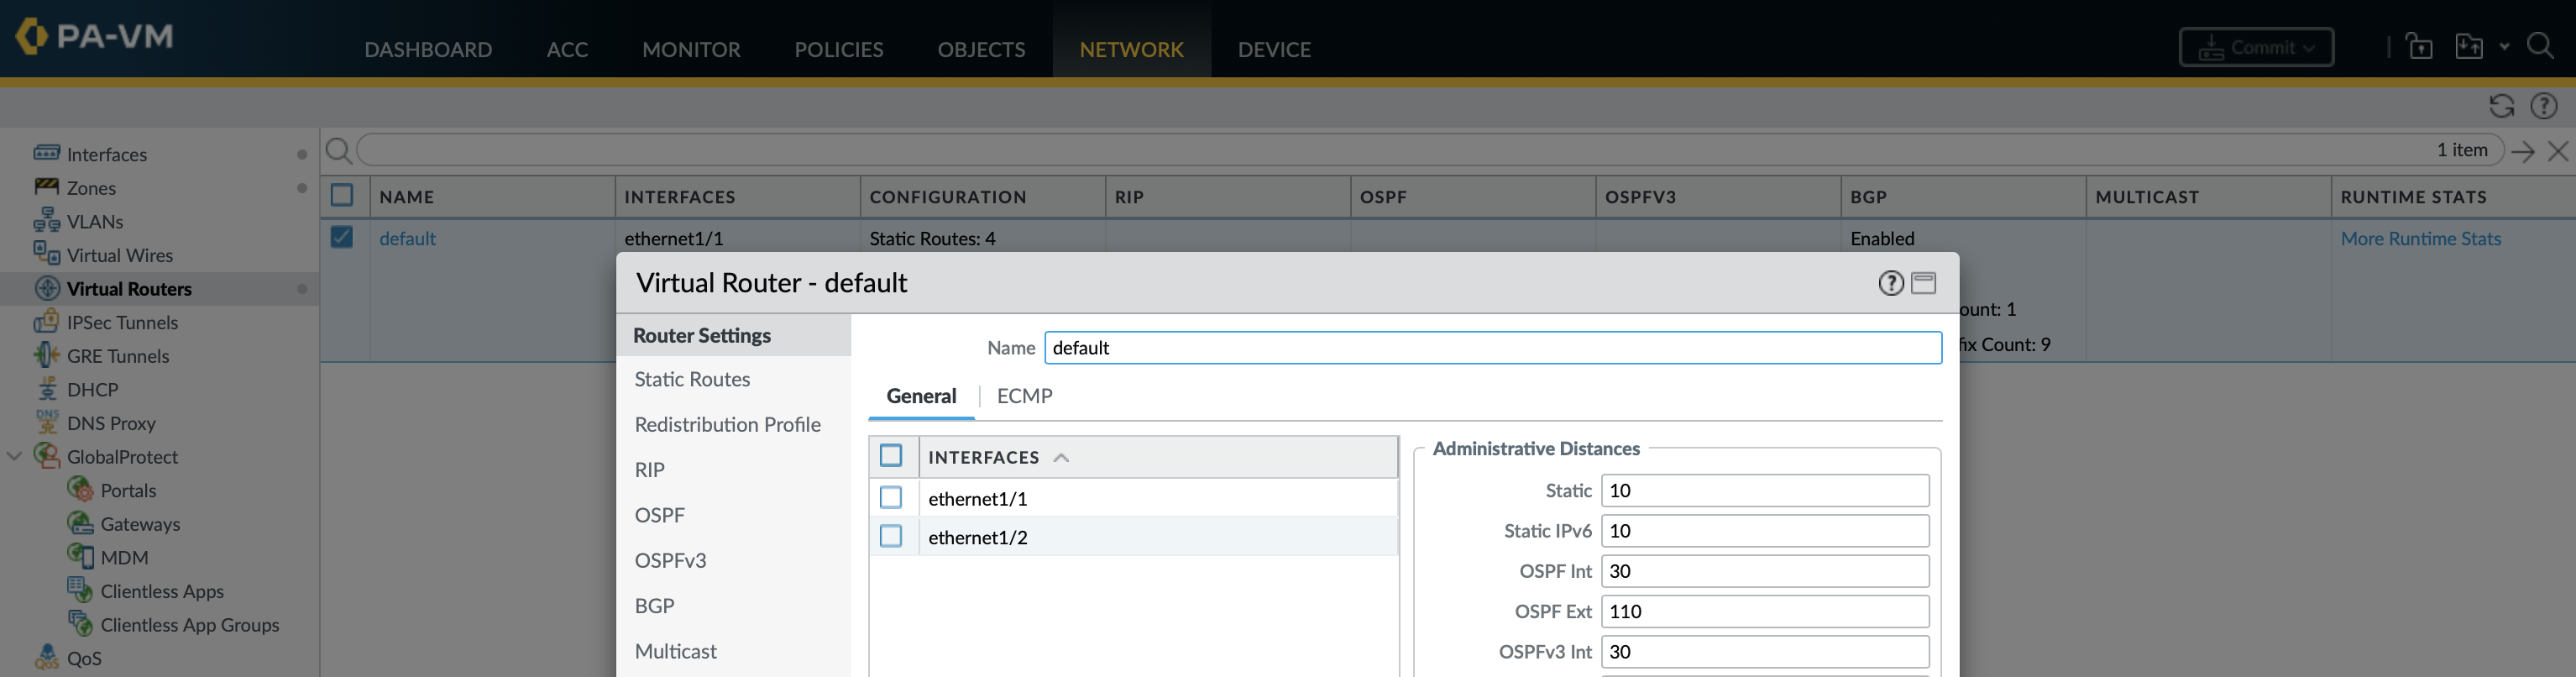
In this example the configuration is all under the default virtual-router.
set network profiles interface-management-profilenorth pingyes set network interface ethernetethernet1/1 layer3 ip192.168.1.3/24 set network interface ethernetethernet1/1 comment'outside interface on vlan999' set network interface ethernetethernet1/1 layer3 interface-management-profilenorth set zonenorth network layer3ethernet1/1 set network virtual-routerdefault interfaceethernet1/1 set network virtual-routerdefault routing-table ip static-routedefault-route interfaceethernet1/1 destination0.0.0.0/0 nexthop ip-address192.168.1.254 set network profiles interface-management-profilesouth pingyes sshyes httpsyes snmpyes set network interface ethernetethernet1/2 layer3 ip10.10.254.3/29 set network interface ethernetethernet1/2 comment'transit interface on vlan3101' set network interface ethernetethernet1/2 layer3 interface-management-profilesouth set zonesouth network layer3ethernet1/2 set network virtual-routerdefault interfaceethernet1/2 show network interfacecommit
Without leaving configure mode you can check the operational state by prefixing operation show commands with run.
# run show interface logical

total configured logical interfaces: 2
name                id    vsys zone             forwarding               tag    address
------------------- ----- ---- ---------------- ------------------------ ------ ------------------
ethernet1/1         16    1    north            vr:default               0      192.168.1.3/24
ethernet1/2         17    1    south            vr:default               0      10.10.254.3/29
To configure an interface to use DHCP for its IP address and default route rather than being statically assigned.
set network interface ethernetethernet1/1 layer3 dhcp-client enableyes create-default-routeyes
Mistakes can undone by using delete, for example to delete a zone and re-add.
delete zoneinside network layer3ethernet1/2 set zonesouth network layer3ethernet1/2
Commands for checking the system, interfaces and connectivity.
show system infoEverything about the system like model, serial, license, versions, uptime, etc show system software statusSee processes running and the ID show system resourcesSame as top showing processes and resources used (add *follow* for realtime) show clockTime and timezone show ntpNTP status show interface hardwareLayer2 info such as speed/duplex/state and MAC address show interface logicalLayer3 info such as vsys, virtual router, IP and security zone show interface allLayer2 (hardware) and Layer3 (logical) interface info show interfaceinterface-name Statistics for a specific interface show counter interface allStatistics for all interfaces show dhcp client state allping source192.168.1.3 host8.8.8.8 Source is optional, by default it uses the management interface traceroute source192.168.1.3 host8.8.8.8 show mac allMAC address table, replace all with VLAN name to limit the scope show arp allARP table, replace all with interface to limit the scope
Licensing
Licensing is based on feature-set and CPUs (2 vCPU VM-100 is 16.5 credits) meaning that if a VM has more vCPUs than you want to license the number used must be limited for firewall registration. A reboot is required for this to take effect.
request plugins vm_series set-cores coresnumber-of-cores request restart systemshow system infoTo check CPUs once rebooted
NGFW credits are assigned via a deployment profile within Palo portal » Assets » Software Credits and the resulting auth-code applied on the firewall. Can mix and match features and CPUs to be more granular on the number of credits used.
It is a good idea to make sure the FW can ping the Palo licensing site before doing the registration. Upon registration FW services are restarted meaning the console session will be closed, when you log back in will get the usual wrong password messages until all services have restarted.
ping host updates.paloaltonetworks.comrequest license fetch auth-codeDxxxxxxx request license infoTo system is licensed
When deleting a firewall you should first deactivate it in the portal so that the credits are returned to the deployment profile (can still be done if the firewall is offline). If the firewall is to be re-licensed rather than destroyed you have to also do the deactivation on the firewall, if you dont it will fail the new activation with the message “Server error : Failed to install licenses. Invalid serial number”.
request license deactivate VM-Capacity modemanual request restart system
Upgrades
The Palos need to be licensed to be able to check for updates, without it you will get a generic connection failure error. PAN-OS comes in:
- Major version (X.y.z): New version released every year
- Feature release (x.Y.z): Contain some new and updated features normally about half a year after major
- Maintenance release (x.y.Z): Released every 6 to 8 weeks (for both minor and major) and mostly contain bugfixes
- Hotfix version (x.y.z-h*): *Bugfixes needed sooner than maintenance release*
When upgrading across multiple major versions (8.1 to 9.0 to 9.1) you must upgrade to the next major version before moving on to the one after it (can’t skip a major version). When upgrading to the latest maintenance release from an earlier maintenance version (9.1.1 to 9.1.10), you do not need to install any intermediary maintenance versions.
The firewall has two system volumes that contain a fully installed PAN-OS of which only one partition is active. The inactive partition either contains the previously installed version or the next version if you have just installed it but not rebooted yet. The upgrade process is similar to F5s where you install the new version on a different partition and boot to that partition.
Check for latest updates and download the required version. Use show jobs to keep track of the download process (all or id).
request system software checkrequest system software download version10.1.6-h3 show jobsall
Once downloaded the new image will be in maint ready to be installed on a partition, the RUNNING-ACTIVE partition is the current version.
> debug swm status
Partition         State             Version
--------------------------------------------------------------------------------
sysroot0          RUNNING-ACTIVE    10.1.6
sysroot1          EMPTY             None
maint             READY             10.1.6-h3
Install the downloaded image onto the sysroot1 a partition, once again can keep an eye on the progress by viewing the job.
request system software install version10.1.6-h3 Download job enqueued with jobid 1010show jobs id6
Once the installation has finished it will be in a PENDING-CHANGE state.
> debug swm status
Partition         State             Version
--------------------------------------------------------------------------------
sysroot0          RUNNING-ACTIVE    10.1.6
sysroot1          PENDING-CHANGE    10.1.6-h3
maint             READY             10.1.6-h3
Reboot the firewall to complete the upgrade.
request restart system
As it uses partitions the rollback process is fairly straight forward, you just have to switch the boot partition.
> debug swm status
Partition         State             Version
--------------------------------------------------------------------------------
sysroot0          REVERTABLE        10.1.6
sysroot1          RUNNING-ACTIVE    10.1.6-h3
maint             READY             10.1.6-h3

> debug swm list
Product     B Version              Built                 Loaded
--------------------------------------------------------------------------------
panos       * 10.1.0               2021-06-01 19:06:12   2022-06-01 13:15:55
panos         10.1.6               2022-05-20 19:55:49   2022-06-01 13:16:15
panos         10.1.6-h3            2022-06-08 18:53:34   2022-07-30 22:22:13
Revert the update by activating the previous partition and rebooting.
debug swm revertReverting from 10.1.6-h3 (sysroot0) to 10.1.6 (sysroot1) request restart system
Below are some useful commands when looking at versions. svm stands for Pan Software Manager, you can see its options using debug swm *.
request license infoAll licenses installed debug swm statusDifferent partitions and images installed on each debug swm listTimestamps for the different panos versions that have been run debug swm infoVersion of software being run show plugins installedPlugins installed
Service routes
By default the firewall uses its management interface to communicate with the various management services such as licensing, updates, DNS, email, User-ID agent, syslog, Panorama, etc. Service routes allow you to choose which interface is used on a per-service basis. Only an interface with a statically assigned IP addresses can be used for service routes, it wont give you the option of IP or interface if that interface is using DHCP.
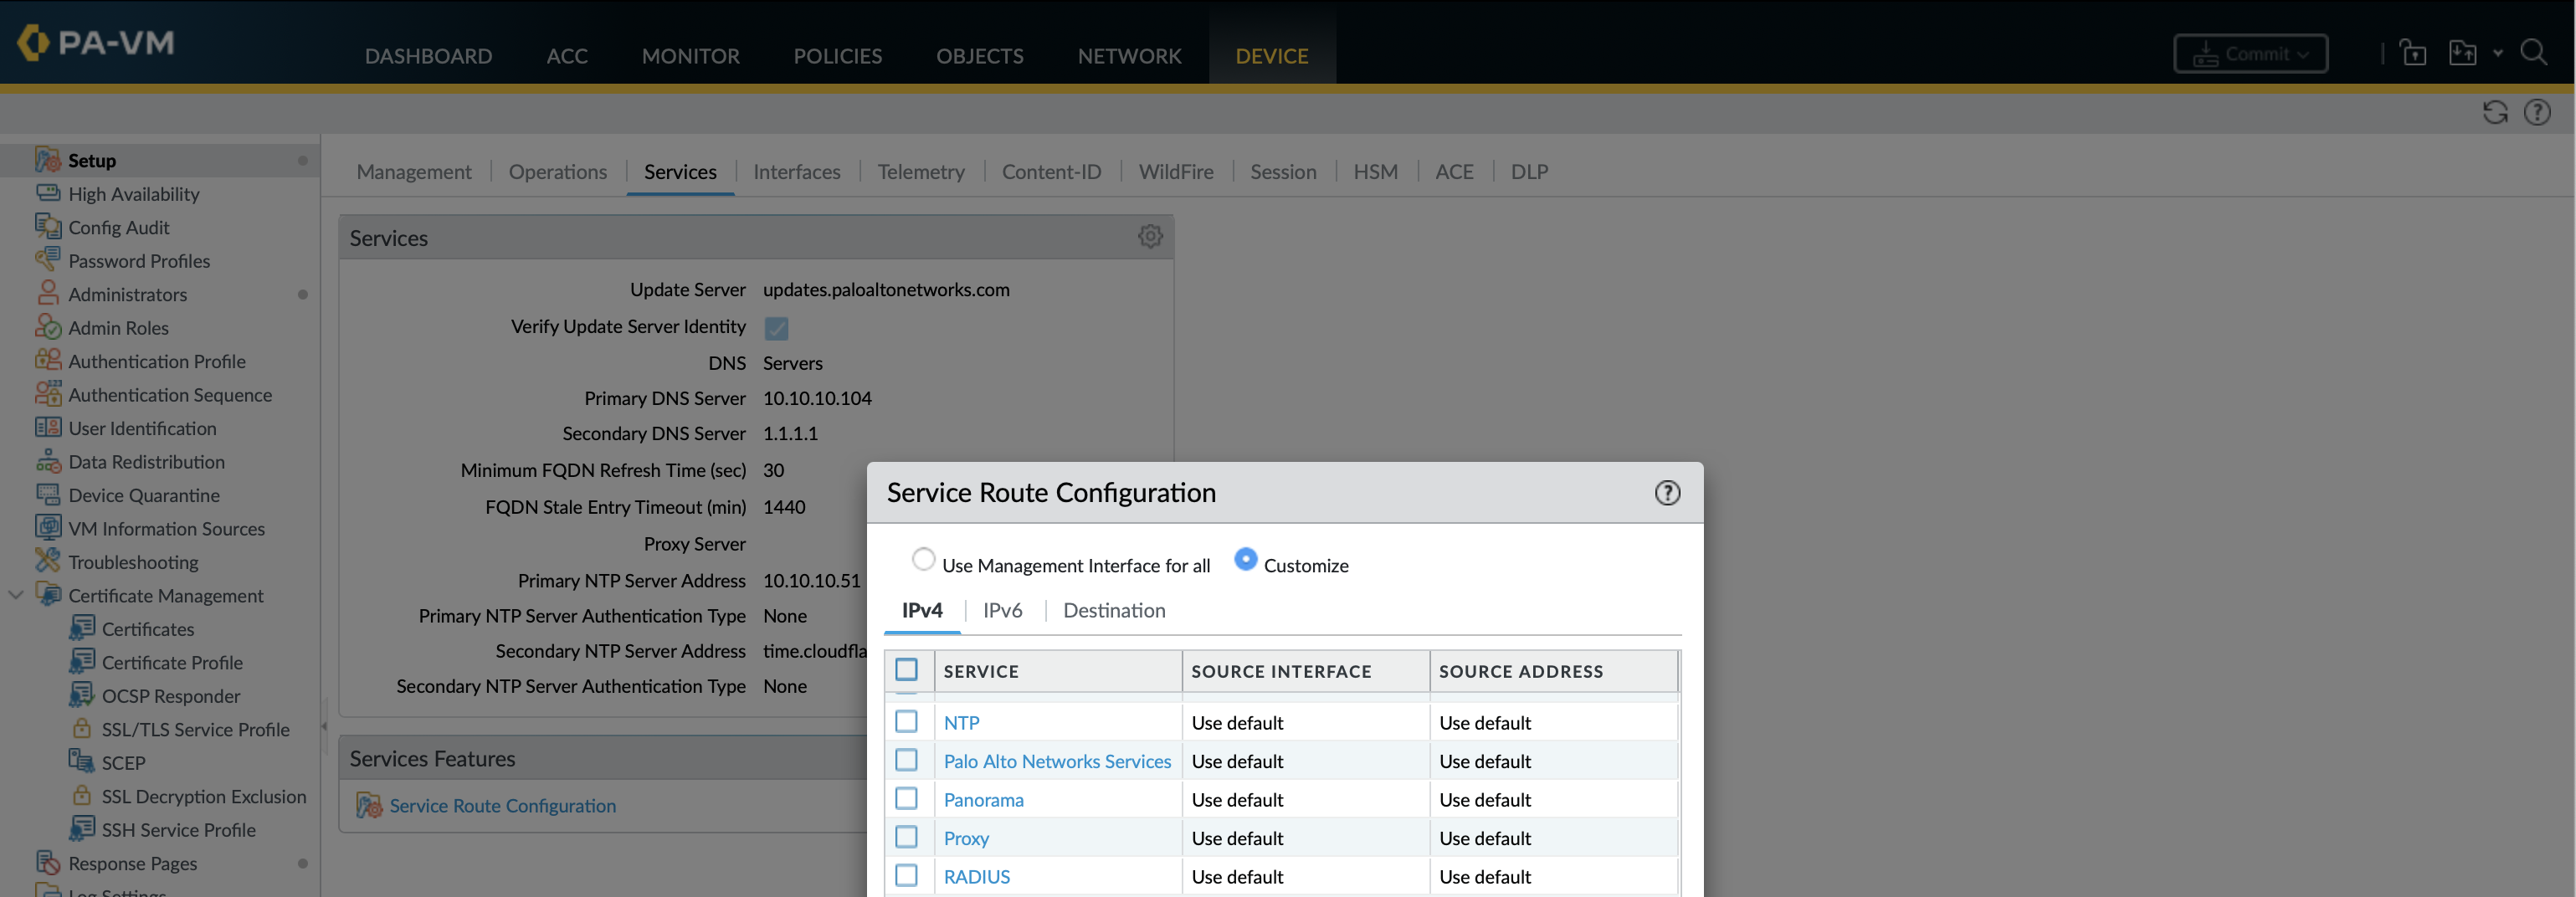
Change paloalto-networks-services so that ethernet1/1 rather than the management interface is used for software updates and licensing.
set deviceconfig system route servicepaloalto-networks-services source address10.1.242.116/28 interfaceethernet1/1
It is also possible to same thing for a specific destination IP or URL rather than a defined service.
set deviceconfig system route destinationIP or FQDN source address10.1.242.116/28 interfaceethernet1/1
Routing - BGP
For a firewall the BGP options available in Palo are pretty impressive, communities (including regex matching) as well as other BGP attributes such as weight, local preference, MED, AS-path, origin and next-hop are all supported in some form. The only thing missing is some sort of multi-VRF address-family like MPLS-VPN or EVPN, but is probably a step too far for a firewall. BFD is possible on higher license models, I tried on a VM-100 but got the error “BFD profile ‘default’ can not be enabled as bfd is not supported on this platform.(Module: routed)". BGP and BFD (if used) need to be explicitly allowed in the firewall security policy.
By default any prefixes learnt via BGP including the default route will not be put in the routing table, this is configured under the general settings.
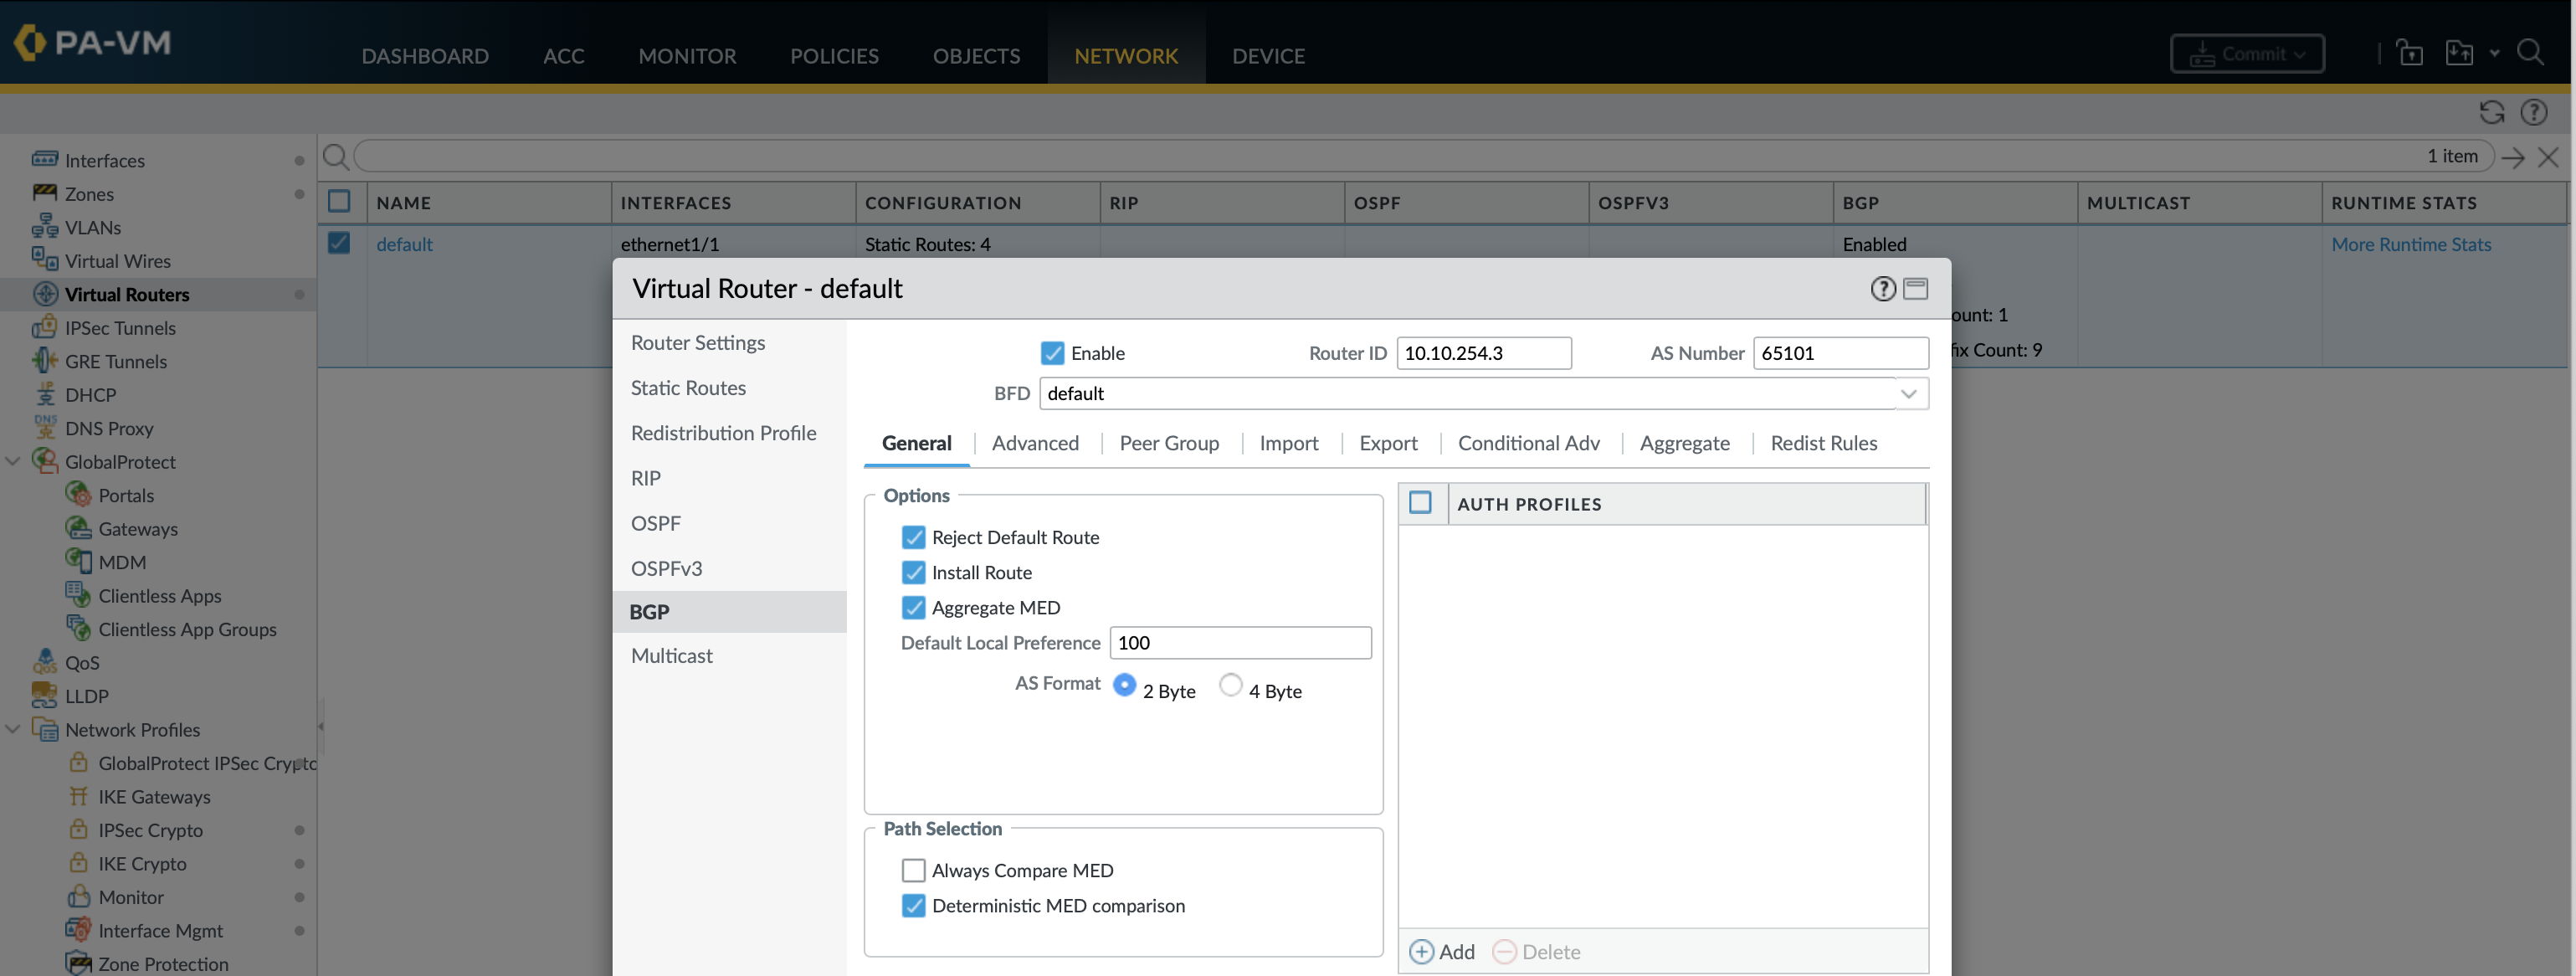
set network virtual-router default protocol bgp
+ allow-redist-default-route   allow redistribute default route to BGP
+ ecmp-multi-as                Support multiple AS in ECMP
+ enforce-first-as             Enforce First AS for EBGP
+ install-route                Populate BGP learned route to global route table
+ reject-default-route         do not learn default route from BGP
Peer groups are a collection of BGP peers that share settings and advertisements. Route-reflector configuration would be done under peers on a per-peer basis. There are 4 types of peer-groups (ebgp, ebgp-confed, ibgp, ibgp-confed) with the main difference being the next-hop options.
- iBGP: export next-hop can be set to either Original (use next hop address from route advertisement) or Use Self (replace the Next Hop with the virtual router’s IP).
- eBgp: export next-hop can be set to either Resolve (resolve the next hop using the FIB) or Use Self. It also has the option of import next-hop (original or Use Peer) and Remove Private AS (from the AS-path).
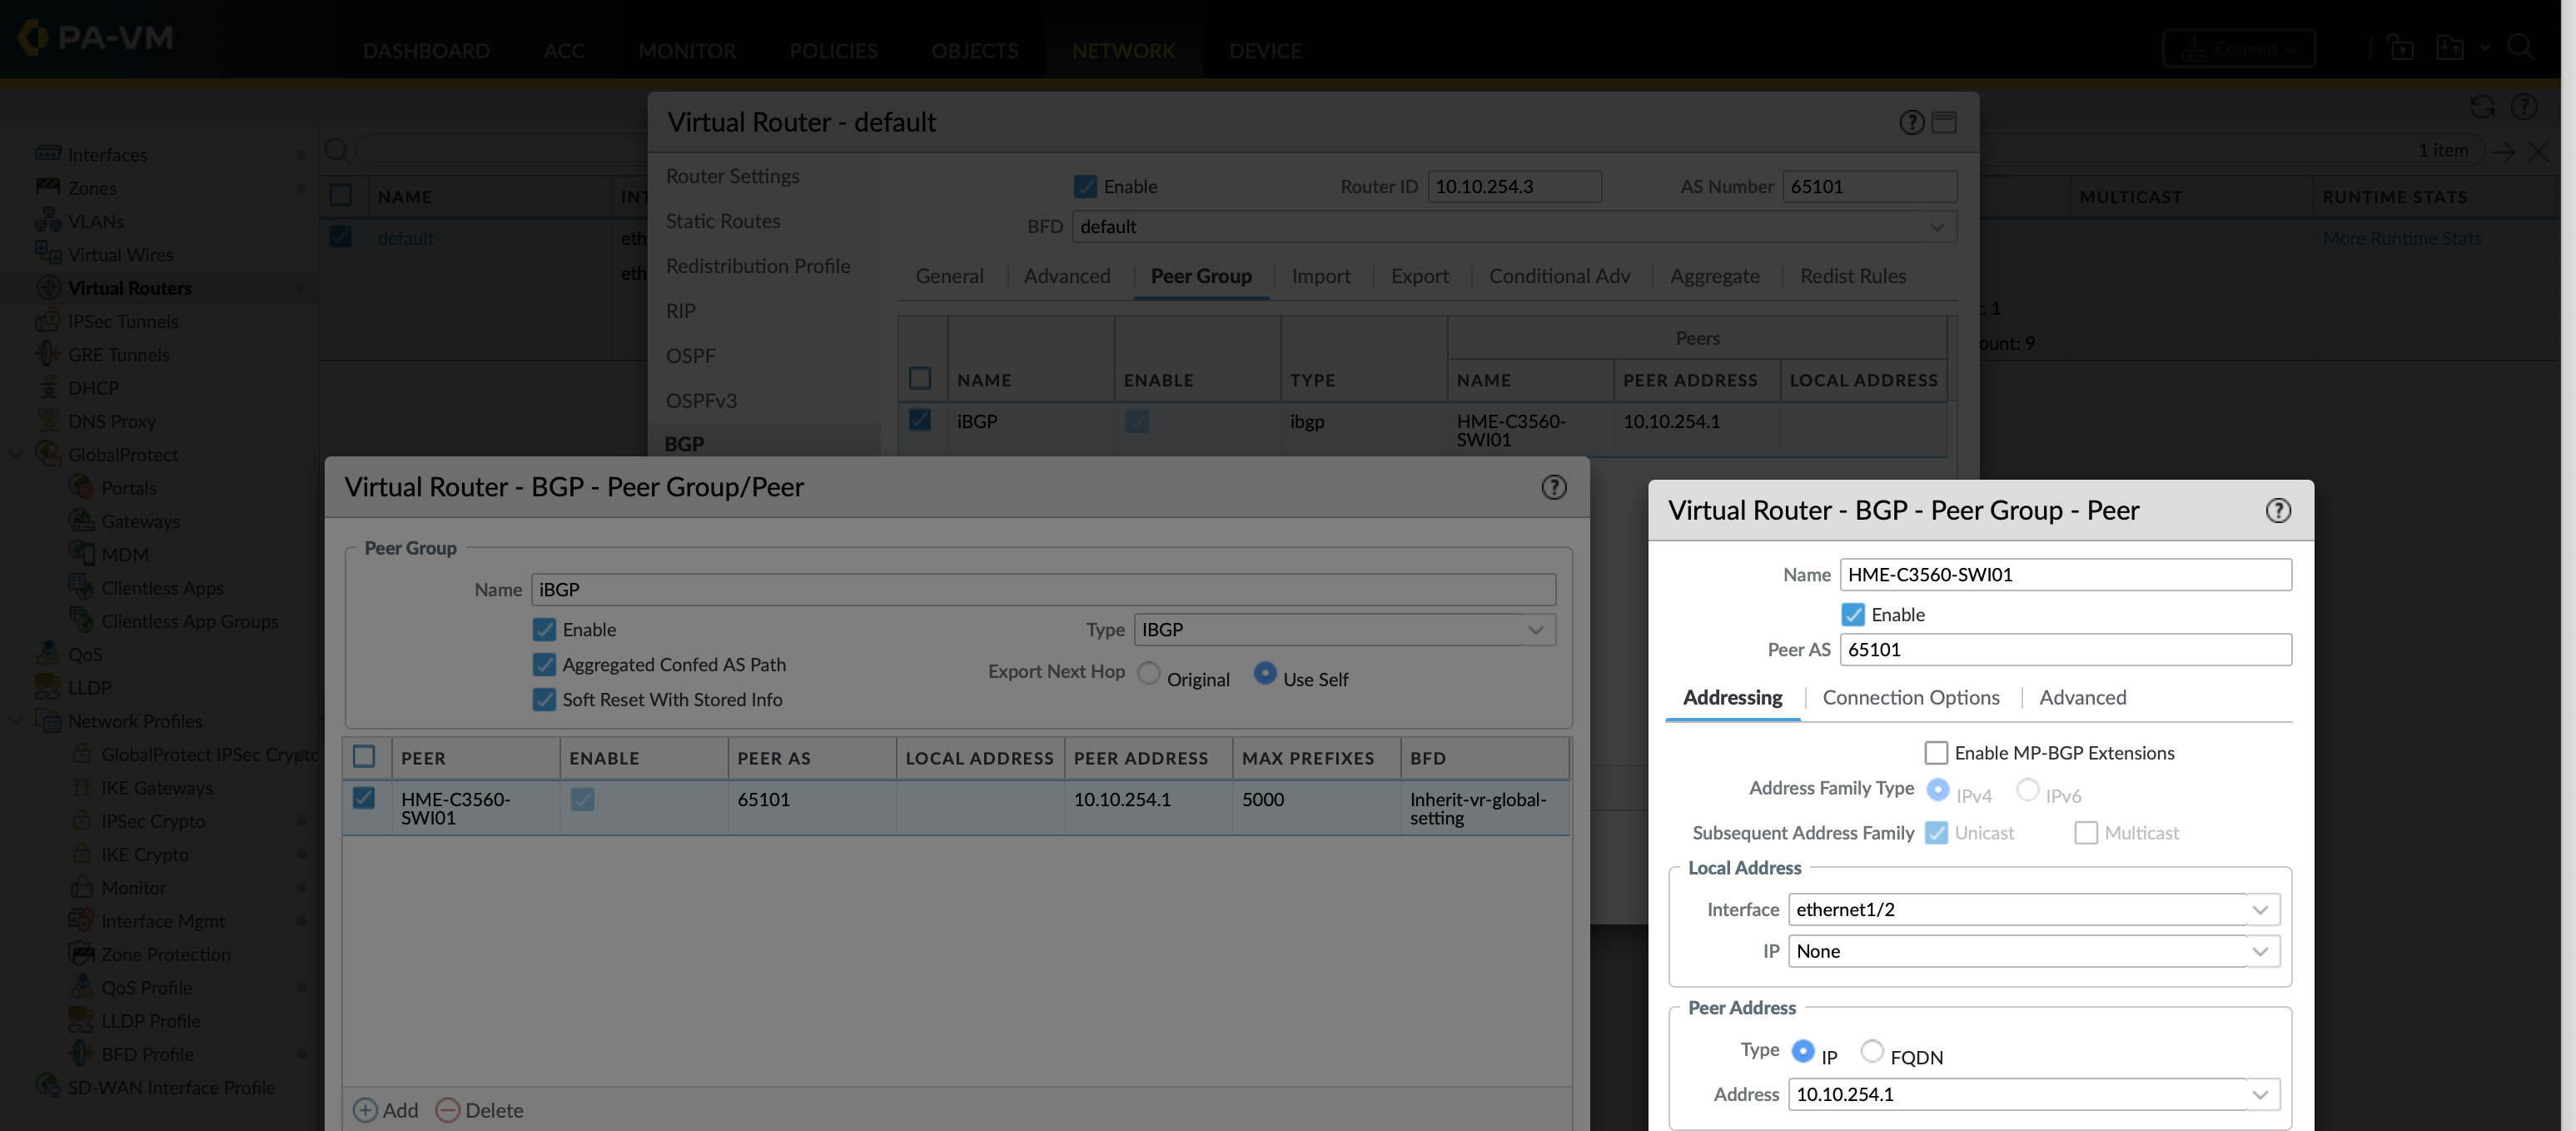
Create an iBGP peer, installs the BGP routes into the routing table and allow for dynamically updating the BGP routing table when routing changes are made (soft-reset-with-stored-info). Each peer must specify a local-address interface or IP (if multiple IPs on interface).
set network virtual-router default protocol bgp enable yes local-as65101 router-id10.10.254.3 install-routeyes set network virtual-router default protocol bgp peer-groupiBGP typeibgp export-nexthopuse-self set network virtual-router default protocol bgp peer-groupiBGP soft-reset-with-stored-infoyes set network virtual-router default protocol bgp peer-groupiBGP peerHME-C3560-SWI01 local-address interfaceethernet1/2 set network virtual-router default protocol bgp peer-groupiBGP peerHME-C3560-SWI01 peer-as65101 peer-address ip10.10.254.1 set network virtual-router default protocol bgp peer-groupiBGP peerHME-C3560-SWI01 connection-options keep-alive-interval3 hold-time9
It is worth noting that when you commit BGP changes it flaps the BGP peerings.
Advertising prefixes
There are 5 types of advertisement, import, export, conditional advertisement and aggregates are associated to a peer-group (aggregates can also be associated to a peer) and redistribution (redist-rules) applied to the whole BGP process.
- Import/ Export: Import or export BGP prefixes using match and action statement. It has similar feature parity to route-maps in terms of what they can do such as matching and/or setting AS-path, next-hop, metrics, communities, etc
- Conditional Advertisement: Control route advertisement in the event that a preferred route (and optionally route attribute) is not available in the local BGP routing table (LocRIB)
- Aggregate: Combines specific routes (longer prefix length) into a single route. Can suppress and aggregate based on peers, next-hops, community, med, as-path, etc, as well as change these values in the aggregate
- Redistribution: Redistribute BGP routes (using redistribute profile) setting attributes such as metric, Local preference, origin and community
Redistribution profiles allow static routes or other routing protocols to be advertised on a priority basis with conditional filtering. The priority of the redistribution profiles (lower priority profiles are matched first) allows for redistributed route inclusion or exclusion. All redistribute profiles must have an action of redistribute or don’t redistribute for the matched filter. If only 1 prefix needs to be redistributed this can be done without the need for a redistribution profile.
# set network virtual-router default protocol redist-profile STATIC_to_BGP priority 1 filter type
  [         Start a list of values.
  bgp       bgp
  connect   connect
  ospf      ospf
  rip       rip
  static    static

# set network virtual-router default protocol redist-profile STATIC_to_BGP priority 1 filter type static
> bgp           specify candidate BGP routes' attributes (community)
> destination   specify candidate routes' destination networks (subnet match)
> interface     specify candidate routes' interfaces
> nexthop       specify candidate routes' next-hop addresses (subnet match)
> ospf          specify candidate OSPF routes' attributes (area, path-type (E1, E2, inter-area, intra-area))

# set network virtual-router default protocol redist-profile STATIC_to_BGP action
  no-redist   do not redistibute when this rule matched
  redist      redistibute when this rule matched
  <Enter>     Finish input

Each redistribution profile is associated to the BGP process (where priorities come in) and BGP attributes set (by default set-origin is incomplete).
# set network virtual-router default protocol bgp redist-rules STATIC_to_BGP
+ address-family-identifier   select redistribution profile type
+ metric                      metric value
+ route-table                 select destination SAFI for redistribution
+ set-as-path-limit           add the AS_PATHLIMIT path attribute
+ set-local-preference        add the LOCAL_PREF path attribute
+ set-med                     add the MULTI_EXIT_DISC path attribute
+ set-origin                  add the ORIGIN path attribute
> set-community               add the COMMUNITY path attribute
> set-extended-community      add the EXTENDED COMMUNITY path attribute
Advertise the RFC1918 ranges and a default route into BGP using static Null routes and allow-redist-default-route.
set network virtual-router default routing-table ip static-routeRFC1918-ClassA destination10.0.0.0/8 nexthopdiscard set network virtual-router default routing-table ip static-routeRFC1918-ClassB destination172.16.0.0/12 nexthopdiscard set network virtual-router default routing-table ip static-routeRFC1918-ClassC destination192.168.0.0/16 nexthopdiscard set network virtual-router default protocol redist-profileSTATIC_to_BGP priority 1 filter type static destination0.0.0.0/0 10.0.0.0/8 172.16.0.0/12 192.168.0.0/16 set network virtual-router default protocol redist-profileSTATIC_to_BGP action redistset network virtual-router default protocol bgp redist-rulesSTATIC_to_BGP enable yes address-family-identifier ipv4set network virtual-router default protocol bgp allow-redist-default-routeyes
Some routing show commands, the virtual-router can be added to most of these commands to limit it to a specific routing table
show routing fibShow the forwarding table show routing routeShow the routing table show routing summaryNumber routes of the different routing protocol types show routing bfd summaryBFD neighbors and protocols used by it show routing protocol bgp summaryGeneral info on each peer such as local pref and number of accepted & advertised show routing protocol bgp peerDetailed info on each peer including all the settings and statistics show routing protocol bgp loc-ribShow the BGP prefixes received from all neighbors show routing protocol bgp loc-rib peerHME-C3560-SWI01 BGP prefixes received from one specific neighbor show routing protocol bgp loc-rib-detailShows the BGP attributes for each prefix received show routing protocol bgp rib-outShows the BGP prefixes advertised out to all neighbors show routing protocol bgp rib-out peerHME-C3560-SWI01 BGP prefixes advertised to one specific neighbor show routing protocol bgp rib-out-detailShows the BGP attributes for each prefix advertised show routing protocol bgp policy importShows the peer-group, prefixes imported, hit count and any actions show routing protocol bgp policy exportShows the peer-group, prefixes exported, hit count and any actions such as change next-hop show routing protocol bgp policy cond-advShows the peer-group and conditional advertisements applied show routing protocol bgp policy aggregateShows the peer-group, peers and aggregates show routing protocol redist bgpShows prefixes redistributed into BGP via different methods and any attributed set
FW Policy (security rulebase)
Tags can be used for multiple purposes, I have used them to colour address and address-groups within the security policy, define membership within dynamic address-groups and to group rules within the different policies. Each object can have up to 64 tags, when an object has multiple tags it displays the color of the first tag applied.
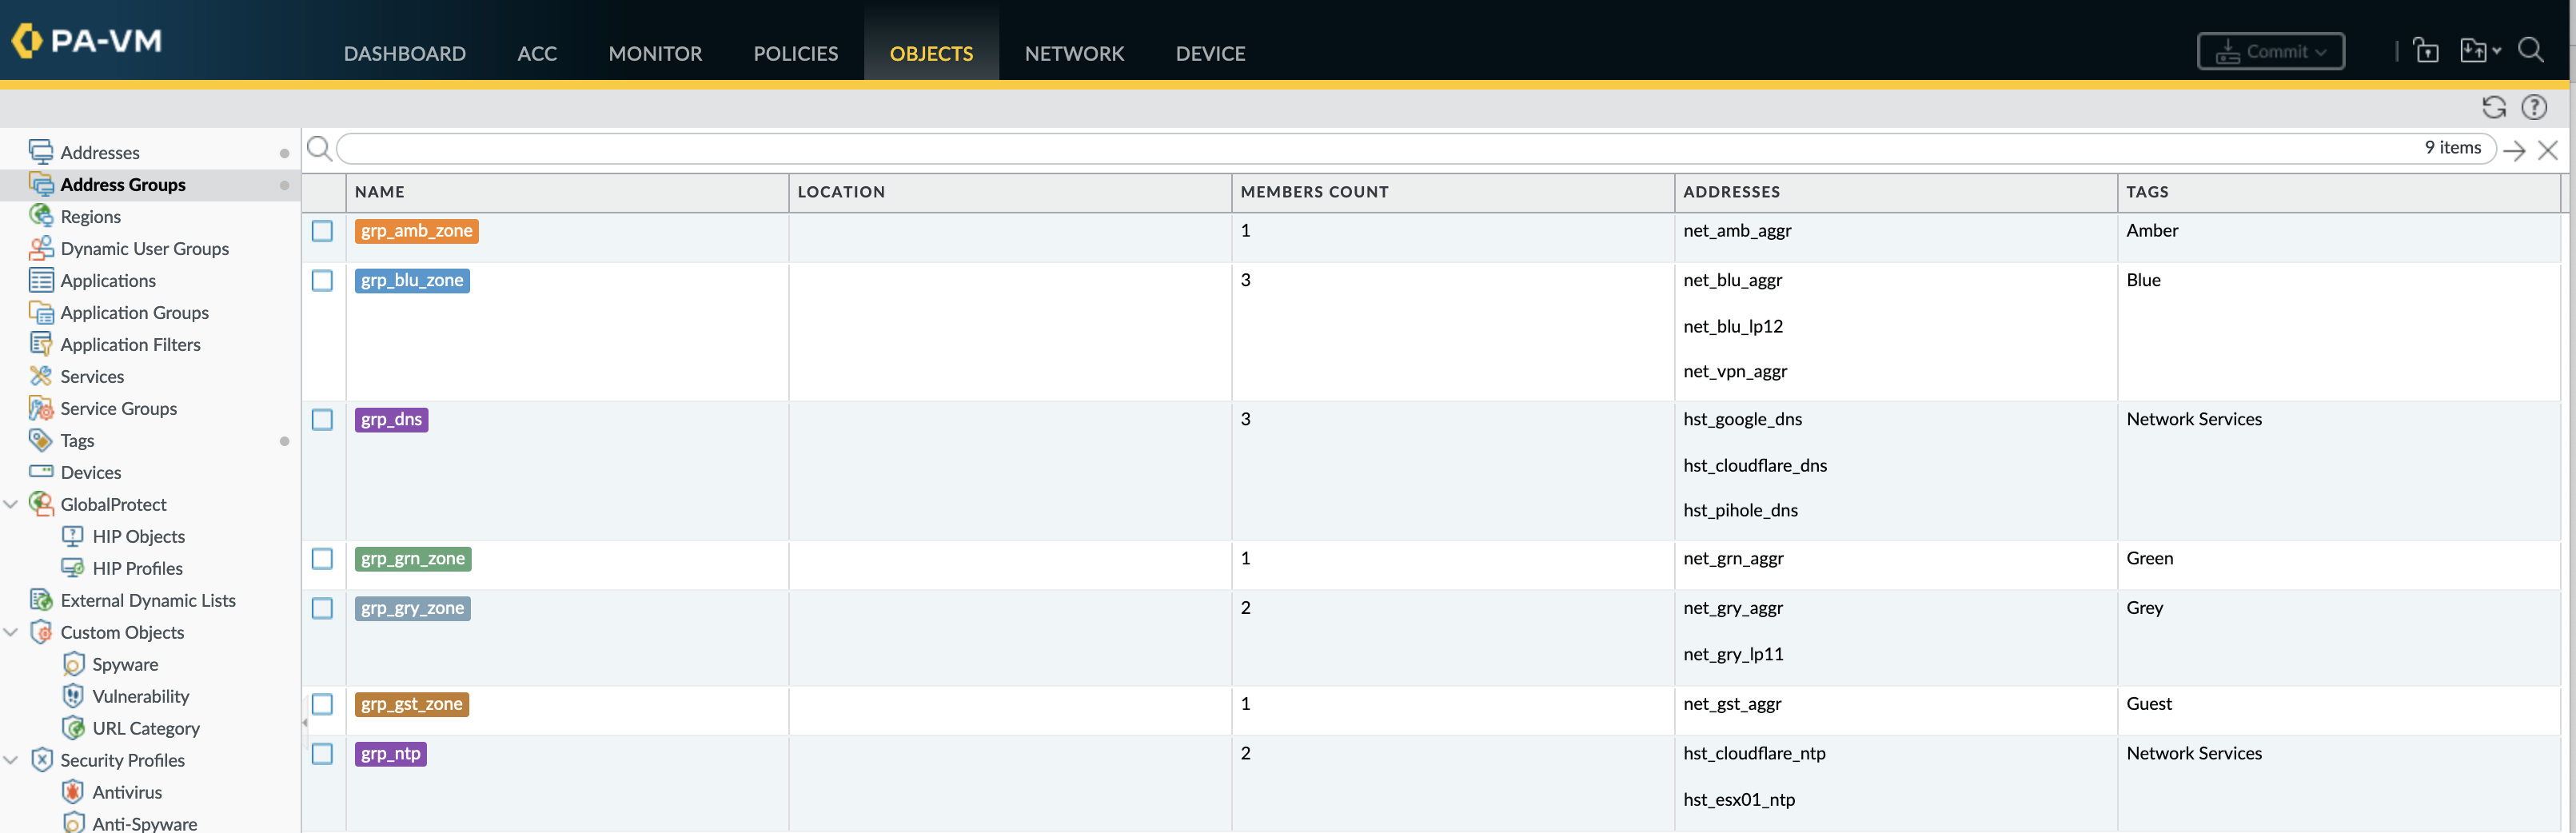
set tagBlue colorcolor24 comments'Blue zone (BLU) objects and rules 'set tagGreen colorcolor22 comments'Green zone (GRN) objects and rules 'set tagAmber colorcolor6 comments'Amber zone (AMB) objects and rules 'set tagRed colorcolor1 comments'Red zone (RED) objects and rules 'set tagiNET colorcolor1 comments'Internet based services 'set tagInfra/Transit colorcolor39 comments'Infrastructure or transit zone (TRI) objects and rules 'set tag'Network Services' colorcolor31 comments'Network Services (NST) objects and rules '
An empty address group cant be created, the commit will fail with “Error: Fail to count address groups”. As per most set commands, to define multiple objects within a command use [] to define the list with each list object separated by a space.
set address net_blu_aggr tag Blue ip-netmask 10.10.0.0/18
set address net_blu_lp12 tag [Blue Grey] ip-netmask 10.10.255.12/32
set address net_grn_aggr tag Green ip-netmask 10.10.64.0/19
set address net_amb_aggr tag Amber ip-netmask 10.10.96.0/19
set address hst_google_dns tag [ iNET "Network Services" ] ip-netmask 8.8.8.8/32
set address hst_cloudflare_dns tag [ iNET "Network Services" ] ip-netmask 1.1.1.1/32
set address hst_pihole_dns tag [ Blue "Network Services" ] ip-netmask 10.10.10.104/32
set address hst_cloudflare_ntp tag [ iNET "Network Services" ] fqdn time.cloudflare.com
set address hst_esx01_ntp tag [ Blue "Network Services"] ip-netmask 10.10.10.51/32

set address-group grp_blu_zone description "All Blue subnets" tag Blue static [ net_blu_aggr net_blu_lp12 ]
set address-group grp_grn_zone description "All Green subnets" tag Green static [ net_grn_aggr ]
set address-group grp_amb_zone description "All Amber subnets" tag Amber static [ net_amb_aggr ]
set address-group grp_all_zones description "All zones" static [ net_blu_aggr net_blu_lp12 net_grn_aggr net_amb_aggr ]
set address-group grp_dns description "DNS servers" tag "Network Services" static [ hst_google_dns hst_cloudflare_dns hst_pihole_dns ]
set address-group grp_ntp description "NTP servers" tag "Network Services" static [ hst_cloudflare_ntp hst_esx01_ntp ]
There are multiple actions that handle inbound connections, some of which are stealthy and some of which are noisy and informative. If you check Send ICMP Unreachable and the ingress interface is Layer 3, an ICMP Unreachable packet is sent to the client for all of the dropped sessions.
- Deny: Drop the session and enforce the default Deny action. Some applications may silently drop while others send an RST packet
- Allow: Allows the session to go through
- Drop: Silently discards packets
- Reset Client: Sends a TCP RST to the client
- Reset Server: Sends a TCP RST to the server
- Reset Both: Sends a TCP RST to both the client and the server
The default action for new security rules is to allow traffic and log once the session is closed (Log at session end). I only really choose Log at session start if I am doing testing.
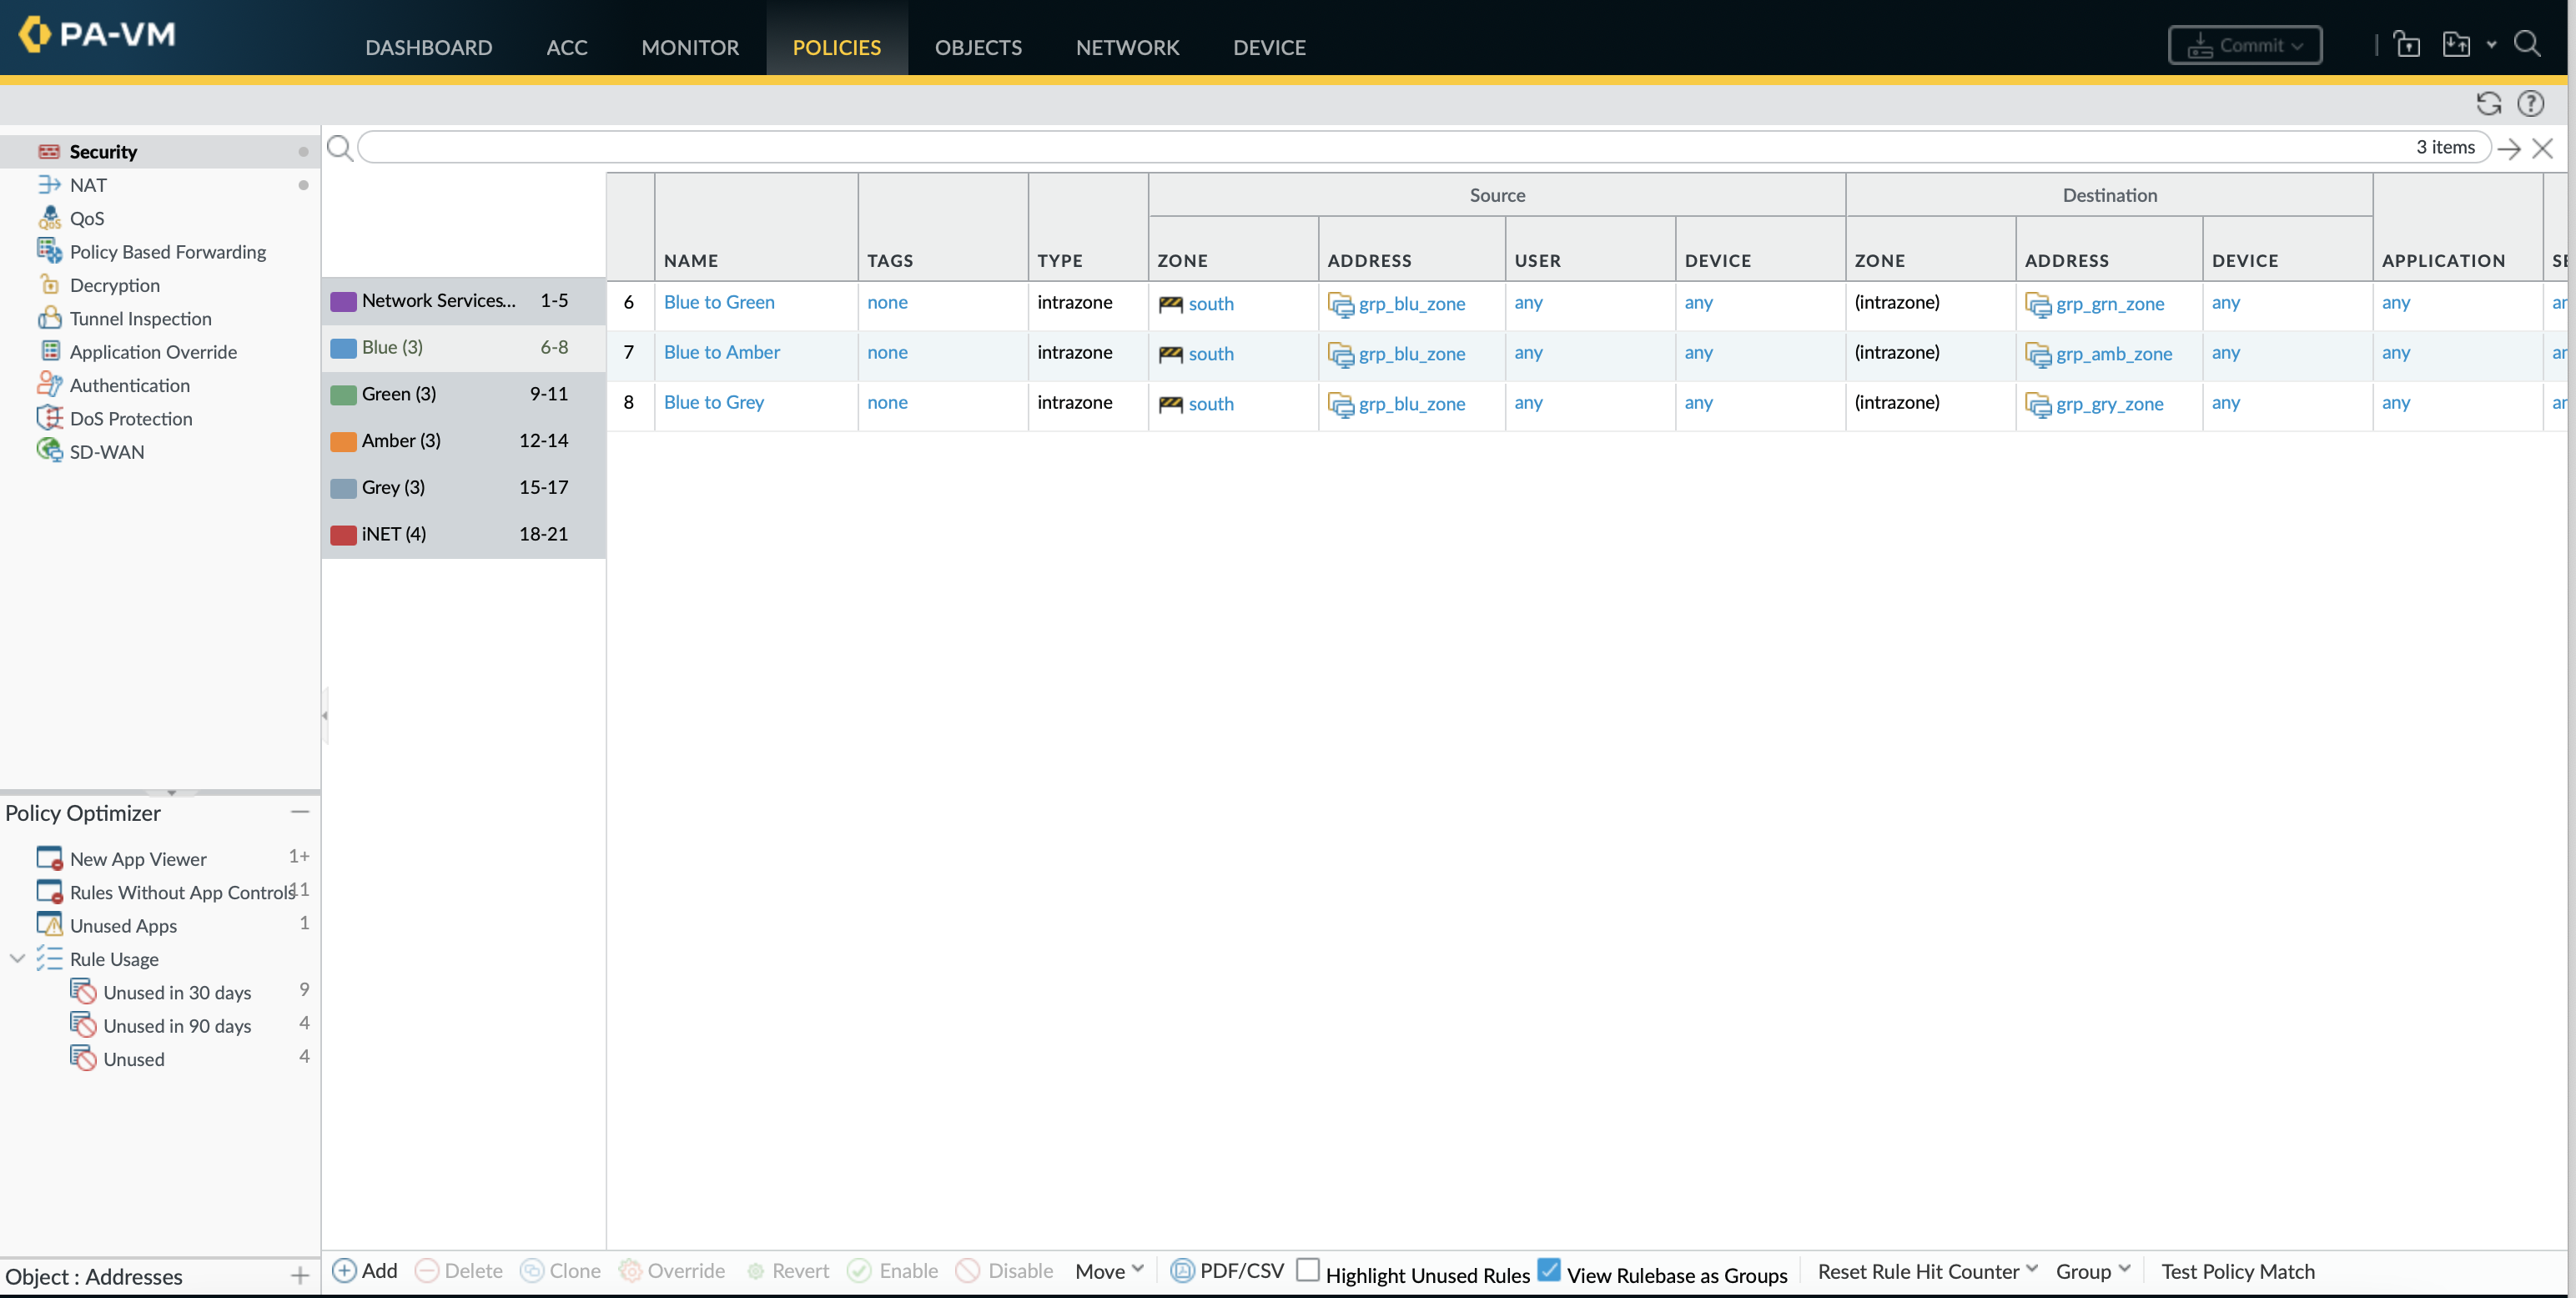
set rulebase security rules'Ping and traceroute' actionfrom allow any toany sourceany destinationany serviceapplication-default applicationping rule-typeuniversal description'Ping and traceroute in any direction' group-tag'Network Services set rulebase security rulesDNS actionallow fromsouth toany sourcegrp_all_zones destinationgrp_dns serviceapplication-default applicationdns rule-typeuniversal description'DNS lookups from all zones' group-tag'Network Services set rulebase security rulesNTP actionallow fromsouth toany sourcegrp_all_zones destinationgrp_ntp serviceapplication-default applicationntp rule-typeuniversal description'NTP lookups from all zones' group-tag'Network Services set rulebase security rules'BGP over transit' actionallow fromsouth tosouth sourcenet_transit destinationnet_transit serviceapplication-default applicationbgp rule-typeintrazone description'BGP peering to HME-C3560-SWI01' group-tag'Network Services set rulebase security rules'Blue to Green' actionallow fromsouth tosouth sourcegrp_blu_zone destinationgrp_grn_zone serviceany applicationany rule-typeintrazone description'Blue to Green zone traffic' group-tagBlue set rulebase security rules'Blue to Amber' actionallow fromsouth tosouth sourcegrp_blu_zone destinationgrp_amb_zone serviceany applicationany rule-typeintrazone description'Blue to Amber zone traffic' group-tagBlue set rulebase security rules'Green to Blue' actionallow fromsouth tosouth sourcegrp_grn_zone destinationgrp_blu_zone serviceany applicationany rule-typeintrazone description'Green to Blue zone traffic' group-tagGreen set rulebase security rules'Green to Amber' actionallow fromsouth tosouth sourcegrp_grn_zone destinationgrp_amb_zone serviceany applicationany rule-typeintrazone description'Green to Amber zone traffic' group-tagGreen set rulebase security rules'Amber to Blue' actionallow fromsouth tosouth sourcegrp_amb_zone destinationgrp_blu_zone serviceany applicationany rule-typeintrazone description'Amber to Blue zone traffic' group-tagAmber set rulebase security rules'Amber to Green' actionallow fromsouth tosouth sourcegrp_amb_zone destinationgrp_grn_zone serviceany applicationany rule-typeintrazone description'Amber to Green zone traffic' group-tagAmber set rulebase security rules'Blue to iNET' actionallow fromsouth tonorth sourcegrp_blu_zone destination net_any serviceany applicationany rule-typeinterzone description'Blue zone to Internet' group-tagiNET set rulebase security rules'Green to iNET' actionallow fromsouth tonorth sourcegrp_grn_zone destination net_any serviceany applicationany rule-typeinterzone description'Green zone to Internet' group-tagiNET set rulebase security rules'Amber to iNET' actionallow fromsouth tonorth sourcegrp_amb_zone destination net_any serviceany applicationany rule-typeinterzone description'Amber zone to Internet' group-tagiNET
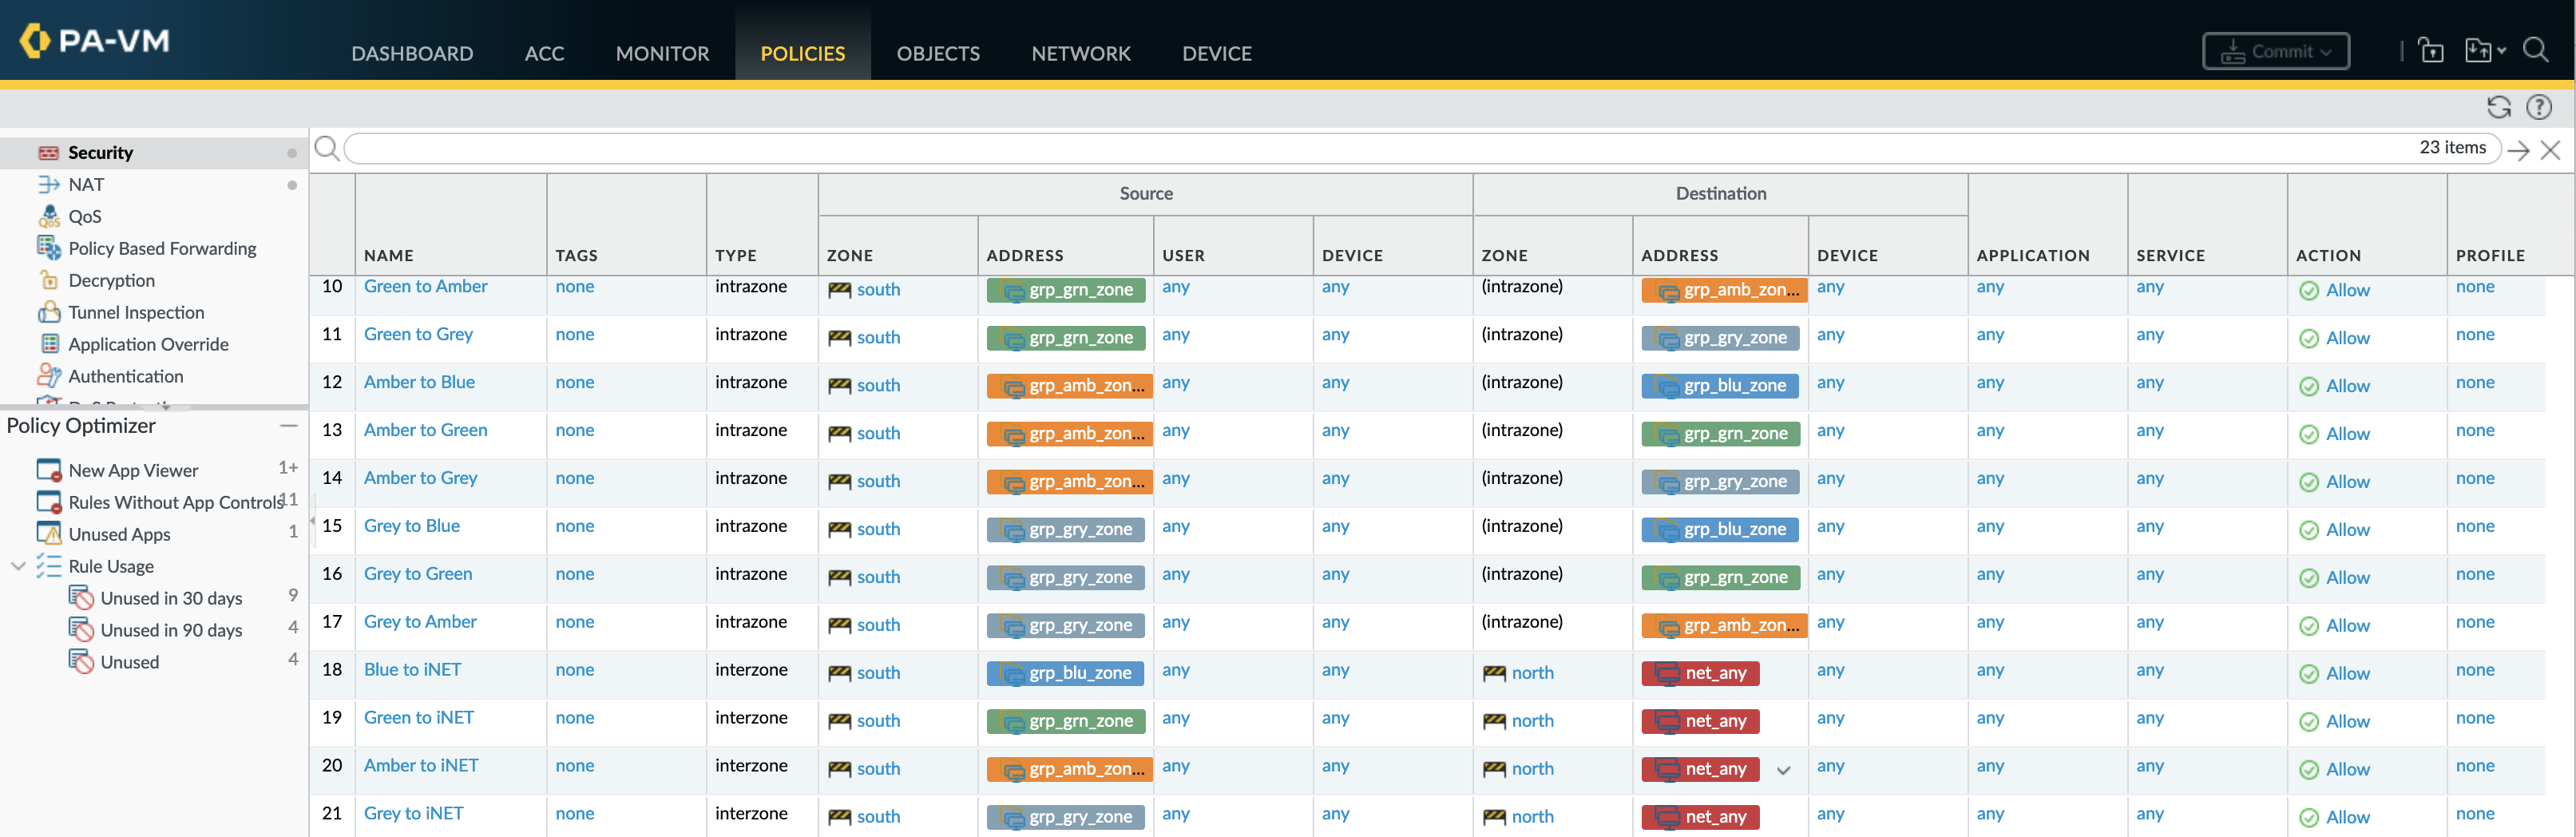
By adding group-tag to the security rules Group rules by tags can be used within the GUI to view the rulebase in categories based on this tag value. While viewing the rulebase as groups the policy order and priority is maintained meaning that if tagged rules are not sequential the categories will not contain all rules (will be multiple categories of same name in different places).
By default every security policy has 2 default catch-all rules, if changed a red cog indicates that the default setting has been overridden.
- intrazone-default (permit no log): This policy is for traffic coming from a zone and destined to the same zone
- interzone-default (deny no log): The default deny policy for traffic coming from one zone and destined to another zone

set rulebase default-security-rules rules intrazone-default actiondeny log-endyes set rulebase default-security-rules rules interzone-default actiondeny log-endyes
Can move rules around (with after, before, bottom, top) or delete them.
# move rulebase security rules PING
  after    after
  before   before
  bottom   bottom
  top      top
# move rulebase security rules PING after NTP

# delete rulebase security rules PING
Security policy objects can be viewed from operation or configuration mode.
> show running security-policy-addressesShow the addresses > show running security-policyShows the security policy > show running rule-use hit-count vsys vsys1 rules all rule-base securityShow recent rulebase hit-count > show rule-hit-count vsys vsys-name vsys1 rule-base security rules allShows more detail rulebase hit-count and when rules created # show tagShow all the tags configuration # show addressShow all the addresses configuration # show address-groupShow all the address-groups configuration # show rulebase securityShow all the rules configuration # show rulebase security rules PINGShow a specific rule configuration # show rule-hit-count vsys vsys-name vsys1 rule-base security rules allshow the hit count for each rule and last time hit
NAT Policy
The source and destination zone for inbound NAT are determined before the NAT policy is evaluated which means the source and destination zone will always be identical. For inbound NAT the source zone will reflect the interface that the clients are connected to and the destination zone the egress interface that a routing lookup determines based on the original packet.
Hide NAT (Dynamic IP and Port (DIPP)) supports around 64,000 concurrent sessions per available source IP, multiplied by the oversubscription factor supported by the platform. As a rule of thumb, smaller platforms commonly support 2x oversubscription, larger platforms support 4x, and extra-large platforms up to 8x (use show running nat-rule-ippool rule <rule name> to check oversubscription).
set addressnat_blu_zone tagRed description'PAT address for BLU zone Internet traffic' ip-netmask192.168.1.201 set addressnat_grn_zone tagRed description'PAT address for GRN zone Internet traffic' ip-netmask192.168.1.202 set addressnat_gry_zone tagRed description'PAT address for GRY zone Internet traffic' ip-netmask192.168.1.203 set addressnat_catchall tagRed description'CatchAll PAT address for all other Internet traffic' ip-netmask192.168.1.204 set rulebase nat rules'Blue PAT' fromsouth tonorth sourcegrp_blu_zone destinationany serviceany description'NAT address for BLU zone to iNET' group-tagBlue source-translation dynamic-ip-and-port translated-addressnat_blu_zone set rulebase nat rules'Green PAT' fromsouth tonorth sourcegrp_grn_zone destinationany serviceany description'NAT address for GRN zone to iNET' group-tagGreen source-translation dynamic-ip-and-port translated-addressnat_grn_zone set rulebase nat rules'Grey PAT' fromsouth tonorth sourcegrp_gry_zone destinationany serviceany description'NAT address for GRY zone to iNET' group-tagGrey source-translation dynamic-ip-and-port translated-addressnat_gry_zone set rulebase nat rules'CatchAll PAT' fromsouth tonorth sourceany destinationany serviceany description'CatchAll NAT address for all other traffic to iNET' source-translation dynamic-ip-and-port translated-addressnat_catchall
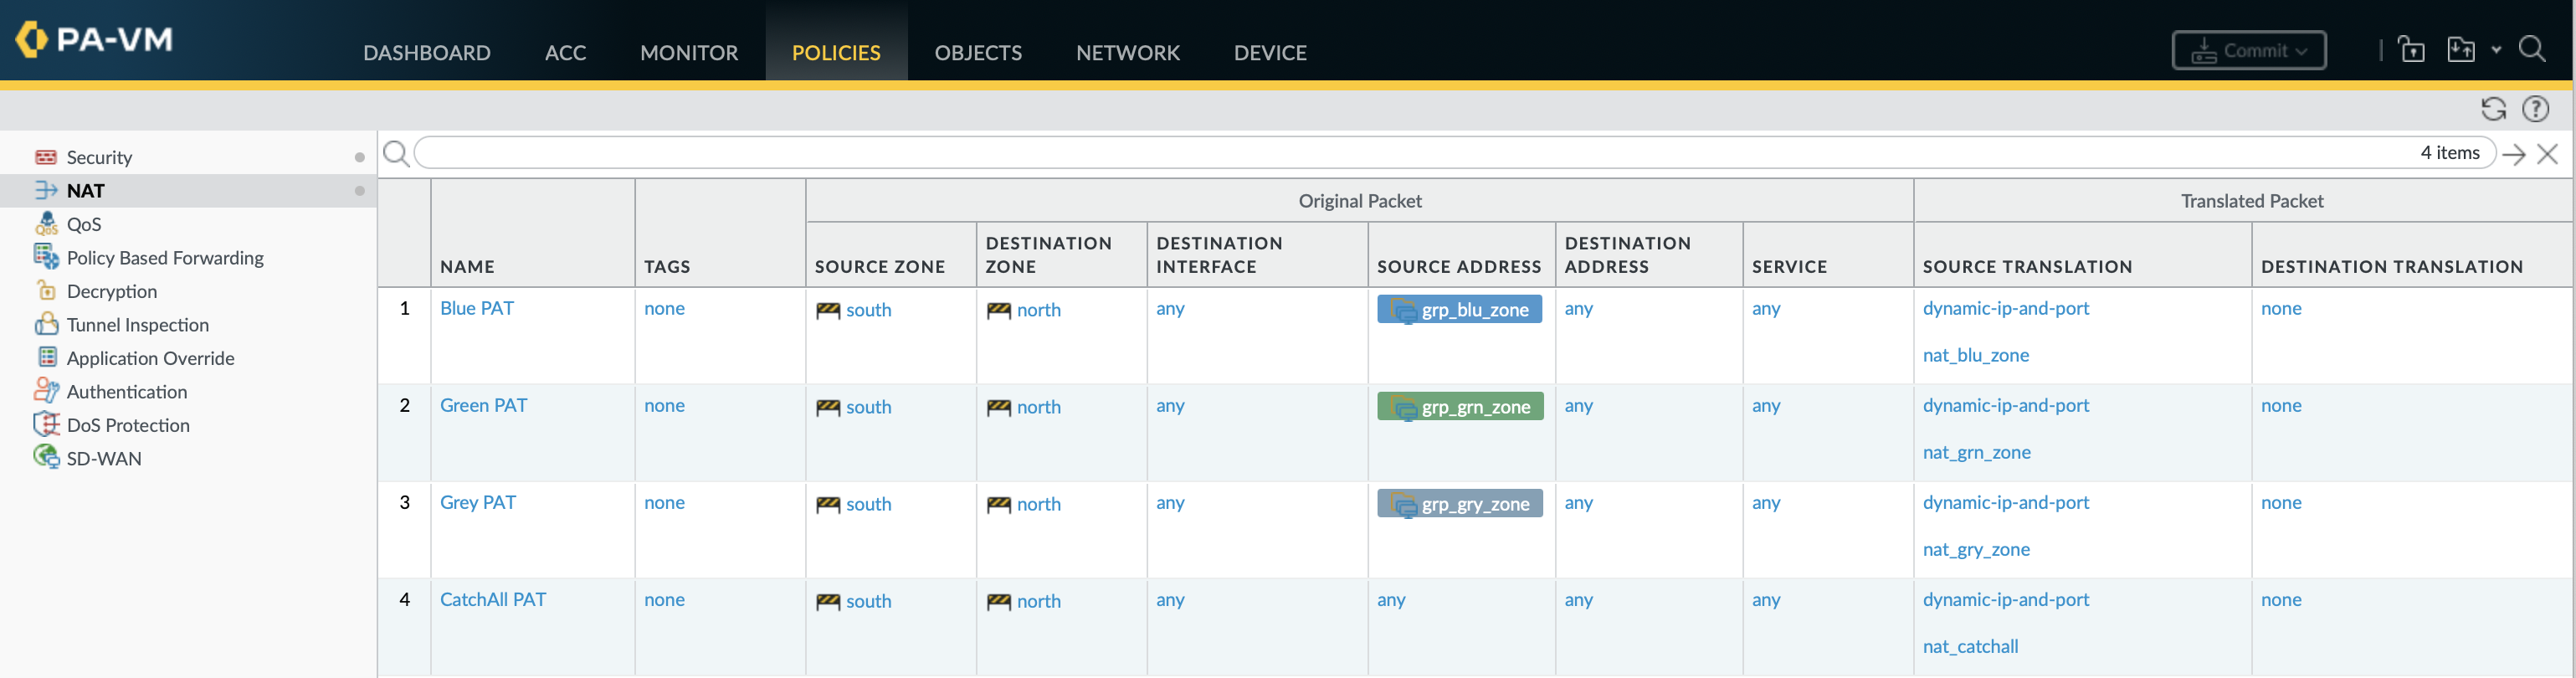
Alternatively Hide NAT can use the interface IP address instead of a dedicated IP addresses.
set rulebase nat rulesPAT fromsouth tonorth sourceany destinationany serviceany source-translation dynamic-ip-and-port interface-address interfaceethernet1/1
As per security rules the NAT policy can also be grouped and displayed in the GUI using tags, the show comand syntax is also very simialr.
> show running nat-policy-addressesShow the NAT addresses > show running nat-policyShows the NAT policy > show running rule-use hit-count vsys vsys1 rules all rule-base natShow recent rulebase hit-count > show rule-hit-count vsys vsys-name vsys1 rule-base nat rules allShows more detail rulebase hit-count and when rules created # show running nat-policyDisplay the NAT policy configuration
References
https://weberblog.net/cli-commands-for-troubleshooting-palo-alto-firewalls/
https://live.paloaltonetworks.com/t5/general-topics/quot-set-cli-terminal-height-500-quot-not-work/td-p/391630
https://itsecworks.com/2013/12/10/palo-alto-troubleshooting-commands/
https://knowledgebase.paloaltonetworks.com/KCSArticleDetail?id=kA10g000000Clfi
https://docs.paloaltonetworks.com/pan-os/9-1/pan-os-web-interface-help/objects/objects-tags/create-tags
https://docs.paloaltonetworks.com/vm-series/10-1/vm-series-deployment/license-the-vm-series-firewall/software-ngfw/limit-licensed-vcpus
https://www.thegeekstuff.com/2020/06/paloalto-panos-upgrade/
https://docs.paloaltonetworks.com/pan-os/10-1/pan-os-cli-quick-start/use-the-cli/modify-the-configuration